Close menu

Resources


PIPER COMPUTER

Everything you need to teach STEAM effectivly using the Piper Computer Kit.

Educator Guides StoryMode Project Guides PiperCode Project Guides
PIPER MAKE

Teach fundamental STEM skills while providing a bridge to career connected learning.

Educator Guides
Best Practices Standards Glossary FAQ Educator Forum

EDUCATOR PORTAL

PIPER

BEST PRACTICES

for Educators, Facilitators and Expanded Learning Professionals

This resource has been created to support our customers who use the Piper products in a learning environment: traditional school, after school, summer camp, homeschool or even online classes! Although all educators have a very unique environment, at Piper we have developed our own Best Practices based on feedback from our customers and our experience leading Piper in programs.

We thank the many educators for contributing to this resource and look forward to collaborating with designing the best Piper STEM program for your students.


The Piper 5 E Instructional Model

Lesson plans designed to engage more students with an enduring understanding in STEAM.

Piper's lesson plan construction is based on the 5E instructional model. If this is your first time teaching with this model, you will find it to be different than traditional teaching methods. It is rewarding to see student-centered learning in action and this model has been proven to lead towards greater student engagement and enduring understanding in STEAM.

“Each phase has a specific function and contributes to the teacher’s coherent instruction and the students’ formulating a better understanding of scientific and technological knowledge, attitudes, and skills. The model has been used to help frame the sequence and organization of programs, units, and lessons. Once internalized, it also can inform the many instantaneous decisions science teachers must make in classroom situations.” (The BSCS 5E Instructional Model: Origins, Effectiveness, and Applications, Bybee, 2006).

STUDENT ENGAGEMENT
Shows interest in the topic.
Asks questions such as:
  • Why did this happen?
  • What do I already know about this?
  • What can I find out about this?
  • How can I solve this problem?
EDUCATOR PRACTICE
Creates interest. Generates curiosity. Raises questions and problems. Activates prior knowledge. Elicits responses that uncover student knowledge about the concept/topic.

STUDENT ENGAGEMENT
Thinks creatively within the limits of the activity. Conducts hands-on activities or experiments. Tests predictions and hypotheses. Forms new predictions and hypotheses. Tries alternatives to solve a problem and discusses them with others. Records observations and ideas. Suspends judgment. Tests idea.
EDUCATOR PRACTICE
Encourages students to work together without direct instruction from the teacher. Provides materials and sets up hands-on activities or experiments. Observes and listens to students as they interact. Asks probing questions to redirect students' investigations when necessary. Provides time for students to puzzle through problems. Acts as a consultant.

STUDENT ENGAGEMENT
Explains their thinking, ideas and possible solutions or answers to other students. Listens critically to other students' explanations. Questions other students' explanations. Listens to and tries to comprehend explanations offered by the teacher. Refers to previous activities. Uses recorded data in explanations.
EDUCATOR PRACTICE
Encourages students to explain concepts and definitions in their own words. Asks for justification (evidence) and clarification from students. Formally provides definitions, explanations, and new vocabulary. Uses students' previous experiences as the basis for explaining concepts.

STUDENT ENGAGEMENT
Applies scientific concepts, labels, definitions, explanations, and skills in new, but similar situations. Uses previous information to ask questions, propose solutions, make decisions, design experiments. Draws reasonable conclusions from evidence. Records observations and explanations.
EDUCATOR PRACTICE
Expects students to use vocabulary, definitions, and explanations provided previously in new context. Encourages students to apply the concepts and skills in new situations. Reminds students of alternative explanations. Refers students to alternative explanations.

STUDENT ENGAGEMENT
Checks for understanding among peers. Answers open-ended questions by using observations, evidence, and previously accepted explanations. Demonstrates an understanding or knowledge of the concept or skill. Evaluates his or her own progress and knowledge. Asks related questions that would encourage future investigations.
EDUCATOR PRACTICE
Refers students to existing data and evidence and asks, What do you know? Why do you think...? Observes students as they apply new concepts and skills. Assesses students' knowledge and/or skills. Looks for evidence that students have changed their thinking. Allows students to assess their learning and group process skills.
Asks open-ended questions such as:
  • Why do you think...?
  • What evidence do you have?
  • What do you know about the problem?
  • How would you answer the question?

Facilitation Approach

We want you to be successful using Piper in the classroom.

To do that, we suggest using these practices to help ensure maximum learning and engagement for your students.


1. Collaboration
  • Collaborative Use: Two or three students can use one Piper kit together to build and program electronics.
  • Peer Assistance: Encourage students who are struggling to get help from those who are progressing more quickly.
  • Empowerment Through Collaboration: This approach empowers students to collaborate, solve problems collectively, and build community and agency without significant guidance.
  • Group Size Recommendations: Recommend a 2:1 approach, but successful 3:1 or 4:1 models are possible with rotating roles to keep each student engaged and contributing in different ways.
  • Leadership and Peer Support: Collaboration enhances learning and encourages the development of leadership skills and peer support.
  • Classroom Engagement: Stop the class at different intervals to have a student share a challenge they overcame during the Piper learning experience.
  • Reinforce Collaborative Spirit: This practice reinforces the collaborative spirit, encourages student leaders to take initiative, and fosters a supportive learning environment.
  • Reflection and Celebration: Provides opportunities for students to reflect on their learning and celebrate their achievements together.
2. Inquiry Based Learning
  • Embedded Guidance: Piper provides guidance through StoryMode directions and PiperCode tutorials, offering an inquiry-based learning experience.
  • Facilitation Over Answers: Facilitate the class instead of giving direct answers to students.
  • Embrace Challenges: Understand that it's difficult to see students struggle, but challenges are crucial for fostering grit, perseverance, and a growth mindset.
  • Cognitive Dissonance: Sometimes cognitive dissonance shows up when students hold beliefs that something should be rather than how it actually is. While using the Piper Computer kit students may believe that it should be easy to build, easy to learn since it is a ‘game’. Encourage students to work through these frustrations identifying that this activity is self-paced with several ways to accomplish tasks (groups solve problems differently). This approach will ultimately build greater creative confidence.
  • Essential Questions: Refer to the “essential questions” found in the Explain sections of our 5E premium curriculum lessons to help guide students. For example, when students start Phase 2 Stoymode and start learning electronics and circuits simple questions like ‘What is the difference between a switch and a button?’ can help students formulate a better understanding of the technical knowledge.
  • Leading Questions: When students ask questions, respond with leading questions to promote critical thinking and independent problem-solving. Here are some examples of leading questions:
    • What are you trying to accomplish?
    • What do you think would happen if…?
    • What have you tried to fix the bug in your code?
    • What are you trying to accomplish?
    • When you run a test, what actually happens?
3. Set Expectations and Build Confidence
  • We have found success starting each session with a discussion and reinforcing expectations that Piper will be challenging, low-stakes failure will happen (that is OK and GOOD!), and understanding concepts is more important than speed.
4. Emphasize Organization and Process
  • We have found that teachers who set up systems of organization for the class and encourage students to stay organized find it easier to start and end each day with the Piper program. Check out storage and organization ideas from educators like you on the Community page.
  • Assign Specific Tasks: In groups, assign each student a specific task, such as retrieving the storage box, plugging in the battery and turning on Piper, or putting items back into the box.
  • Prevent Loss of Parts: Emphasize the importance of keeping small electronic parts in the storage box to avoid loss or damage.
  • Teach Organization Skills: Explain that being organized is a necessary skill for all engineers.
  • Address Organizational Issues: If organization is a problem, have a discussion about it.
  • Encourage Student Input: Ask students to share their own strategies for staying organized.
5. Encourage Productive Struggle
  • Support collaboration during struggle: Since the Piper computer program is student-centered, students are often challenged to explore and learn on their own with guidance rather than direct instruction. This leads to growth and development of grit in students from this productive struggle. Collaboration in these moments of dissonance also leads to greater learning outcomes and a positive classroom community.
  • Boost creativity! Encourage out-of-the-box thinking with leading questions, encouraging students to draw their ideas of how to complete the challenge.
  • Allow students to share their reasoning and support each other’s process.
  • Explain and reinforce that the trial-and-error process could come with feelings of discouragement – and that’s OK!
  • As a teacher, explain times that you have had to overcome a challenge, and how you felt before and after the situation.

Preperation by Phase

Suggested student to kit ratio is 2:1 (up to 3:1 if necessary).

For large groups, assign roles, i.e. carpenter, inventory manager, documentation expert, etc.

Provide Engineering Notebooks for each student, or group of students to reflect on the process and document questions, ideas and solutions.

We advise you hold on to and charge batteries behind your desk until students finish building to prevent them from moving ahead.

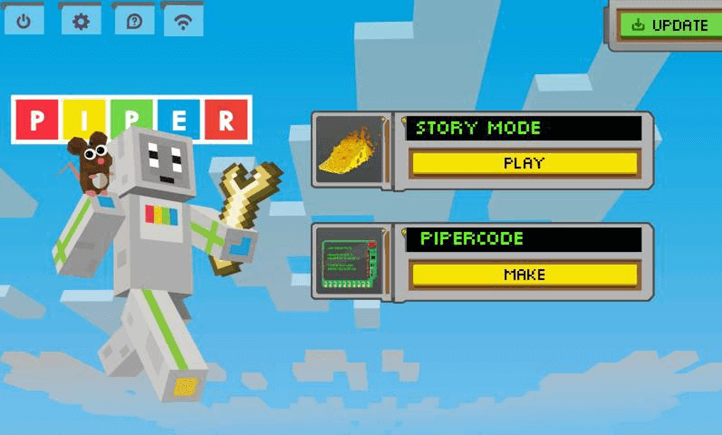
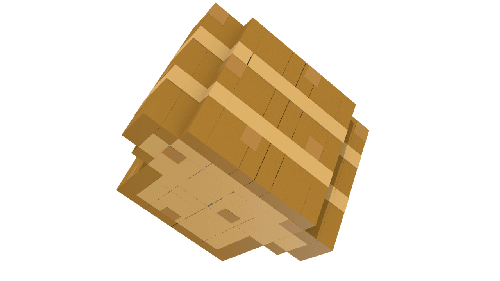
Introduce the Piper Computer Kit and spend time looking at the blueprints, having the students take inventory which allows them to become familiar with identifying hardware terms and taking ownership of their kit. Since a blueprint doesn’t have much text, our first learning objective is for learners to understand and read exploded engineering diagrams.

When building Piper Computer Kits, students can work on tables or the floor. If there is not enough room for each team to spread out the poster, you can project the blueprint on a screen for the whole class to see or put them up on the walls!

For younger grades during Phase 1: Build lessons, you can have a built Piper available for reference. Watch the Piper Support Piper Assembly Video or have this playing in the background.

If you are worried about students going at different paces, you can give them particular sections of the blueprint to build per each class. If you want students to go at their own pace but meet back up at the end you can have fast groups go help slower groups so that students become “building experts for the class”.

The blueprint is made of high quality paper. It is designed for kids to sit on top of it and work. They can also put it up on a wall or lay it out on a work bench area. Some facilitators may choose to show a hi-res version of the blueprint on a projector or monitor.

New to Minecraft? 5 Functions to Know
  • Left click the mouse to “break” blocks.
  • Right click the mouse to “place” blocks.
  • Use the mouse scroll to go through inventory (found at the bottom of the game screen).
  • Right click on the “crafting table” to get instructions on what to build.
  • Click on the blue “info block” to get hints on the challenge.

Troubleshooting is important in this first phase. As students learn how to build a circuit, the concept of how electricity flows is a key learning moment. Have the class watch a video on circuits and breadboards (one of our favorites in Science Buddies).

To further explain circuits, the University of Colorado has a free circuit simulation program called PhET available for educators. Look under the science topic Physics for their Electricity, Magnets and Circuits simulations. TinkerCad also is a free resource for online learning. Check out their TinkerCad Circuits website.

In the first challenge, students will need to touch two wires and move their character. If there are two or more students working on a single Piper, moving Piperbot with the wires while directing him with the mouse is a good way to incorporate both players.

Before closing activities, have students exit the software and close the Piper Computer Kit.

Make sure Piper kits are built, connected, functioning, and batteries are charged ahead of time!!

Introduce coding by playing Ruby the Robot:
  • In groups of two, assign one learner to be Ruby “The Programmer” and one to be “The Robot”.
  • Assign each pair an activity (may be written on a piece of paper pulled from a hat).
  • Ask the Programmer to explain to their partner (Robot) how to perform the steps needed to complete their activity using words only (no non-verbal motions like hand movements)!
  • Switch pairs.
  • After the activity, use this as an opportunity to talk about the importance of simple, clear instructions and sequences (if the room is loud, say: “‘Head Programmer’ says, all Rubies stop!”).
  • Congratulate learners for creating their first algorithms and pseudo code!

Tour the PiperCode platform as a class

All but the first Blink project are locked until the student clicks Next and successfully follows the prompts to build the code of each project.

The right click menu on the blank Canvas has some handy actions:
  • Undo/Redo actions
  • When the Code Canvas gets crowded, tuck away blocks (Clean up, Collapse/Expand)
  • Add comment to leave yourself a note
  • Duplicate - make an exact copy of the selected block or group of blocks to save time

Click the four arrowed icon on the top right of diagrams and videos to expand to full screen - this is helpful when trying to exactly line up lights and wires to the right pins on the breadboard.

Under Electronics tab in the Project Panel, you can always reference the GPIO pin map, but you might also want to coach the students to create their own physical “cheat sheet” diagram in their design journal or on sticky labels under the Pi board.

You need to click the green Start block on the top left of the Block Library to run your code. You should also see the lights on the Raspberry Pi board react.

To save time, you can right-click on a block in the Code Canvas and duplicate a single or group of blocks as a sort of copy and paste of your code.

Stop running the code when you’re adjusting blocks or variables! If you adjust the variables of the code blocks while its running, you have to start/stop to make sure you communicate the new code to the board.
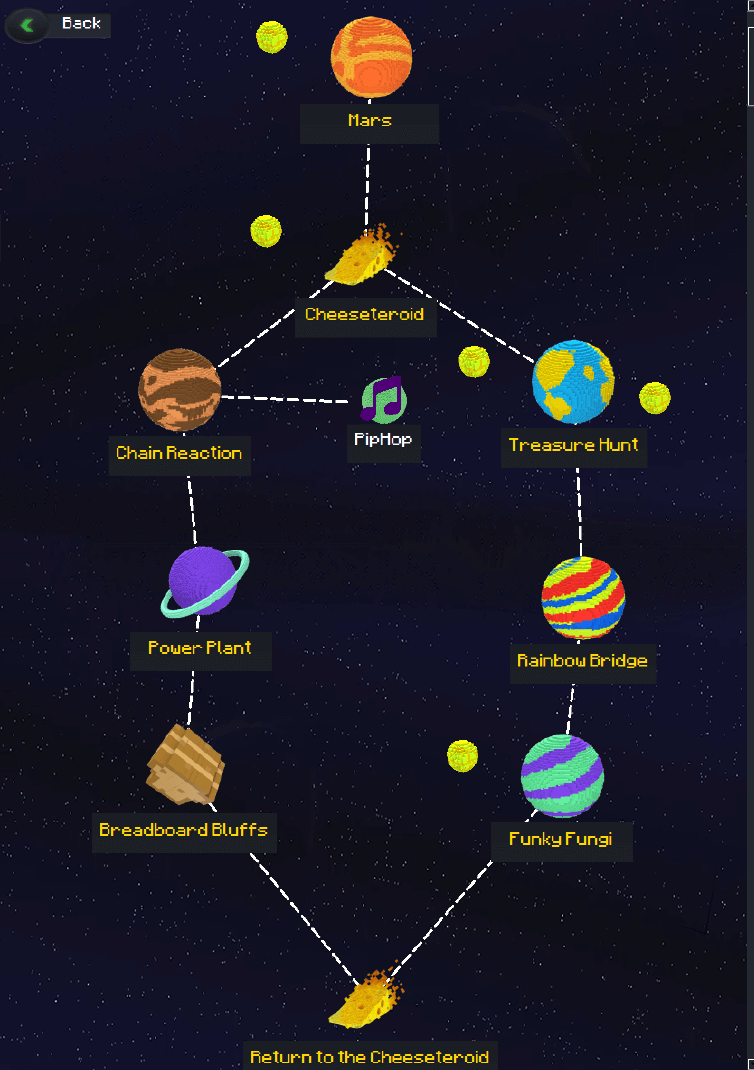
If your code blocks string gets long:
  • Click on the white of the Code Canvas and drag up to move the whole canvas.
  • Use the mouse scroll to zoom in and out.

MiniGames are the small planets that unlock after completing a main project. These have been designed to extend play, so instead of solving a challenge and moving to the next level, students can play these games over and over to try and beat their last score or time.

Use minigames for student groups who are moving faster through Phase 2 & 3.

Host a Make-A-Thon in phase 4 to allow students to start creating their own technology.

Students can design their own game in PiperCode by selecting the /My Projects > NEW.

What is StarLab? StarLab has projects for the Sensor Explorer Kit, an add-on for the Piper Computer Kit. You can find these lessons in StoryMode, off the main navigation screen.
  • Color Sensor = Chameleon Giant
  • Temperature Sensor = TerraSense
  • Ultrarange Finder = Post No. 34 1/2

The current model Piper Computer v4 (July 2024) includes a blueprint that guides the deconstruction process.

Before putting all the parts in the box, have students lay their parts on the blueprint for easily conducting a visual inventory.

We recommend to not unscrew the screen framing.

For more ideas on how to store your Piper Computer Kits for multiple year use, visit the Educator Community Page.

Missing parts or need replacement pieces? Email hi@playpiper for assistance.

Tips & Tricks

TOP TIPS!

  • Build and play yourself first! The best way to support your students is to understand the process. Try building the Piper computer ahead of time, working through Minecraft: Raspberry Pi Edition with StoryMode, and try out projects in PiperCode!

  • You can connect one of the Piper Computers to your monitor or projector using the HDMI input on the Raspberry Pi. This allows the facilitator (or select students) to show the class what they are doing on their Piper!

  • Do your updates! If your kits have been sitting around for a while, make sure you have updated the Game Software for the most updated StoryMode and PiperCode software. Read more about updating your software here. NOTE: If you own a Piper Computer version 1 or 2, these came with an 8GB SD Card, our current software requires a 16GB SD Card. You can purchase a new SD Card here.

  • Before turning on any Piper computer, you need to charge the Piper batteries. You should also make it a habit to charge batteries between every lesson! We recommend at least charging the battery for 5 hours.

  • If your learners build the kit and turn on the battery, but the screen is black, there’s some common missed steps - check out the Piper Get Support page.

  • We lost some screws! Accidentally broke a part! If you bought a Piper Classroom bundle, you have extra parts in your spare parts kit! If not, contact Piper Customer Service by emailing hi@playpiper.com or order replacement parts.

  • Serve your English Language Learners! - Piper Story Mode comes in English, Chinese (Mandarin), Spanish, French, and Japanese. To choose the language, go into the game's settings menu and select the language option.

  • Confused about moving around inside Minecraft or Piper Story Mode levels? - Ask one of your learners who’s a Minecraft enthusiast to give you a tour! Or check out the Project Guide for StoryMode Mars Step 1.

  • Always shut down the computer correctly to avoid corrupting the SD Card. When you are on the home screen of the software, click the Power Icon and select ‘Shutdown’.

  • RaspberryPi ports and GPIO pins: You should not have to apply much force to connect the HDMI cable or USB cables. If something is not fitting easily, check to make sure that you are connecting to the right port (the shapes should match up). The GPIO pins are more sensitive and require little to no force when connecting wires; the wires should slide easily onto the pins. Extra pressure can bend or damage these pins.

  • Visit the Piper YouTube Channel for Piper Computer short videos

  • Have FUN! One of the best things we can suggest is to have fun while teaching STEM through the Piper Computer Kit! As students encounter a wide range of characters and stories – add in a little bit of creativity and have students write Pip and Piperbot’s next adventure or use the characters to discuss SEL concepts. Although we designed the Piper Computer Kit to teach key STEM skills, there is so much more to learning in today’s classroom – and having FUN is the best way to have the full Piper experience!

Piper Software Guide


Need an over the air update?

When connected to the internet , click the update button to download the latest Piper software. Depending on wifi configuration, this might take a while. NOTE: Before accepting any updates, please visit the Support Page to find out more about updates for your specific version.

Power icon
  • Exit to Desktop
  • Reboot
  • Shutdown
Options icon
  • WiFi
  • Sound Volume: on/off and adjust volume
  • Subtitles: on/off
  • Words Per Minute
  • Language: English, French, Spanish, Japanese, Chinese (Mandarin)
  • Reset Play Data: Resetting play data will lock levels
  • Unlock all Cheesteroid levels
  • Unlock all levels
Wireless Internet Icon (software does not need to be on wifi to work)
  • Tool to select a wireless network to connect to via Wifi
What is Desktop Mode?

By clicking on the power icon, then selecting “Exit to desktop” you will now open the Piper Desktop. Piper is a fully functioning computer! The Piper Desktop will look similar to the desktop of a PC. Piper is pre-loaded with lots of great content!

Mars

Mars

Concept: Electrical currents and circuits

Level Hints/Tips: Be sure buttons are secure in the breadboard to ensure a connection, but don’t push too hard! If the silver pins are not lined up, they will bend and may be affected.

What You’ll Build: Controller with working Left, Right & Forward buttons

Cheeseteroid

Cheeseteroid

Concept: Directional flow of circuit

Level Hints/Tips: Follow the red blocks to a crafting table. Open it, then look for an exit out of the room opposite of where you came in. This will take you to a set of doors that will be the completion of the chapter.

What You’ll Build: Jump button on controller


Treasure Hunt

Treasure Hunt

Concept: Electrical flow through a LED

Level Hints/Tips: Find a series of clues from info boxes which will eventually lead to a crafting table. After you wire in the LED, use it as a “treasure detector”. When Piperbot gets closer to the X, marking the hidden wrench, the LED will flash increasingly faster.

What You’ll Build: LED output on small breadboard

Chain Reaction

Chain Reaction

Concept: Digital binary bit states

Level Hints/Tips: After finding the crafting table and using TNT to get to it, use the TNT to blow through sand and castle walls to reach the next portal.

What You’ll Build: Switches on small breadboard


Power Plant

Power Plant

Concept: Parallel circuits

Level Hints/Tips: Turn the power ON to open gates, release water, pump water, raise elevators, and make your way to the next portal. There are two phases to complete this challenge.

What You’ll Build: Switches on small breadboard

Rainbow Bridge

Rainbow Bridge

Concept: Sound Outputs and component polarity

Level Hints/Tips: The buzzer indicates which color will disappear next by beeping the number that correlates with the color.

Hardware Hint: Be sure to line up the + on the piezo buzzer with the red wire and the left-most pin of the pin pair.

What You’ll Build: Add a buzzer to small breadboard


Funky Fungi

Funky Fungi

Concept: Parallel circuits; grounding; memory states, On-demand vs. constant states, based on switch

Level Hints/Tips: Use each button to recall a different structure from memory that will allow you to cross the chasm. Eventually, you’ll plug in a switch, which will let you “pave” a platform as you move or jump.

Game Tip: It can be easy to get lost in this level. After the second crafting table keep going up to reach the red platform with the portal.

What You’ll Build: Two buttons and a switch to small breadboard

Breadboard Bluffs

Breadboard Bluffs

Concept: Breadboards as circuits

Level Hints/Tips: Knockout gray/glass blocks and plant colored blocks to complete circuits in a virtual breadboard and toaster. There are two toaster levels.

What You’ll Build: Switches on small breadboard


Cheeseteroid Return

Cheeseteroid Return

Concept: On-demand vs. constant states, based on switch

Level Hints/Tips: Use the switch to help Piperbot change between constructing and destroying the cheese world to get through.

Game Tip: As you see what both power blocks are doing, there is a crack in the geometry that is easy to miss. Otherwise, keep building, destroying, and alternating from constant and on-demand mode until you get through.

Game Note: This is the longest and hardest level in the game. Once completed, Piperbot saves earth and creative mode is unlocked.

What You’ll Build: Add one switch


**NOTE: There are images of MOONS near some of the planets which are fun and educational MINI-GAMES. Mini-games may be played over and over so that learners can try to improve their score or time. Use these as extensions to reinforce learning concepts around building inputs and outputs or to differentiate when some students are moving more quickly through Story Mode than others.

What is StarLab? StarLab has projects for the Sensor Explorer Kit, an add-on for the Piper Computer Kit. You can find these lessons in StoryMode, off the main navigation screen.

  • Color Sensor = Chameleon Giant
  • Temperature Sesnor = TerraSense
  • Ultrarange Finder = Post No. 34 1/2

Before your program begins!

  • Experience the Piper Make Base Station and complete at least the first two lessons (Getting Started and Blink).
  • Familiarize yourself with the Piper Make UI (User Interface) features.
  • Are you a Google Classroom? There are so many features that integrate with Google Classroom!

Facilitation Approach

Piper Make was created during the pandemic when schools were quickly going virtual. Teachers needed an easy way to teach physical computing at home – and Piper Make was born! Originally designed as a 1:1 STEM education product for virtual learning, the Piper Make program has expanded to support 1:1 and 2:1. At Piper, we love the fact that our products teach beginning STEM skills plus can be used to foster collaboration and communication when students work together!

Tips & Tricks

Using a new tool can be intimidating. We're here to help, so check out our quick guide to using Piper Make.

GENERAL TIPS

Lesson Organization

Piper creates all products and lessons revolving around a story. Students will meet our main characters Piperbot and Pip who are exploring Earth and Mars during several Expeditions.

Vocabulary

Each expedition has 10 vocabulary words that educators can focus on and point out during lessons to encourage students to develop STEM language. For students this will help them build their STEM identity and build more confidence!

Career Connections

Each lesson offers links to different STEM careers, focusing on the theme of the widget (add-ons to the Base Station). Use the students natural activity interest to guide them experiencing the Piper Make Widget which aligns with that interest. Do you have an creative student who dreams of being the next Andy Warhol? The Light Show will help teach foundational STEM skills and spark their creativity!

Make-A-Thon Lesson

Don’t forget to build on your students learning by hosting a Piper Make-A-Thon. This activity is a great way to incorporate all the learning and creativity of your class! Here is a link to the student worksheet.

Looking for some videos to introduce the Piper Make products?

Check out the Piper Make Playlist, short 2-3 minute video highlighting the Base Station lessons and hosted by the Piper Co-Founder, Shree Bose


TOP TIPS!

  • Before starting with the Base Station review the principles of what makes a circuit. Here is a good age appropriate video about circuits from Science Buddies.

  • Have students use the blueprints and take inventory before starting the projects. This will reinforce the vocabulary of STEM.

  • Accelerated Students: If you have some students in the class that are more experienced with circuitry and coding and seem to need a challenge introduce them to Creative Mode! This is an area that the students can start inventing their own projects – and you can even challenge them by combining products like the Controller and Walker Robot. Ask is they could use the controller to steer the robot?

  • Spare Parts Kit: We recommend having a central spare parts kit in case some of the small parts and pieces get lost in prior uses.

  • Student Frustration? We have found success starting each session with a discussion and reinforcing expectations that Piper will be challenging, low-stakes failure will happen (that is OK and GOOD!), and understanding concepts is more important than speed. Remind them that a breadboard is a prototyping tool – it was built for things not working!

  • Code not working? Check all the code blocks and drop-down menus. If it looks correct, refresh the page and try running it again. Still not working? Make sure the Pico is connected!

  • The Digital View tab is the best troubleshooting tool! If your students project is not running correctly, open the the Digital View which will show the electrical voltages being detected on each GPIO pin. If the pin is not flashing there is a problem.

  • Want to brush up on your STEM vocabulary? The Library is the perfect place to land to learn about basic components and terminology (plus great tips & tricks!)

  • Did you know? The Base Station powered by the RaspberryPi Pico has the ability to expand with the RaspberryPi Education Foundation! A quick Google search can open up a wide variety of projects.

  • Last, but not least allow students to collaborate on troubleshooting is needed – shifting the leadership and problem solving activities to the next generation of innovators.