 Look for the graphic above
Code secret messages and make sure to hide your ~true colors~
Students will learn how to use a color sensor to create a secret message. By the end of the lesson, students will understand how colors can be represented by numbers (RGB values) and use these values in code to reveal a hidden message. A real world example is if you want to buy a specific color blue you saw in a picture to paint your room. A color sensor would help by scanning the picture and giving you the exact RGB values!
 Piper Computer Kit
 Color Sensor
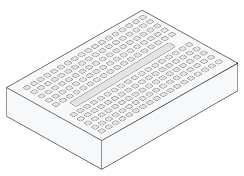 Breadboard
 4 Wires
 4-Pin Jumper Cable
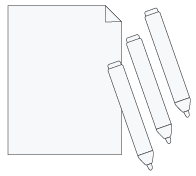 Different colored markers and white paper
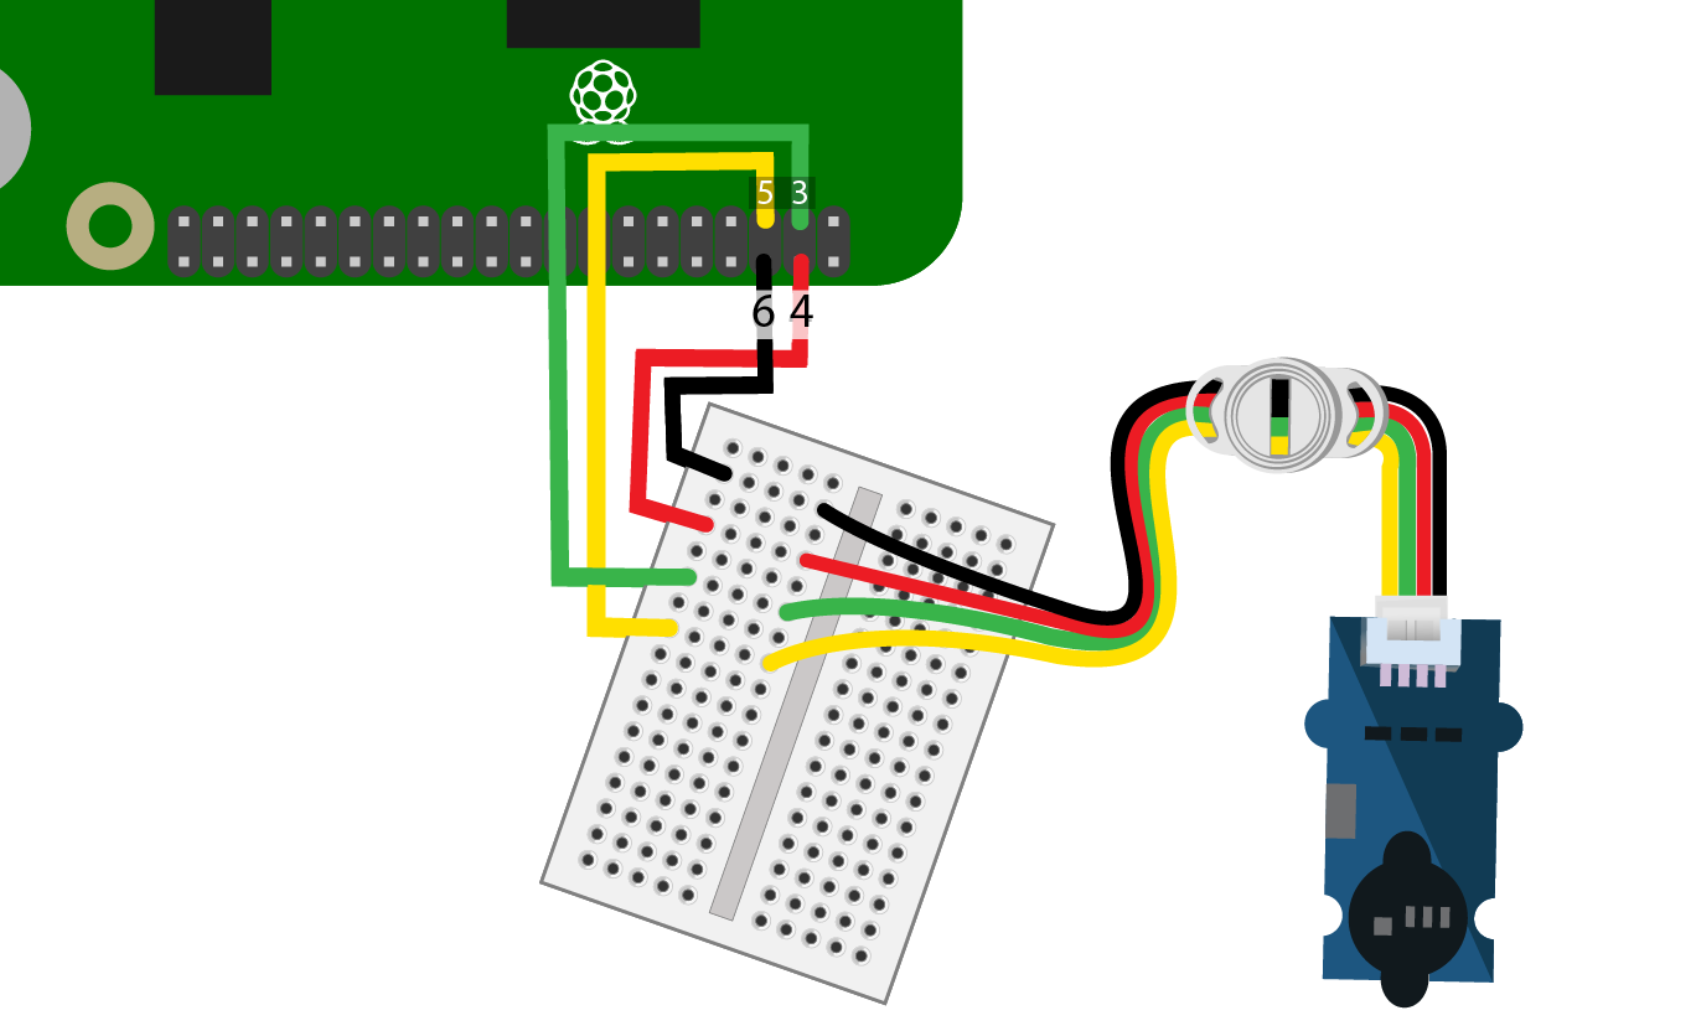
Newer Sensor Explorer Kits are now shipping with a 4-pin cable that has a white wire instead of a green wire. When you see the green wire in a wiring diagram, just connect the white wire instead.
Students use sequences and simple loops to make a program spell out letters in the display when the RGB values are entered into the code. Color Coded is a great step for learning how to create programs that include sequences, events, loops, and conditionals.
In this project, you will "color-code" a secret message using your Color Sensor. First, wire up your sensor to the Raspberry Pi as shown.
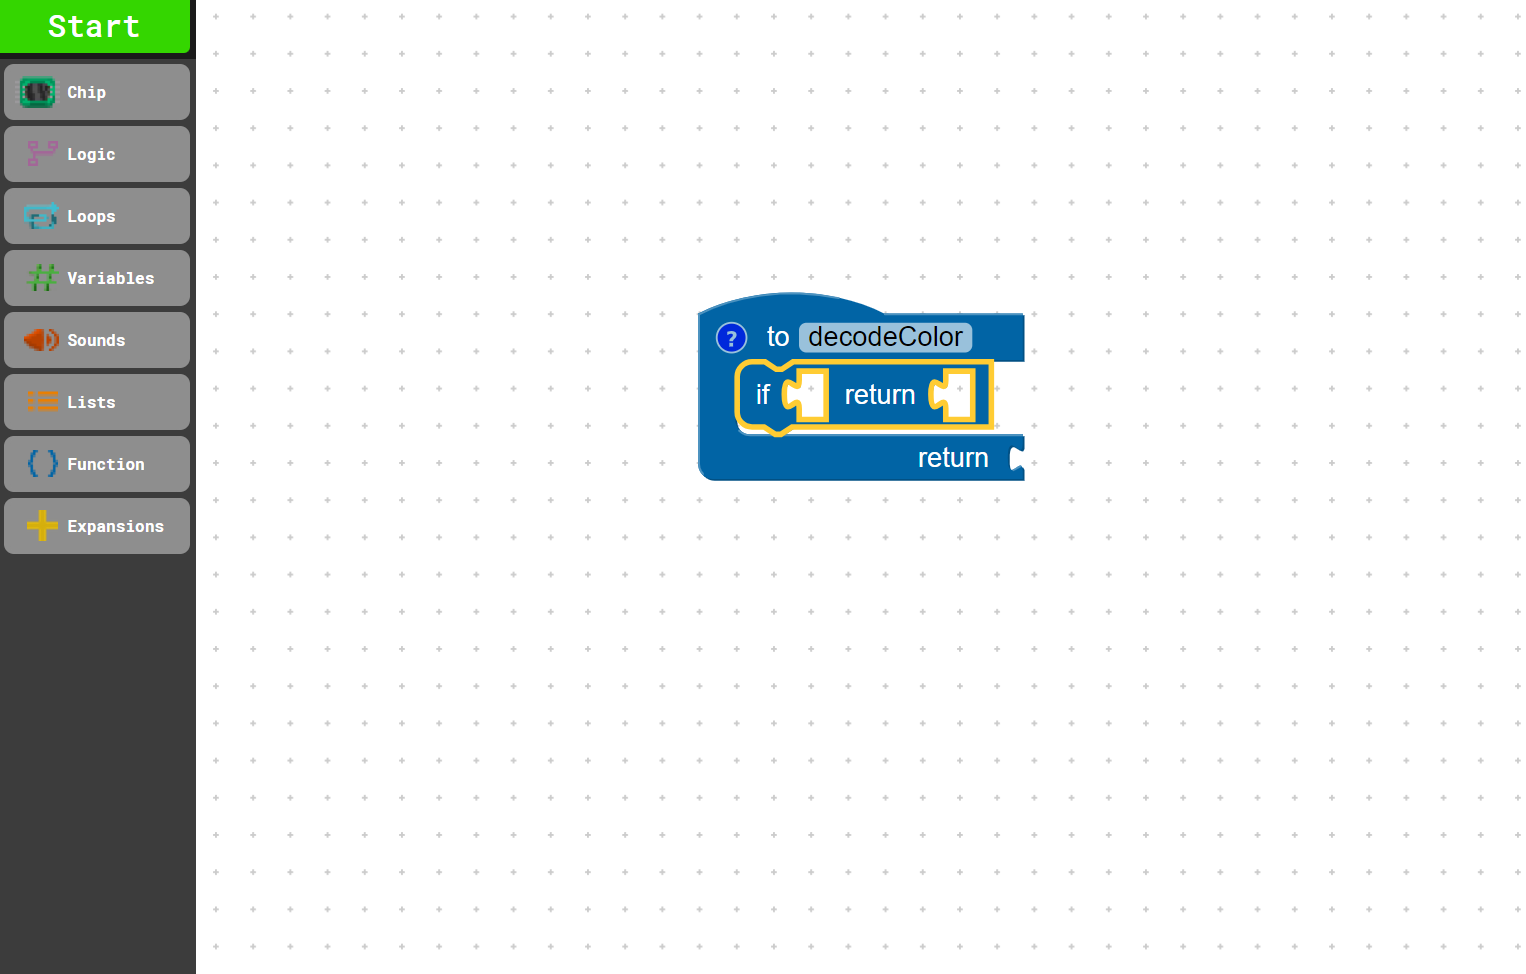
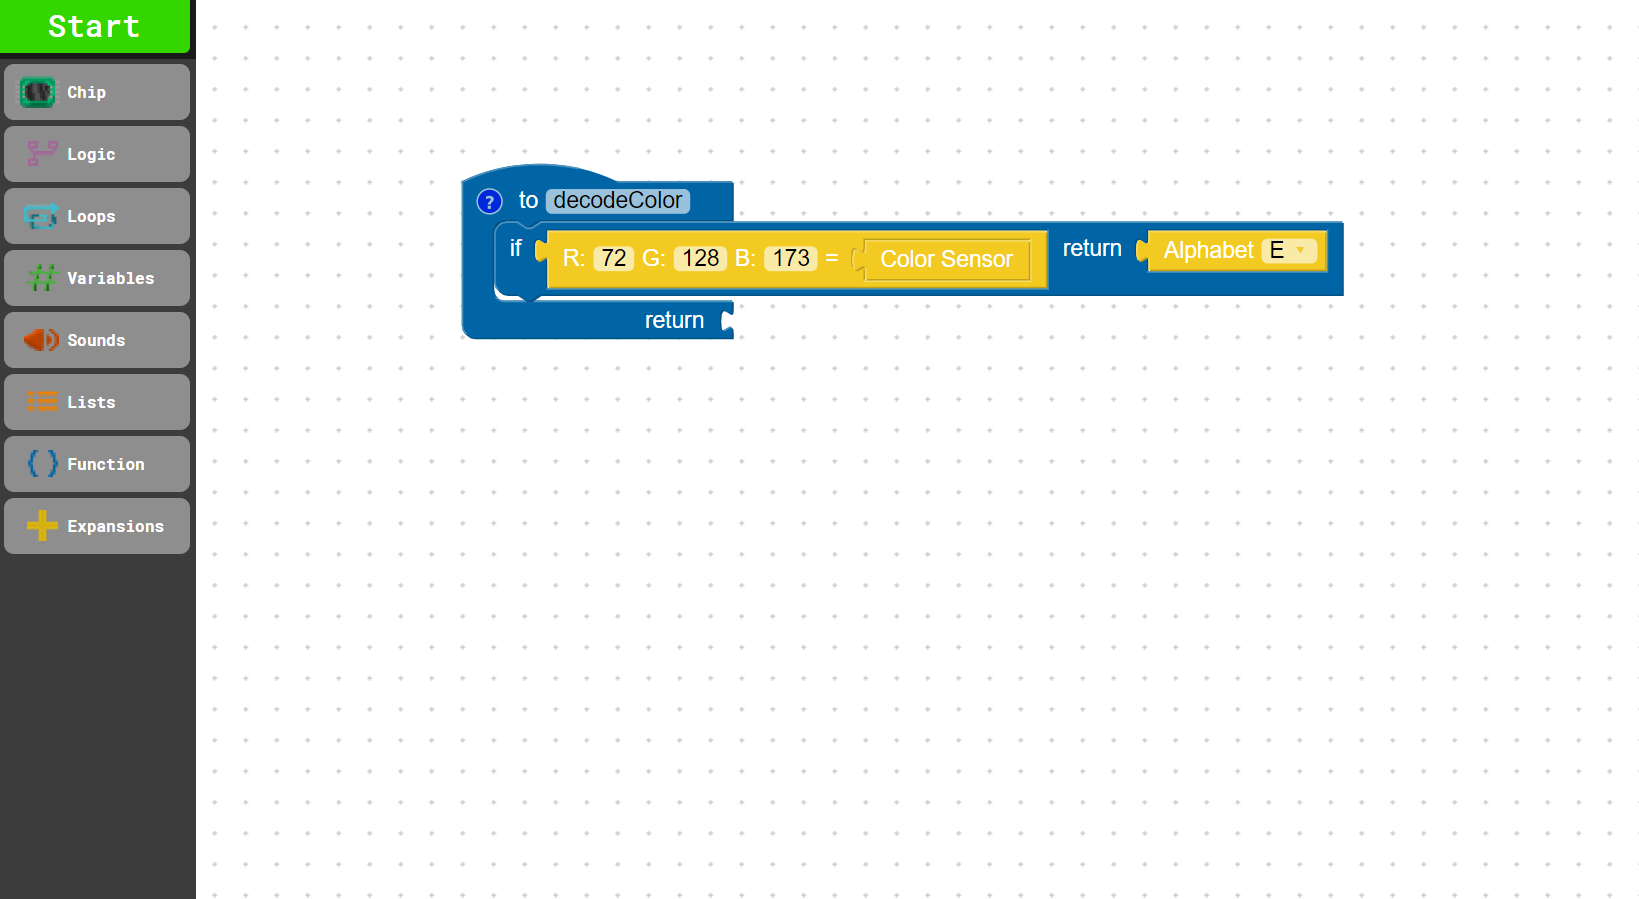
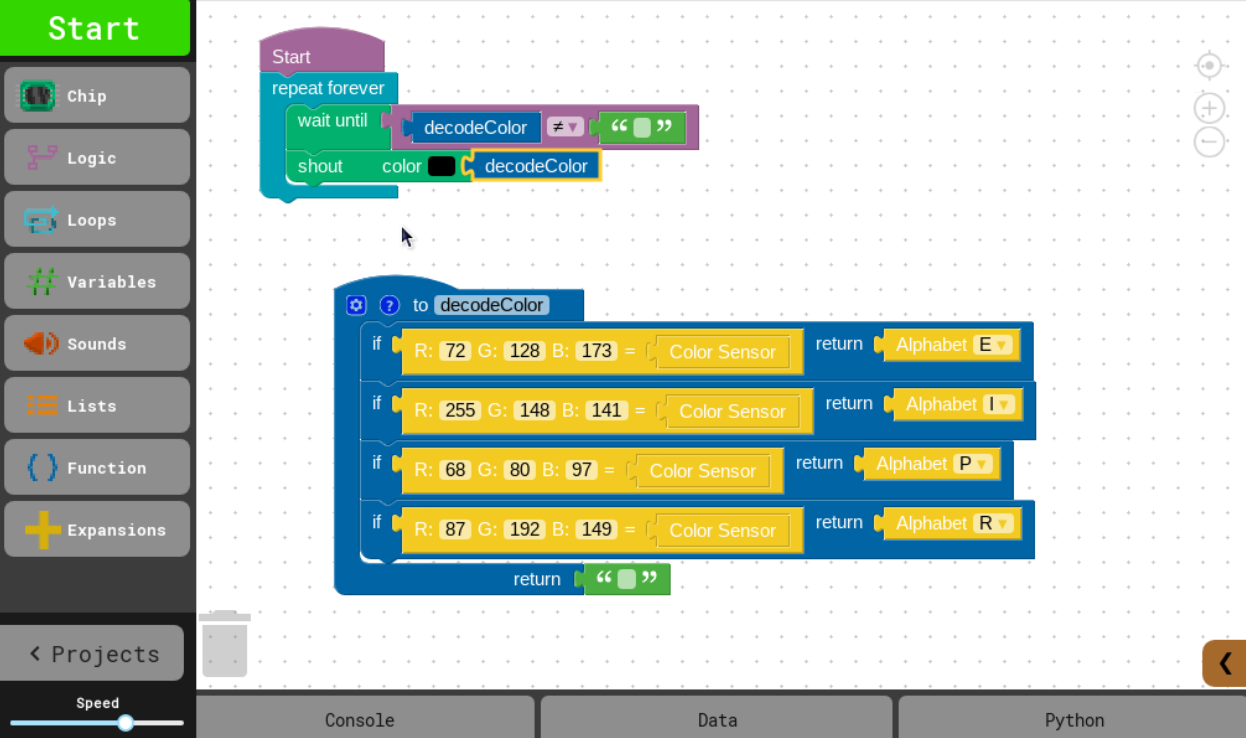
Find the do something block under Function and drag it into your programming space. Name your function by changing "do something" to "decodeColor" as shown.
Under Function, grab the if, return block and drag it underneath the to decodeColor block. This allows us to define a function that will decode letters with colors. Your code should look like the image provided.
Click on the Data tab to view RGB values detected by the Color Sensor. Turn on the switch on the Color Sensor and make sure white light is shining from the sensor. Scan colors and note their RGB values on the bar graph provided. (Use markers to create color squares to scan. Scan the colors by pressing the paper down over the color sensor.)
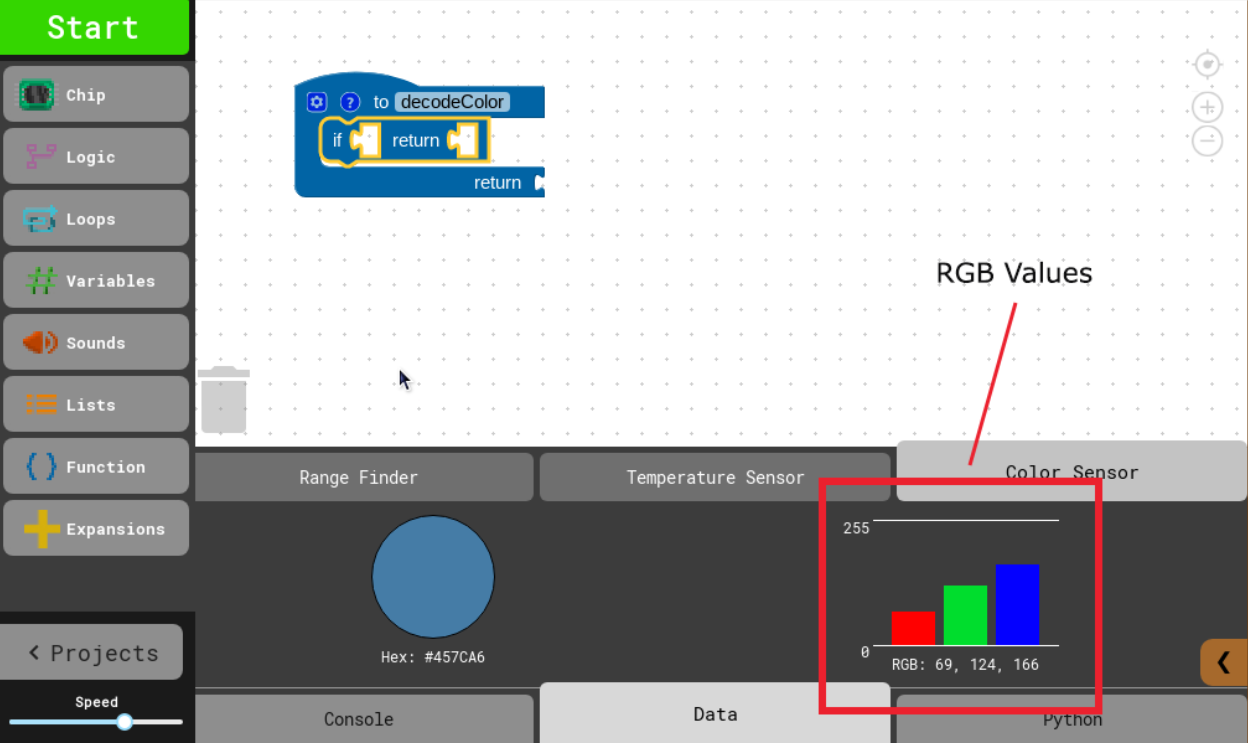
Find the RGB= block under Expansions. Drag it inside the if statement in your function. Discuss: How do RGB values represent the color you are scanning?
Scan a color of your choice using the color sensor with the Data tab open. Enter the RGB values provided by the bar graph into the R, G and B parts of the RGB= block.
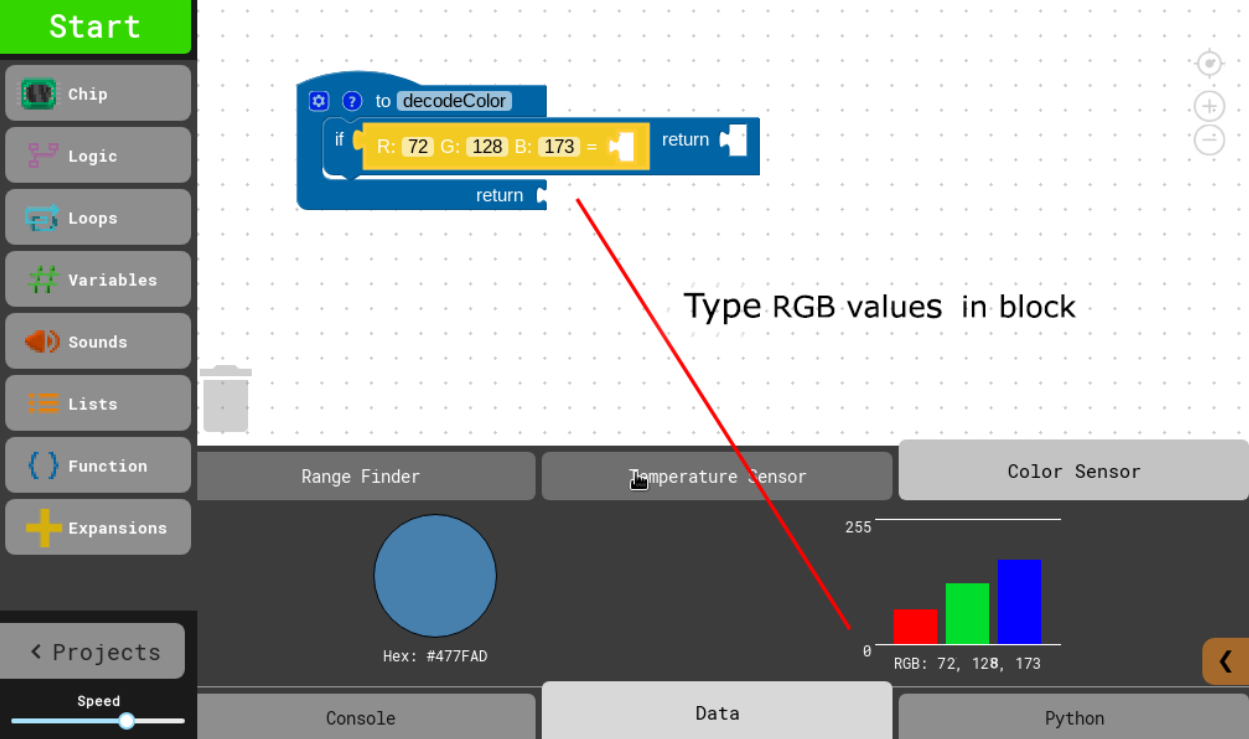
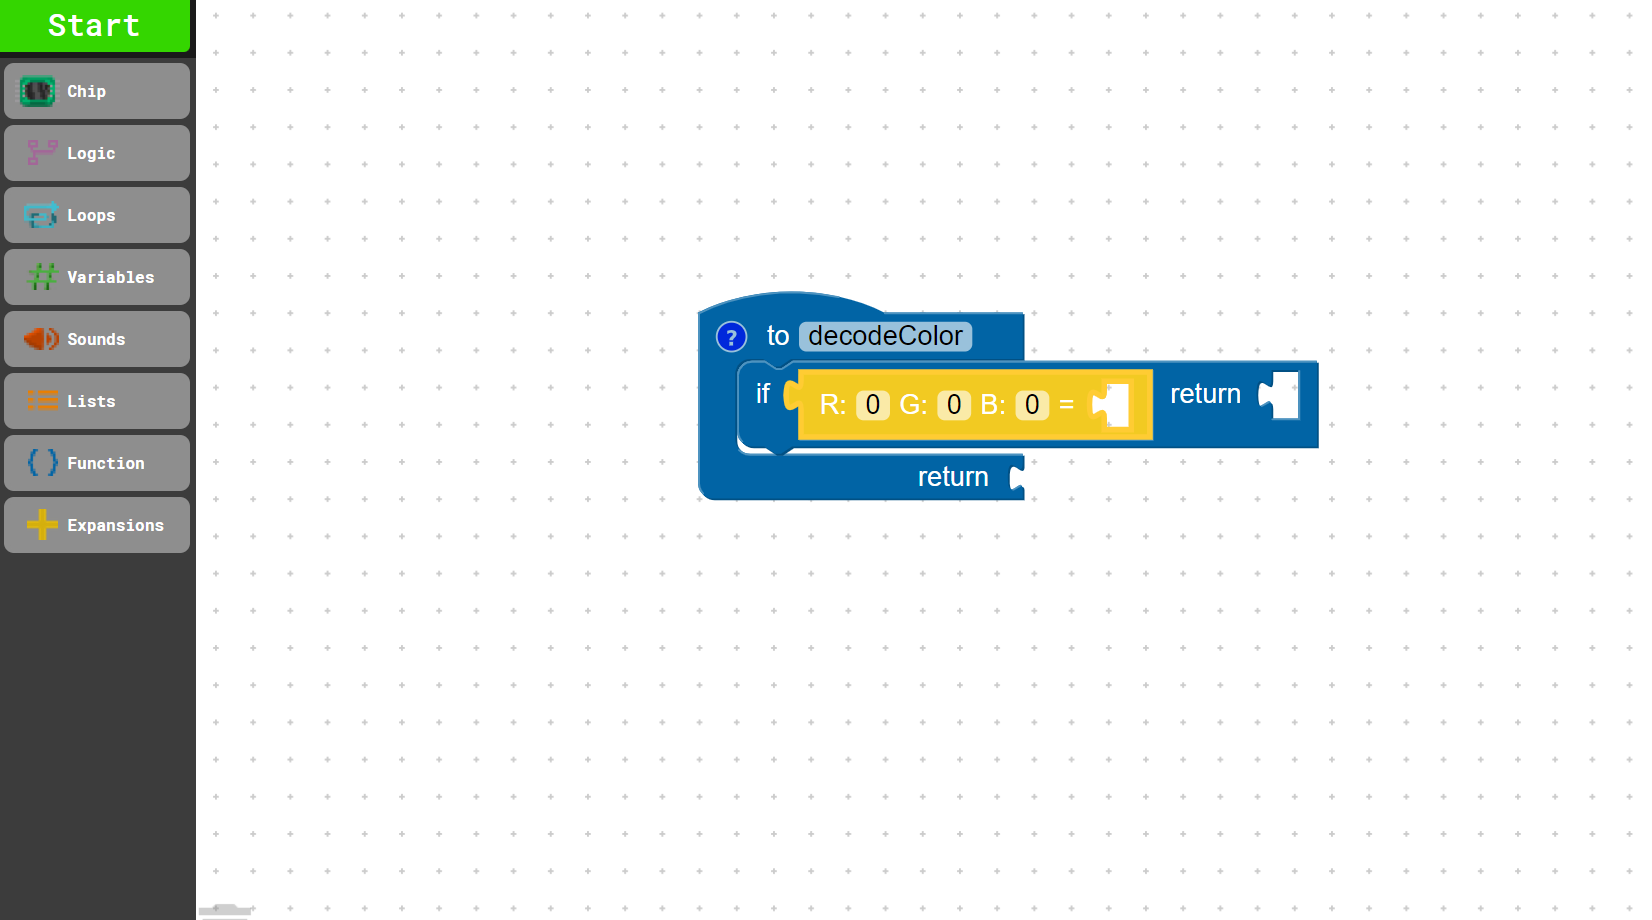
Find the Color Sensor block under Expansions and drag it inside of the RGB= block. Add an Alphabet block from Expansions to the return part of the statement. Change the letter to "E" using the dropdown menu. Your code should look like the image provided.
To add more "color coding", select the if, return block. Once highlighted, right click and select "Duplicate". Drag the duplicate blocks into the to the decodeColor function. Do this a total of 3 times. Discuss: What do these "if, return" functions do?
Scan another color of your choice with the color sensor and enter the corresponding RGB values to the second RGB= block. Repeat this for the last two RGB= blocks. Each RGB= block should include values for a different color you have scanned with your color sensor.
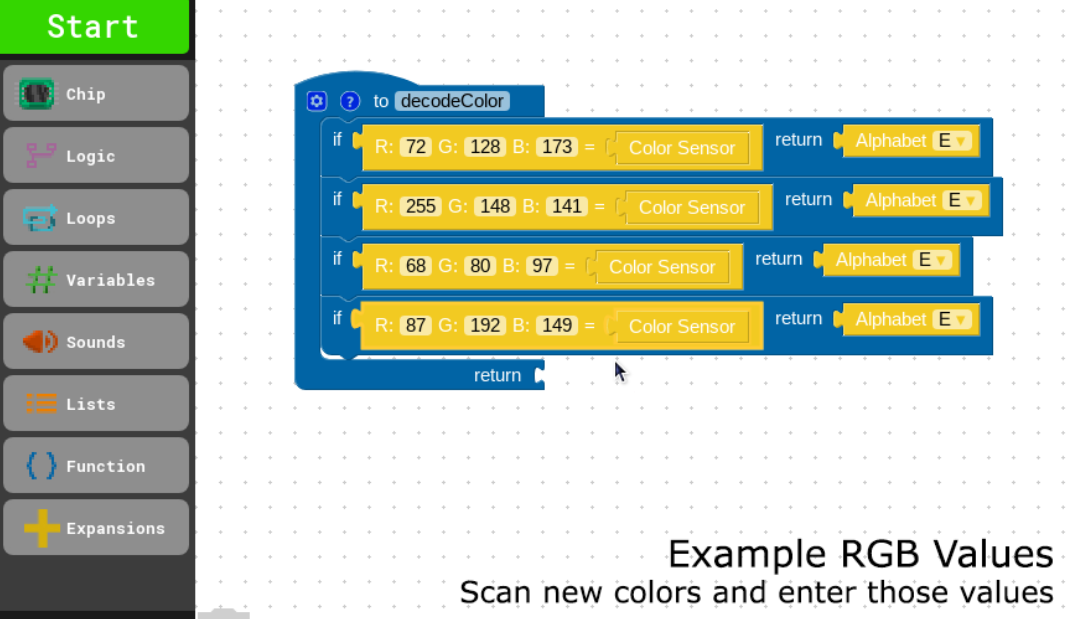
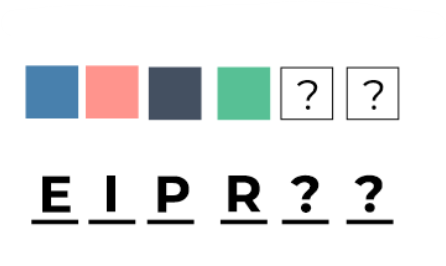
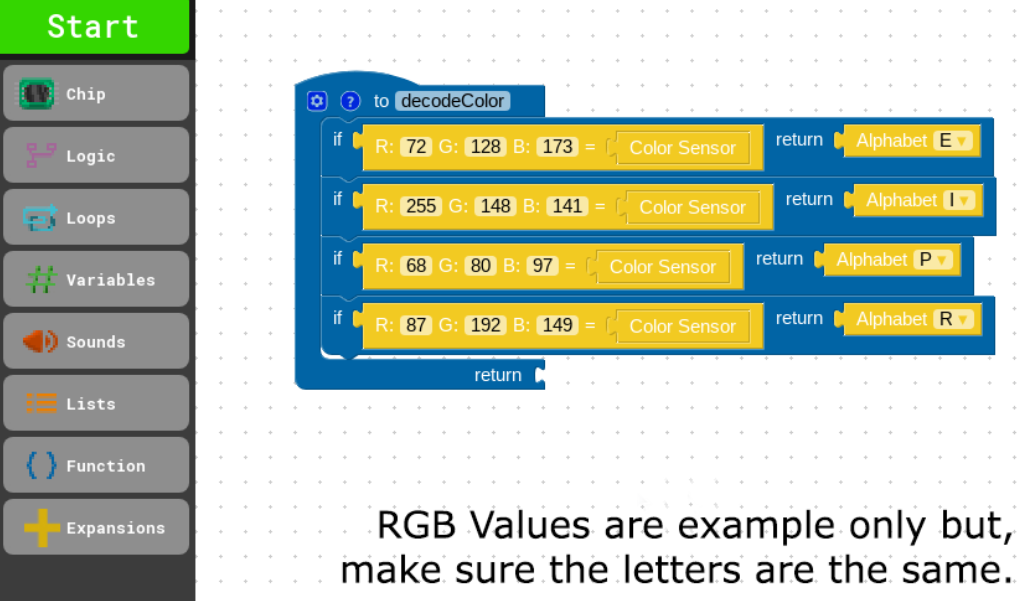
Change the Alphabet letters so that they read E, I, P, R in that order. Discuss: What do you think you will do to display each letter?
Complete the function by adding a " " block under Variable. Drag it into the return value of the decodeColor function. We want the function to return a value when an RGB value is scanned that is not coded to return a letter. This is often called an "empty string".
Find a Start block under Logic and drag it into the programming space, separate from your current code. Connect a repeat forever loop to it. Follow the image provided.
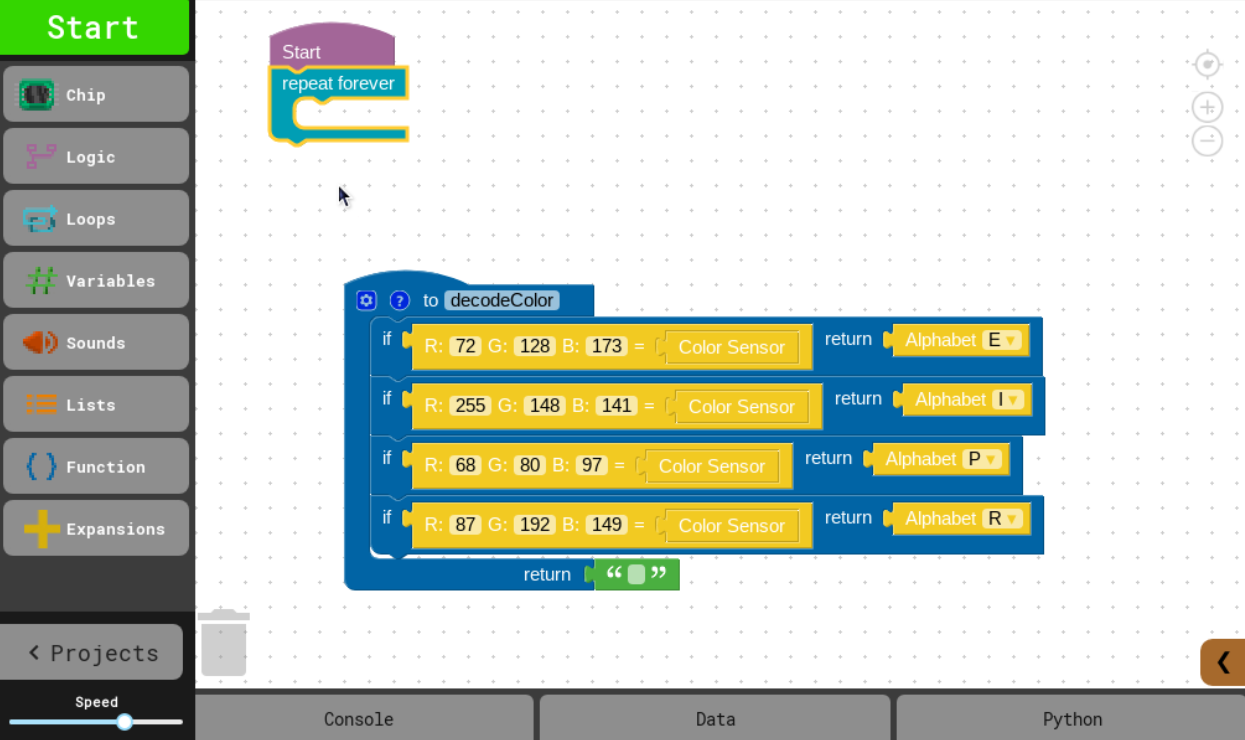
Add a wait until block found under Chip into the repeat forever loop. Drag an = Logic block and connect to your wait until block. Change the sign to "does not equal" (≠).
In the "does not equal" (≠) block, drag a decodeColor under Function and an empty string (" ") so that decodeColor ≠ " ". This ensures that the computer waits until the function, decodeColor, scans a color with a coded letter before moving forward in the code.
Find the shout color block under Chip and drag into the repeat forever loop under wait until. Add the decodeColor function block as shown.
Now that your code is complete, press START in the top left corner of your screen. Try to spell "P - I - P - E - R" by scanning colors! Discuss: Which colors in what order do you need to scan with your color sensor in order to spell PIPER?
Next, customize your code and send a secret message to a friend with color! Hint: To do this you will need to add if, return statements and/or change your Alphabet letters.