Close menu

Resources


PIPER COMPUTER

Everything you need to teach STEAM effectivly using the Piper Computer Kit.

Educator Guides StoryMode Project Guides PiperCode Project Guides
PIPER MAKE

Teach fundamental STEM skills while providing a bridge to career connected learning.

Educator Guides
Best Practices Standards Glossary FAQ Educator Forum

EDUCATOR PORTAL

Close menu

ALL GUIDES


StoryMode

  1. Mars
  2. Cheeseteroid
  3. Treasure Hunt
  4. Chain Reaction
  5. Power Plant
  6. Rainbow Bridge
  7. Funky Fungi
  8. Breadboard Bluffs
  9. Return to the Cheeseteroid

  1. Pip Hop
  2. Bot Builder

  1. Ring Race
  2. Snake Trap
  3. Dark Maze
  4. Explosive Escape
  5. Chest Quest

PiperCode

  1. Blink
  2. Stop Light
  3. Light Show
  4. Tally
  5. Siren
  6. Circuit Design
  7. Debug
  8. Frog Frenzy

  1. Color Coded
  2. Ther-Mood-Stat
  3. Security Zone

  1. Randomizer
  2. El Pangolin (Simon)
  3. Beat the Buzzer
  4. 5-Button Synthesizer

PIPER COMPUTER

PROJECT GUIDES


YOU ARE HERE

PiperCode

Project 7 of 8

PiperCode Project 7 of 11

Debug


Intermediate

45 Mins

Grades 3 - 8

Look for the graphic above
to launch the project
INTRODUCTION

Bug-B-Gone -- Learn to debug a program and circuit here!

In this project, students learn about debugging a program and circuit.

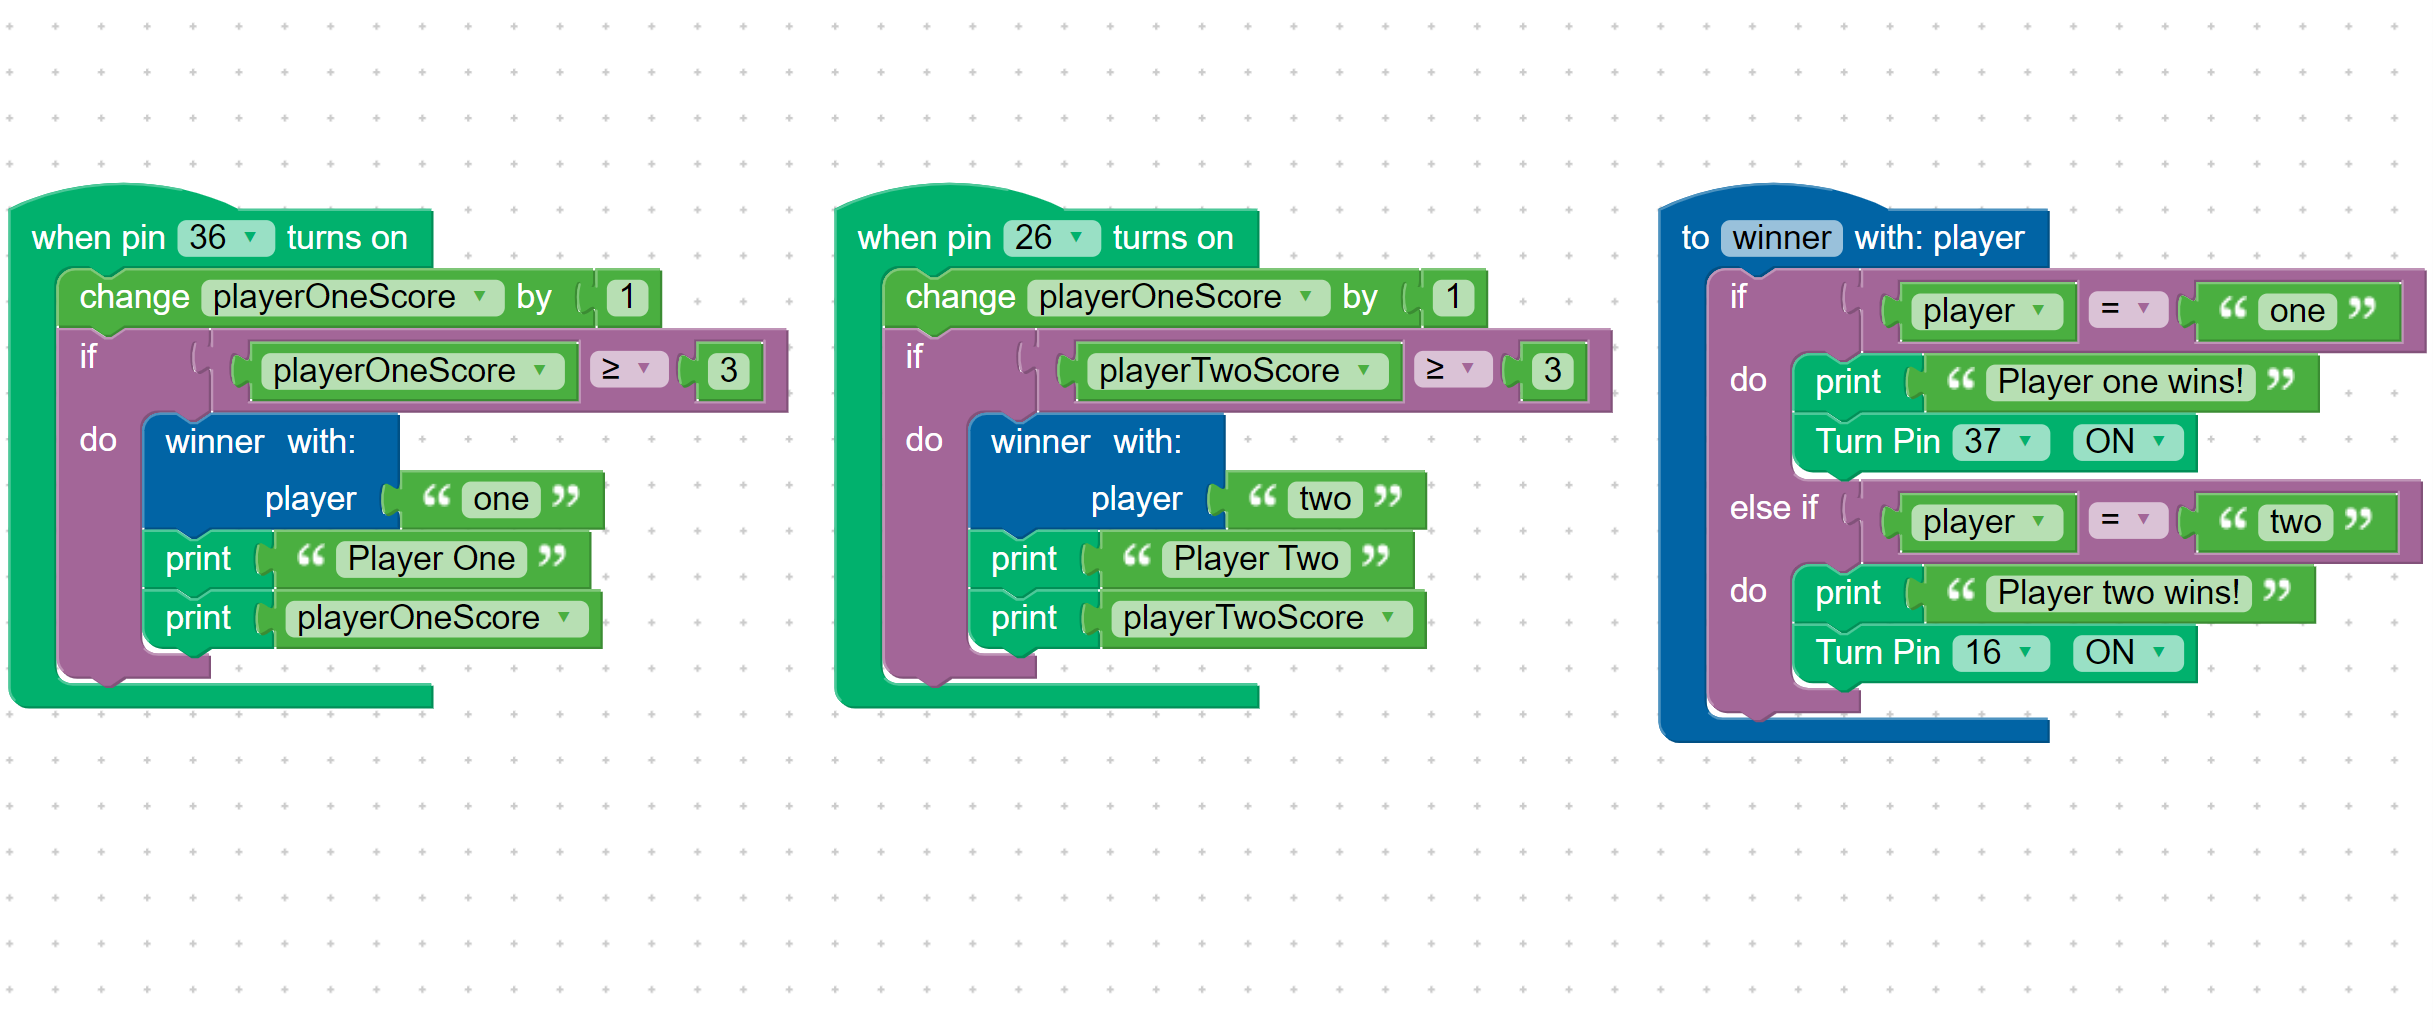
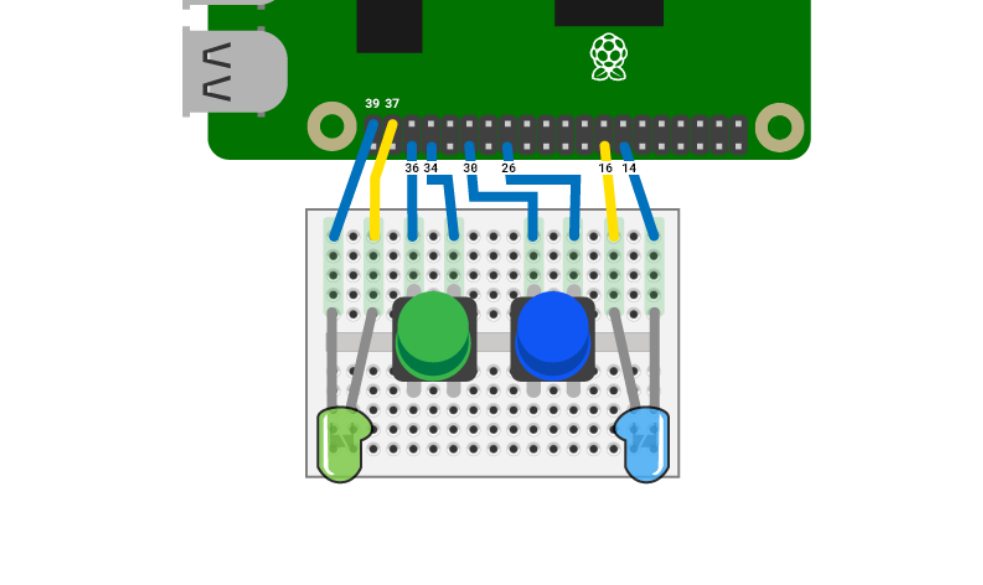
Students are presented with a game design and the code, where player 1 presses the green button, and player 2 presses the blue button. They will need to build the circuit and then follow instructions on how to identify the incorrect code using the print statement.
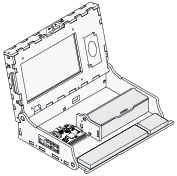
PROJECT MATERIALS

Piper Computer Kit
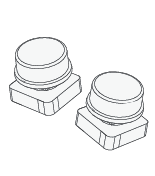
Two buttons (green, blue)
2 LEDs (green, blue)
8 Wires (various colors)

PROJECT RESOURCES

Concepts

In this project, students will learn a key skill which is fixing code that someone else has written incorrectly. Students will view code that is written incorrectly and must use the print command with the console to understand what is wrong with the code before making the necessary changes. The print statement is used to view variable values on the console. Other key skills in this project are events, conditionals, variables and functions.

Troubleshooting Tips

  • The DeBug project is different from previous projects in that students start with code that has already been written. Students must check the code by using the print command and the console to debug the code someone else wrote. The print commands display the current value stored in the variables player_one_score and player_two_score.
  • There are many new coding concepts to learn at once, and students may struggle to understand what is happening in the code. Note that the code assumes pin 3 is connected to the green button for player one and pin 8 is connected to the blue button for player 2. Those are the two event blocks.
  • The first 2 Code Solutions on the right are the events. The event for pin 8 (when pin 8 block) is incorrect in the project as it states to "change player_one_score" when it should be coded to "change player_two_score." The third Code Solution on the right shows the function 'winner' that runs when one scores greater than or equal to 3.
  • The student must remove the print commands for the two event blocks before running the game. The print commands are there only to debug what is wrong with the scores. However, they can leave the print commands in the winner function.
  • In the event blocks, if blocks are used as conditionals to check the value of the variables that store the number of times the button has been pressed. In the winner function, an if else block is used as a conditional to check the value of the variable player. This variable value is passed to the function with the blocks winner with player "one" and winner with player "two." The if block checks to see if player contains the value of "one" in the first half of the if block and checks for the value of "two" in the "else if" part of a block. When one of those conditions is true, the winner message prints to the display, and the LED turns on.

Our customer support specialists are on hand to ensure your implementation of Piper runs seamlessly.
View Support Docs or Contact Support
PROJECT STEPS

Step 1 Build it

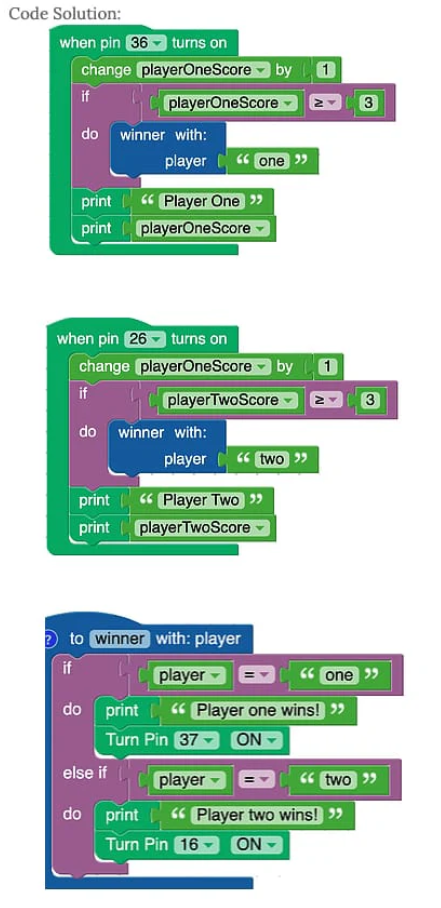
This is the code for a two player game. First, build your controllers.

Step 2 Try it

Now press Start. The first player to press their button 3 times should win and their LED should light up. Does it work for both buttons?

Step 3 Print variables

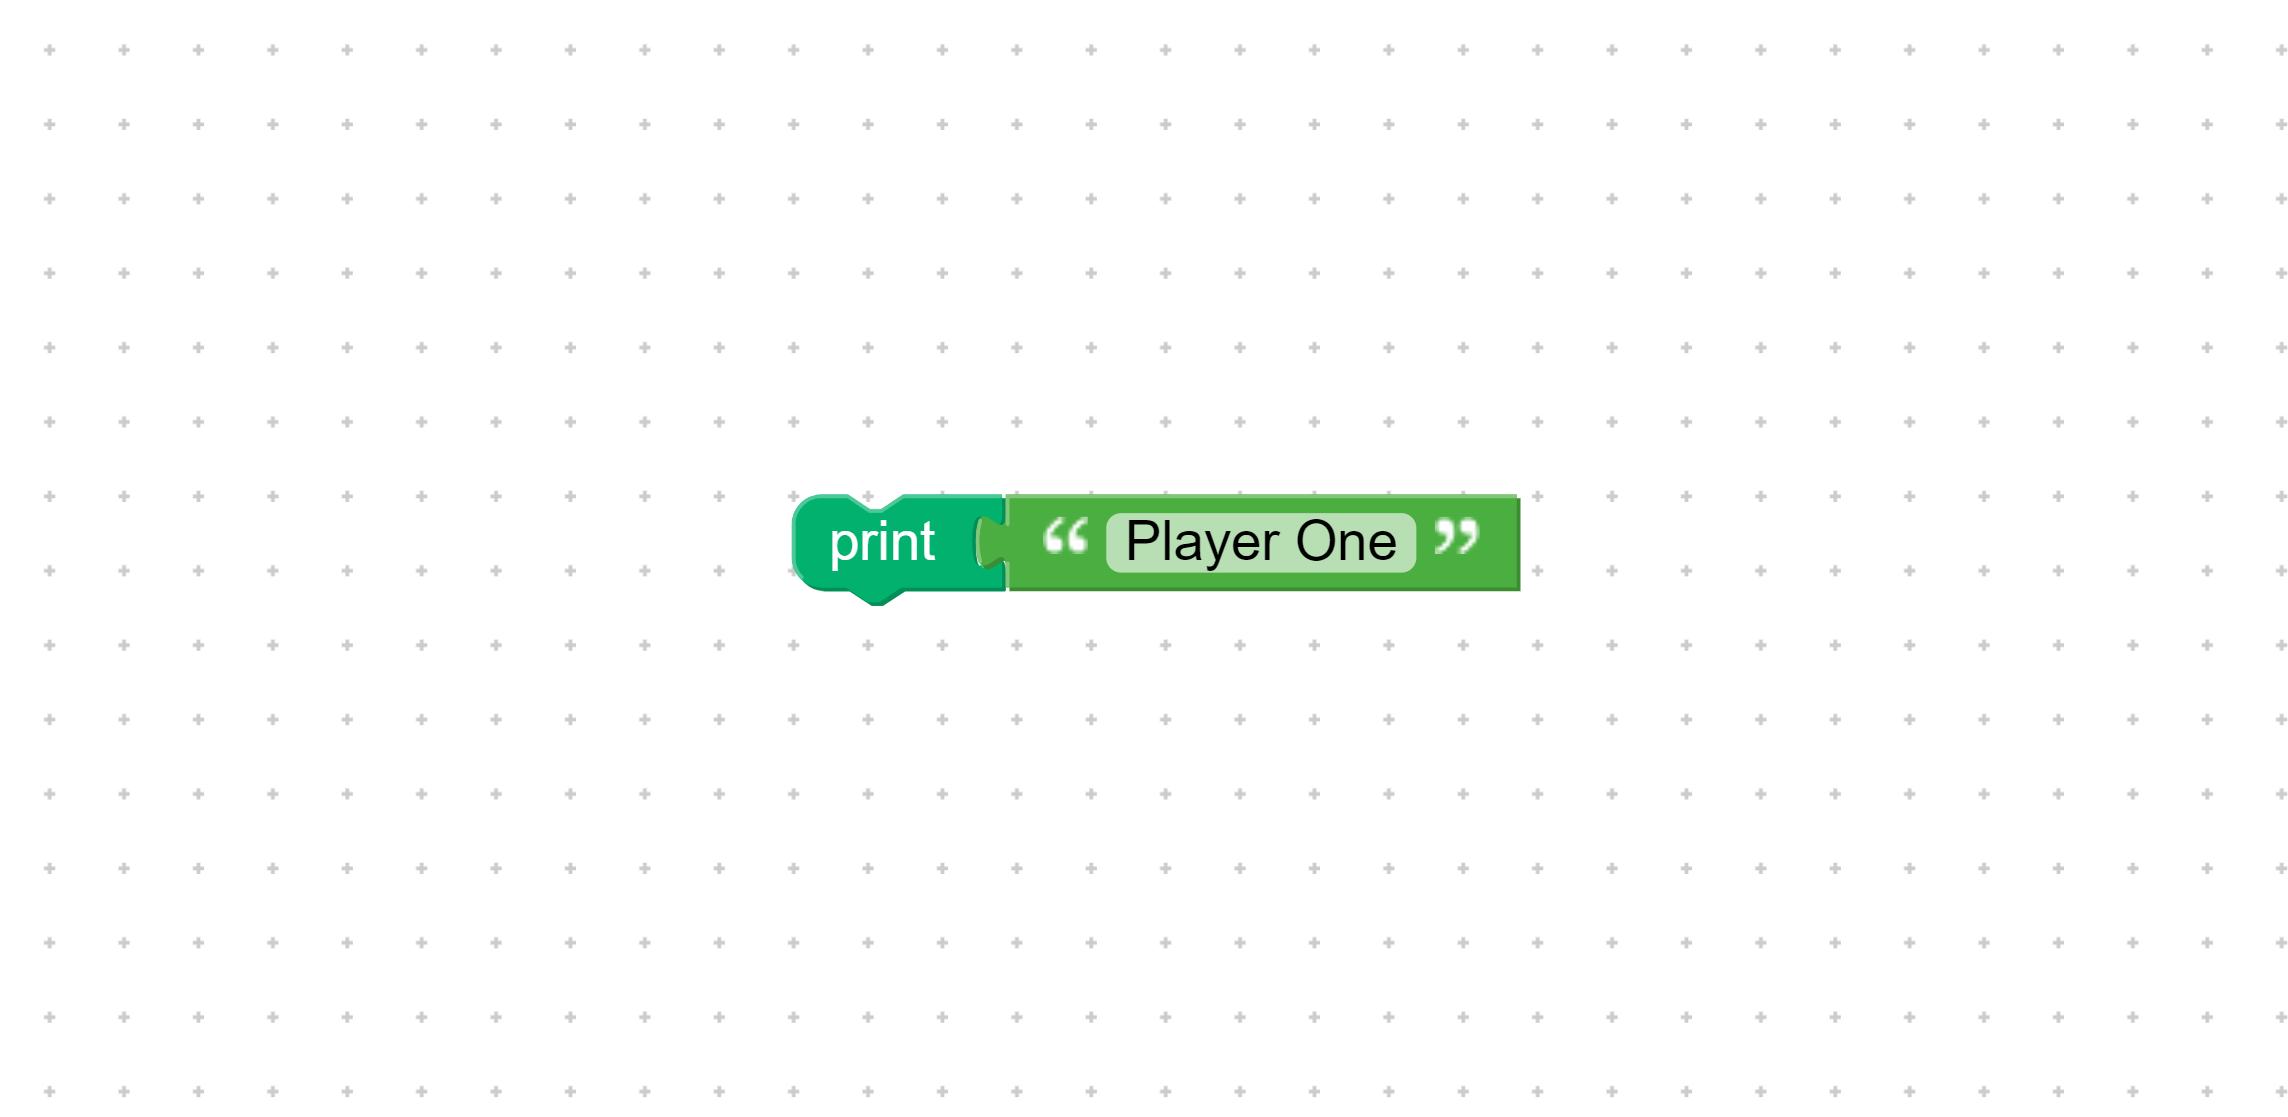
Player One always wins. Why is that? Lets add a Print block to find out. Attach the String block and type Player One.

Step 4 Print player one

Add another Print block. This time attach the playerOneScore variable.

Step 5 Attach to button

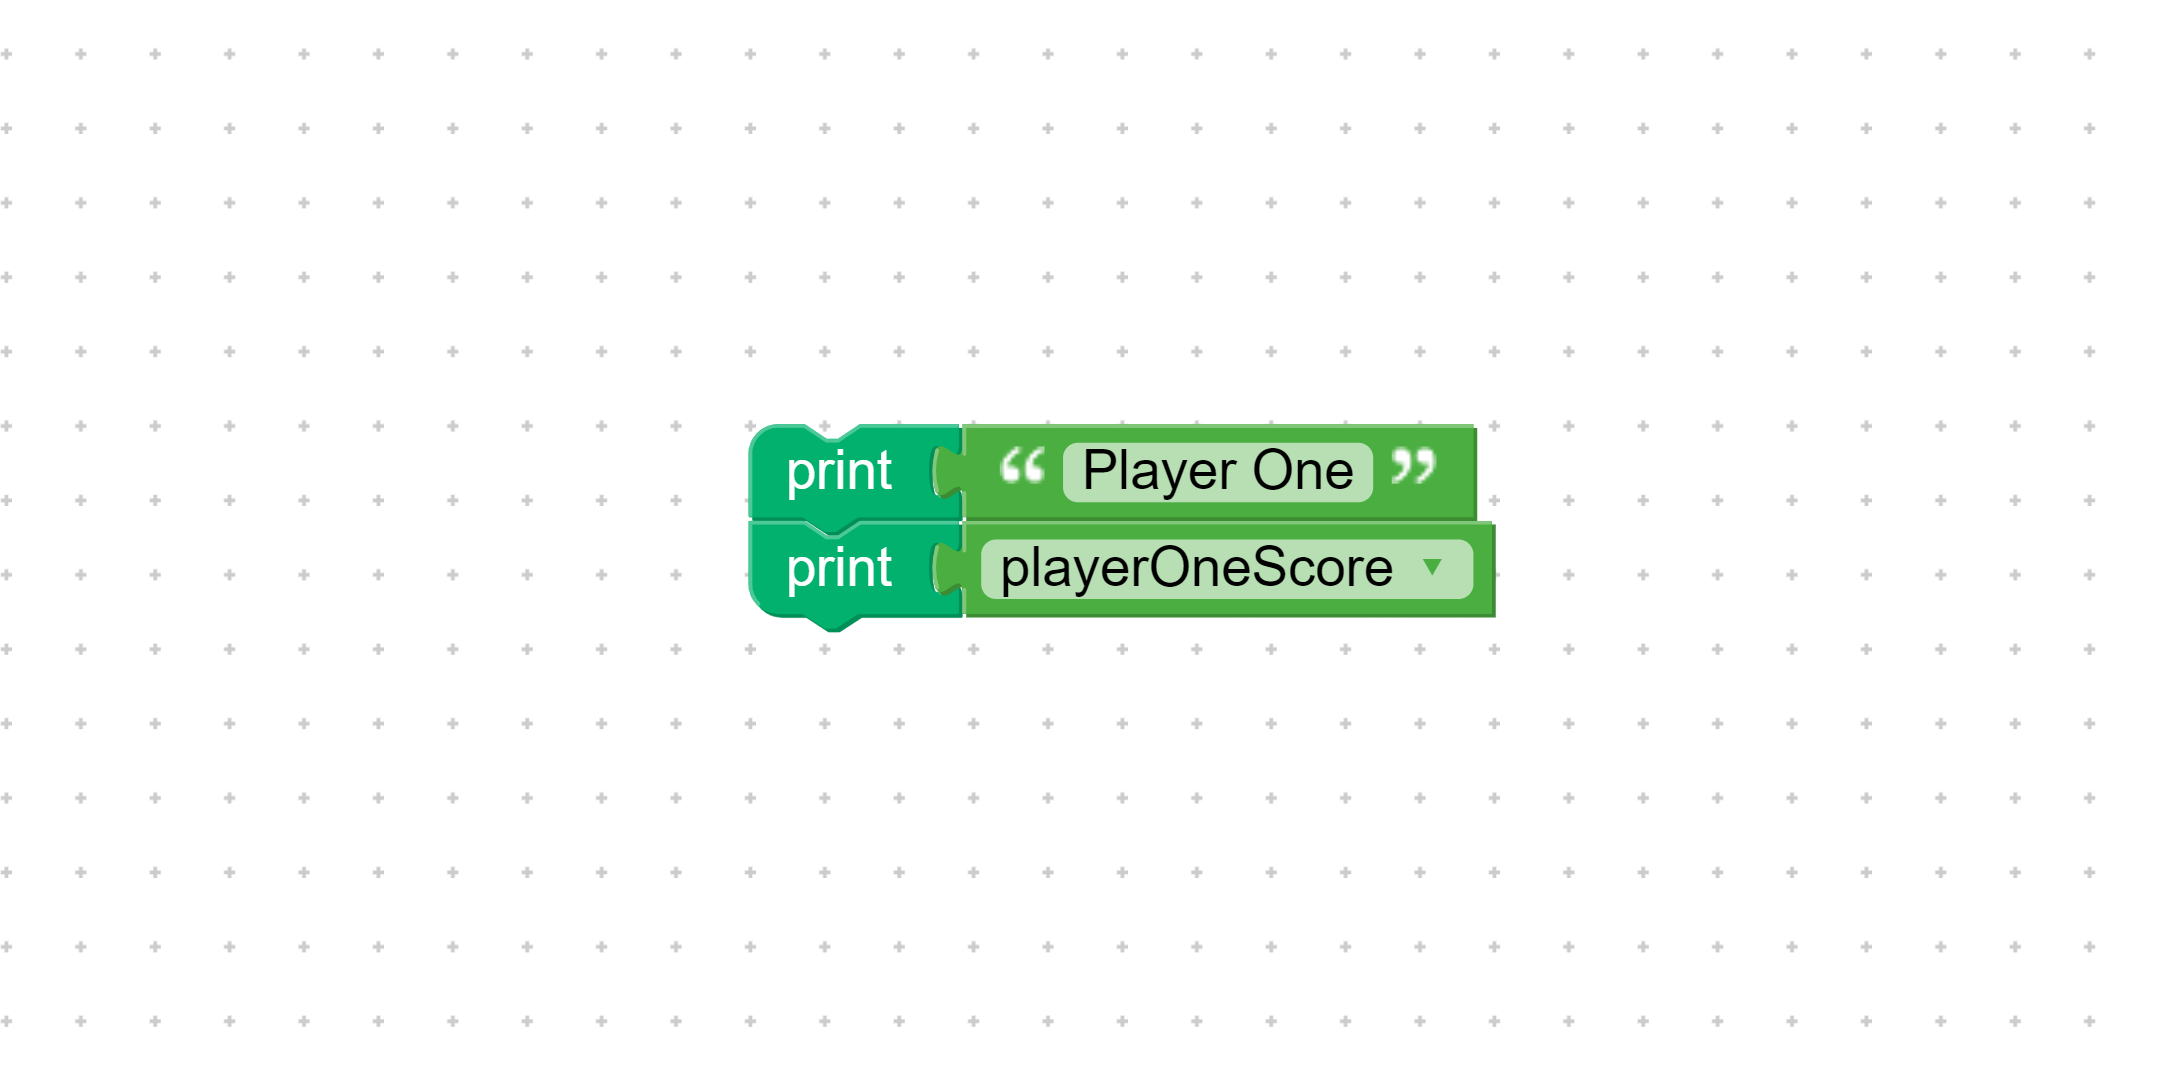
Drag these two Print statements into the pin 36 event block.

Step 6 Use the console

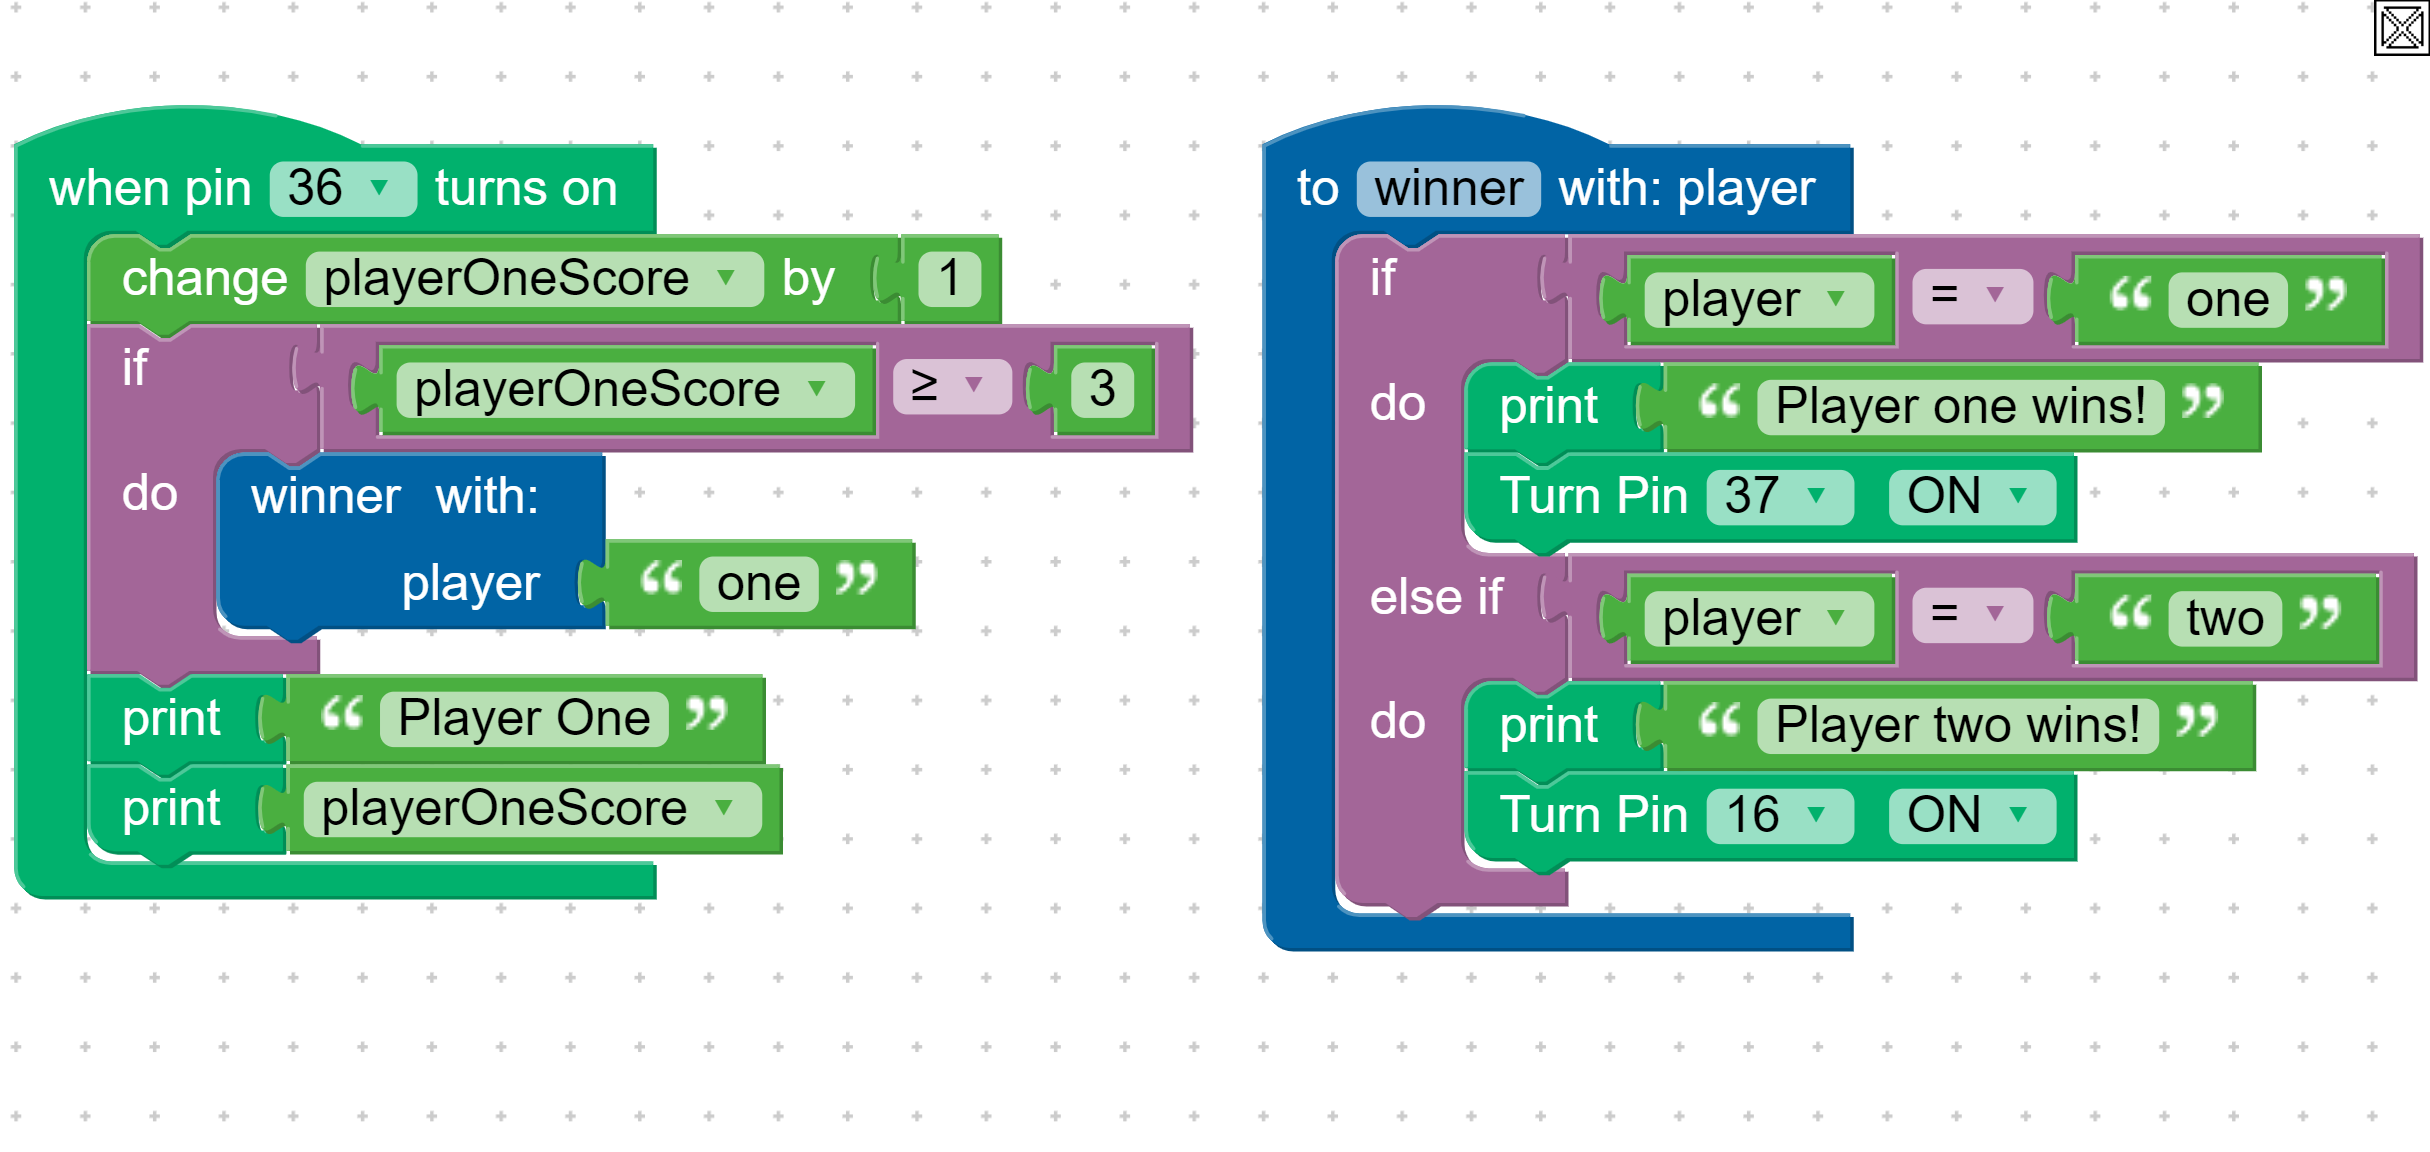
Select the Console Tab and press Start. When you press the green button you should see the player one variable count up.

Step 7 Try player two

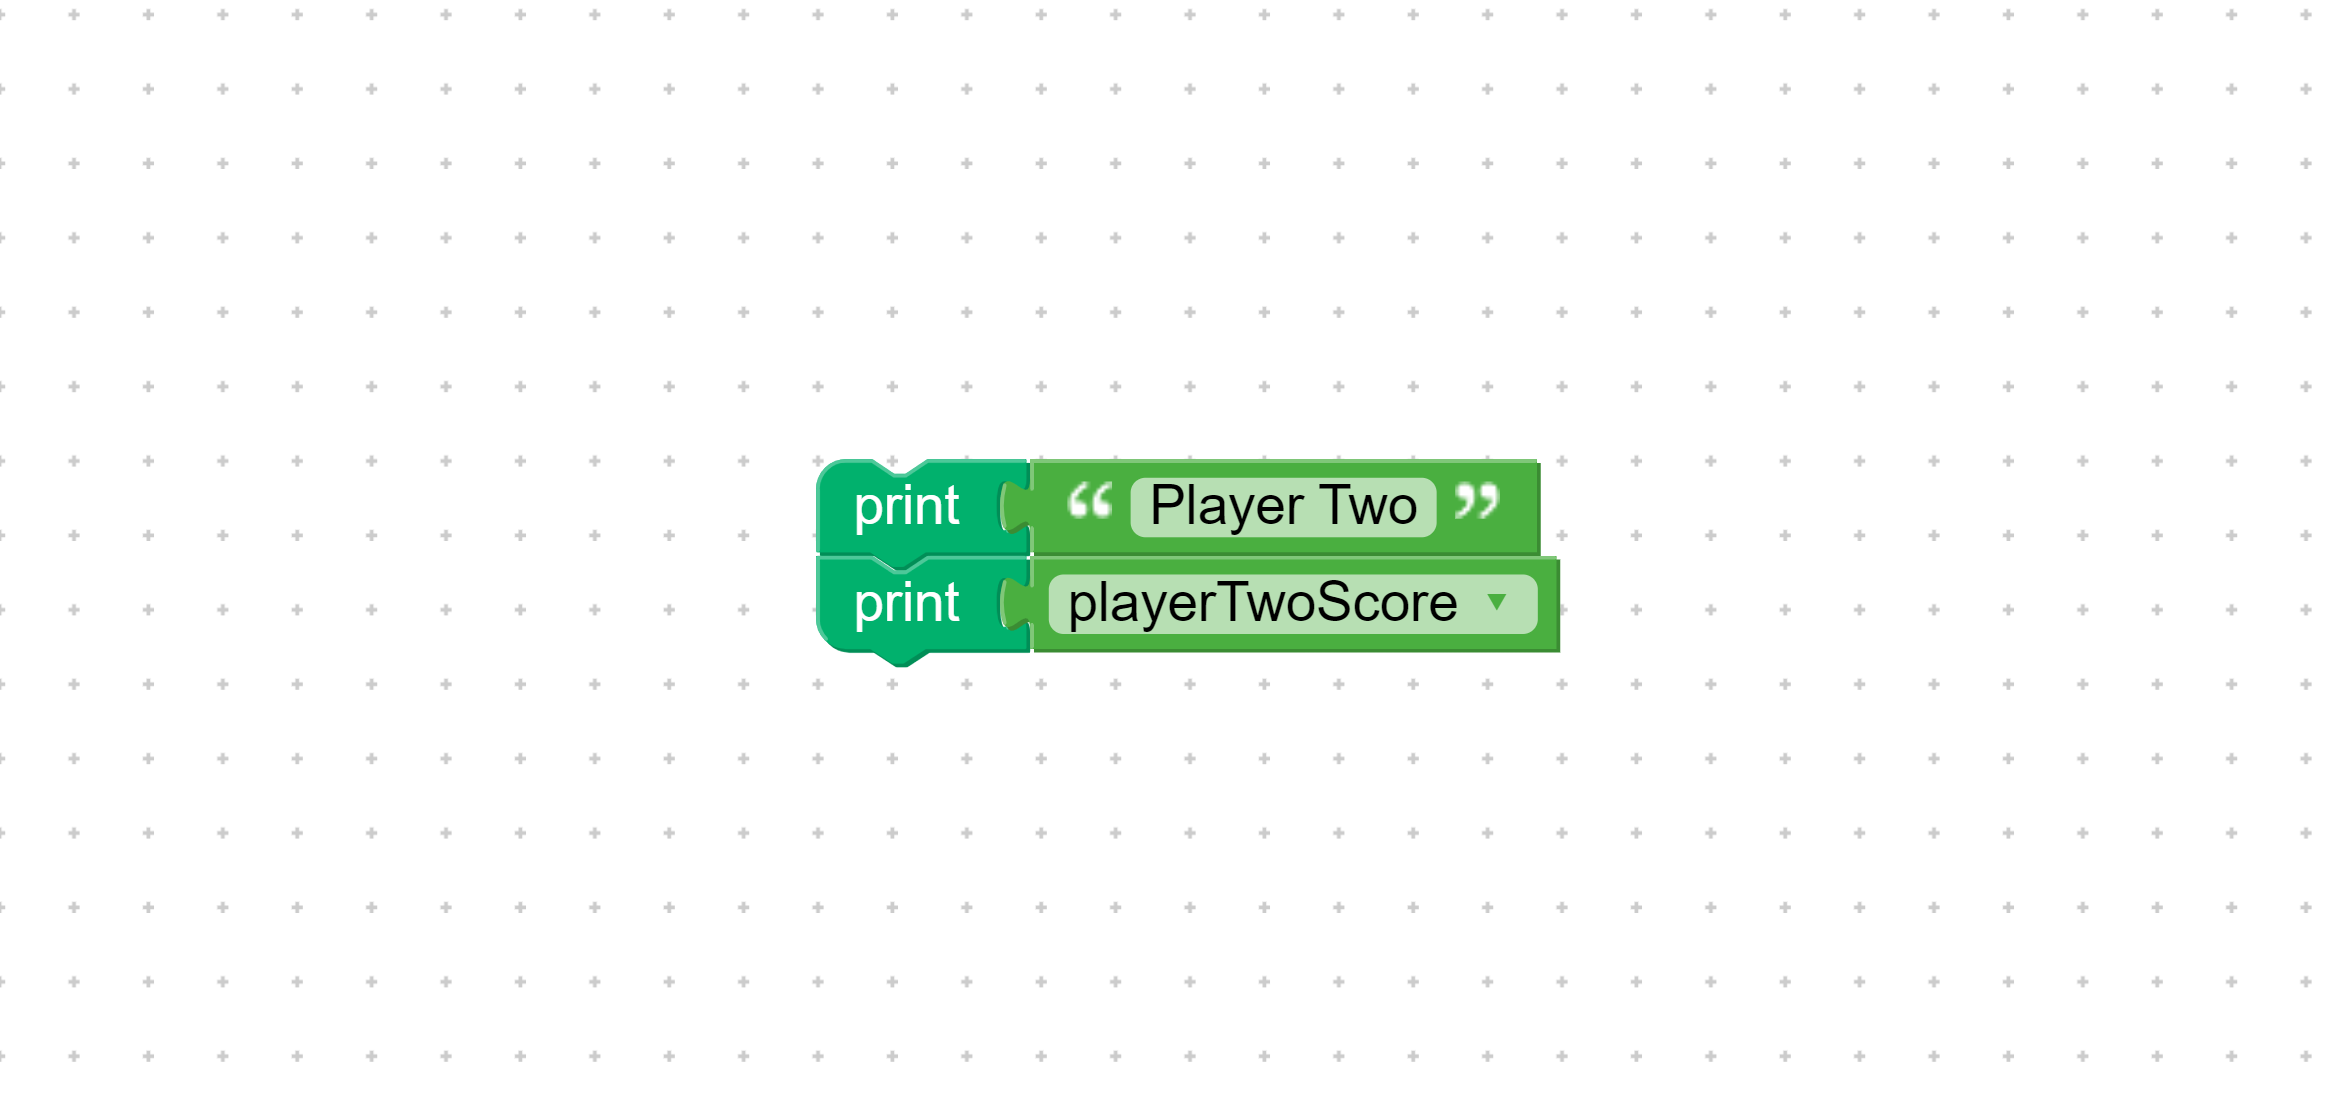
Player one looks good, now let's try player two. Create Print statements for player two.

Step 8 Attach to the button

Now drag the new Print statements into the pin 26 event block.

Step 9 Check the Console

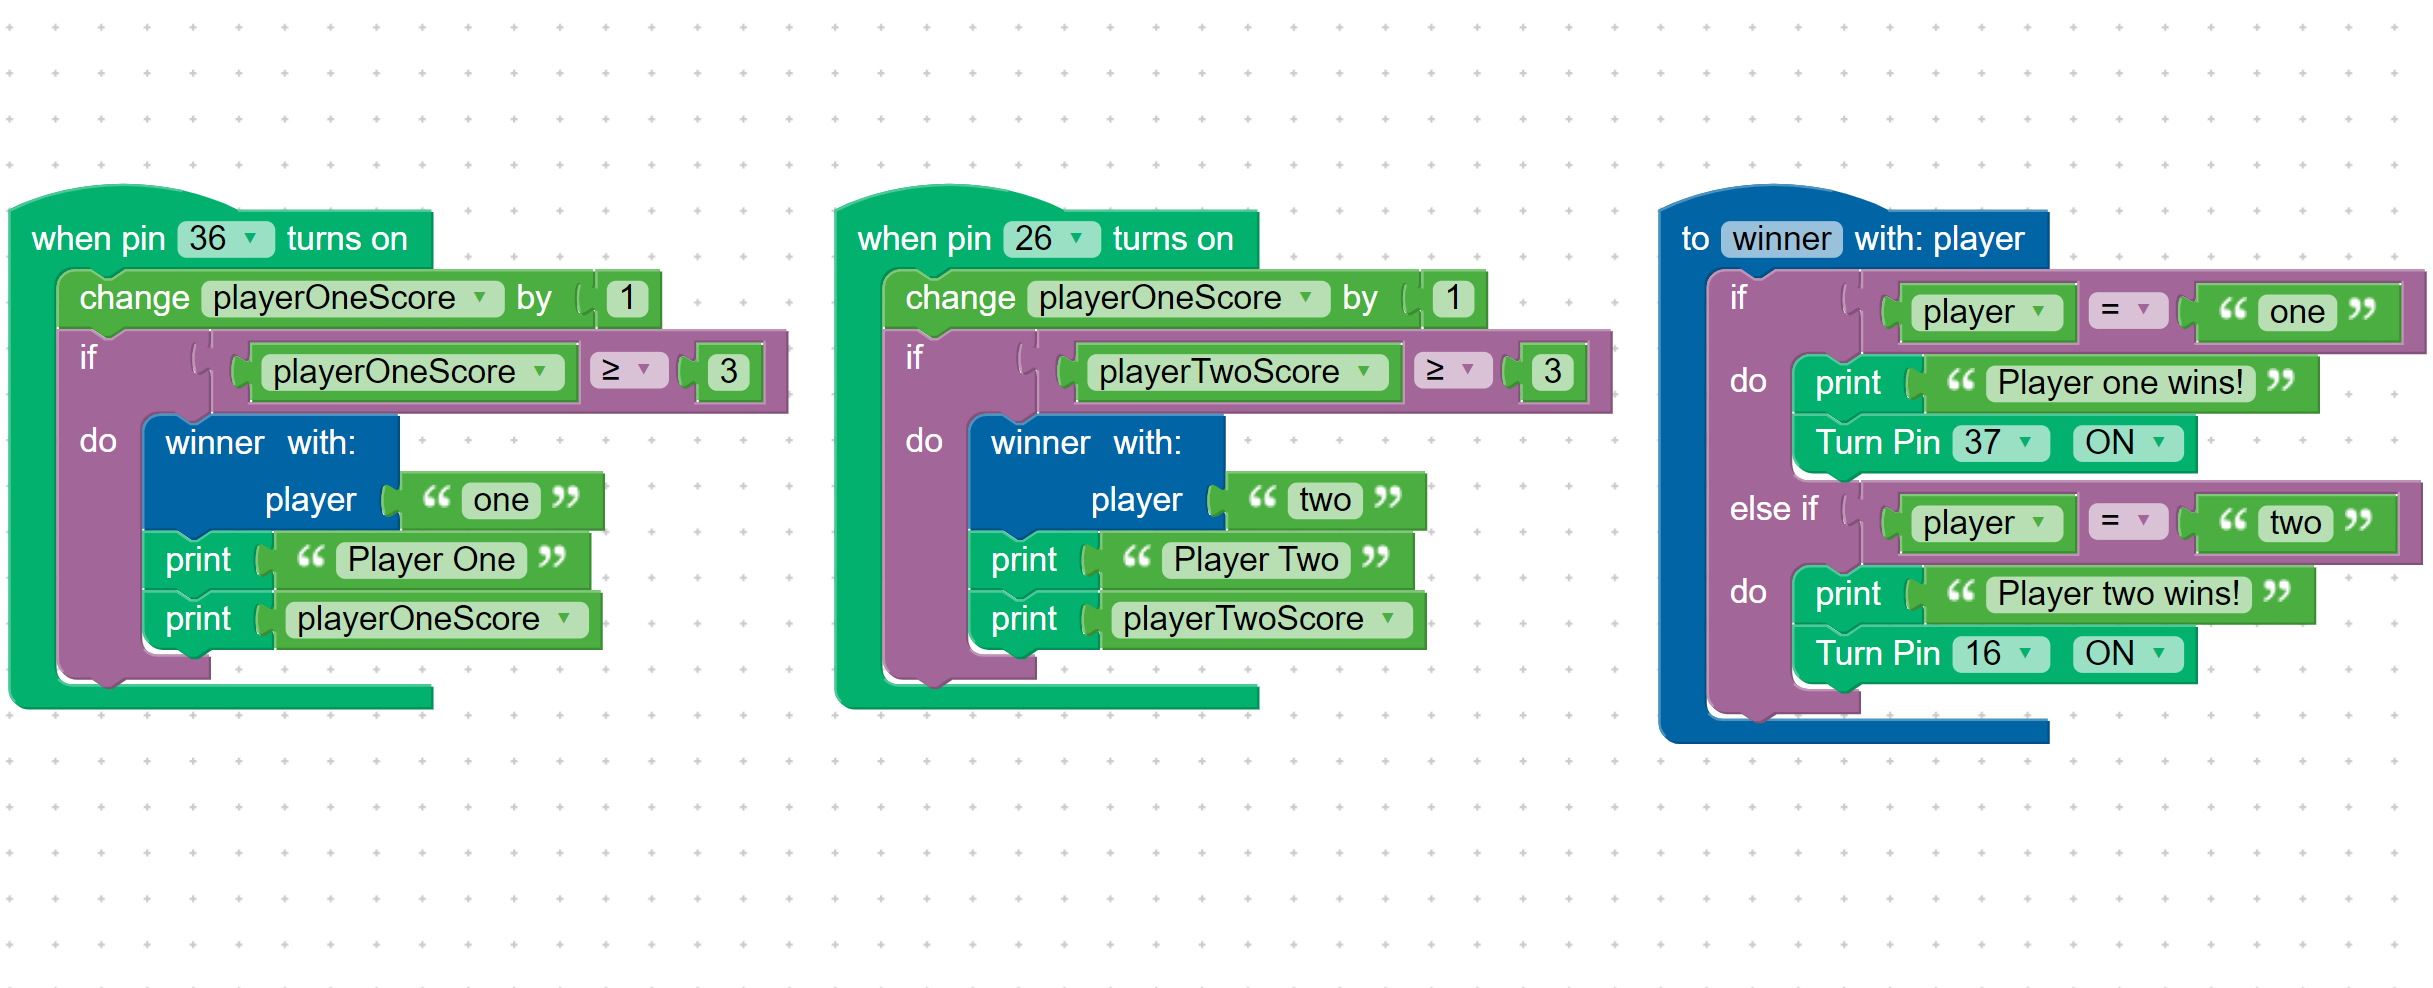
Now press Start with the console on. What happens when you press the blue button?

Step 10 What's wrong?

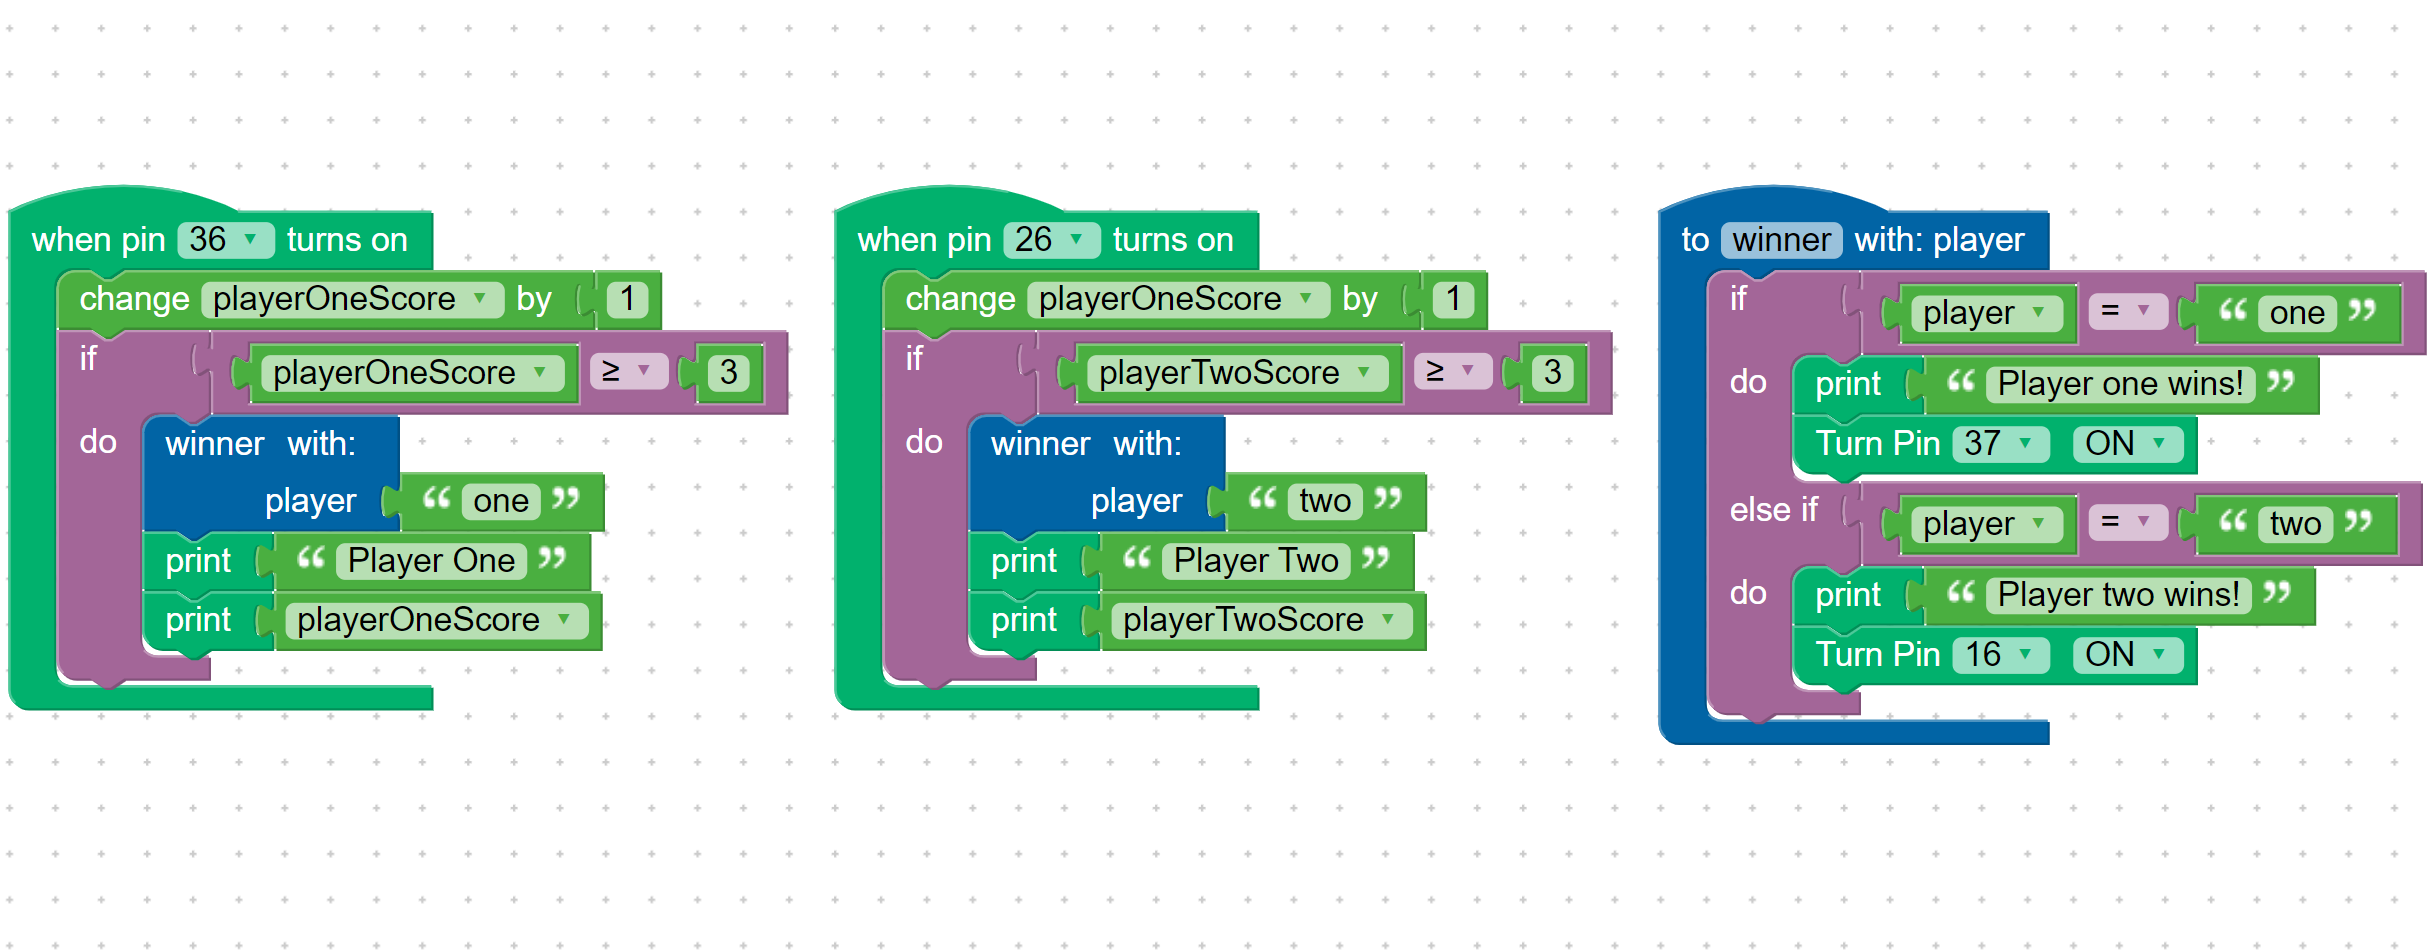
Look closely at the code in the pin 26 event block. Is something wrong? Try to fix it.

Completed!