In this project, students design a game of skill that they may play against each other. Similar to the game of Simon, this head-to-head game will have one player press a sequence of five button clicks and the second player must repeat the same sequence. If done correctly, a winner sound will play OR a loser sound will play if not done correctly. The step-by-step instructions in the tutorial guide students through the process of building the circuit and writing the code.
In this project, students will learn to use lists, another key skill for programming. This is the most complex project in Piper Code combining all of the key skills learned through the previous projects (except events) including functions, procedures, variables, conditionals, sounds, debug and states.
Troubleshooting Tips
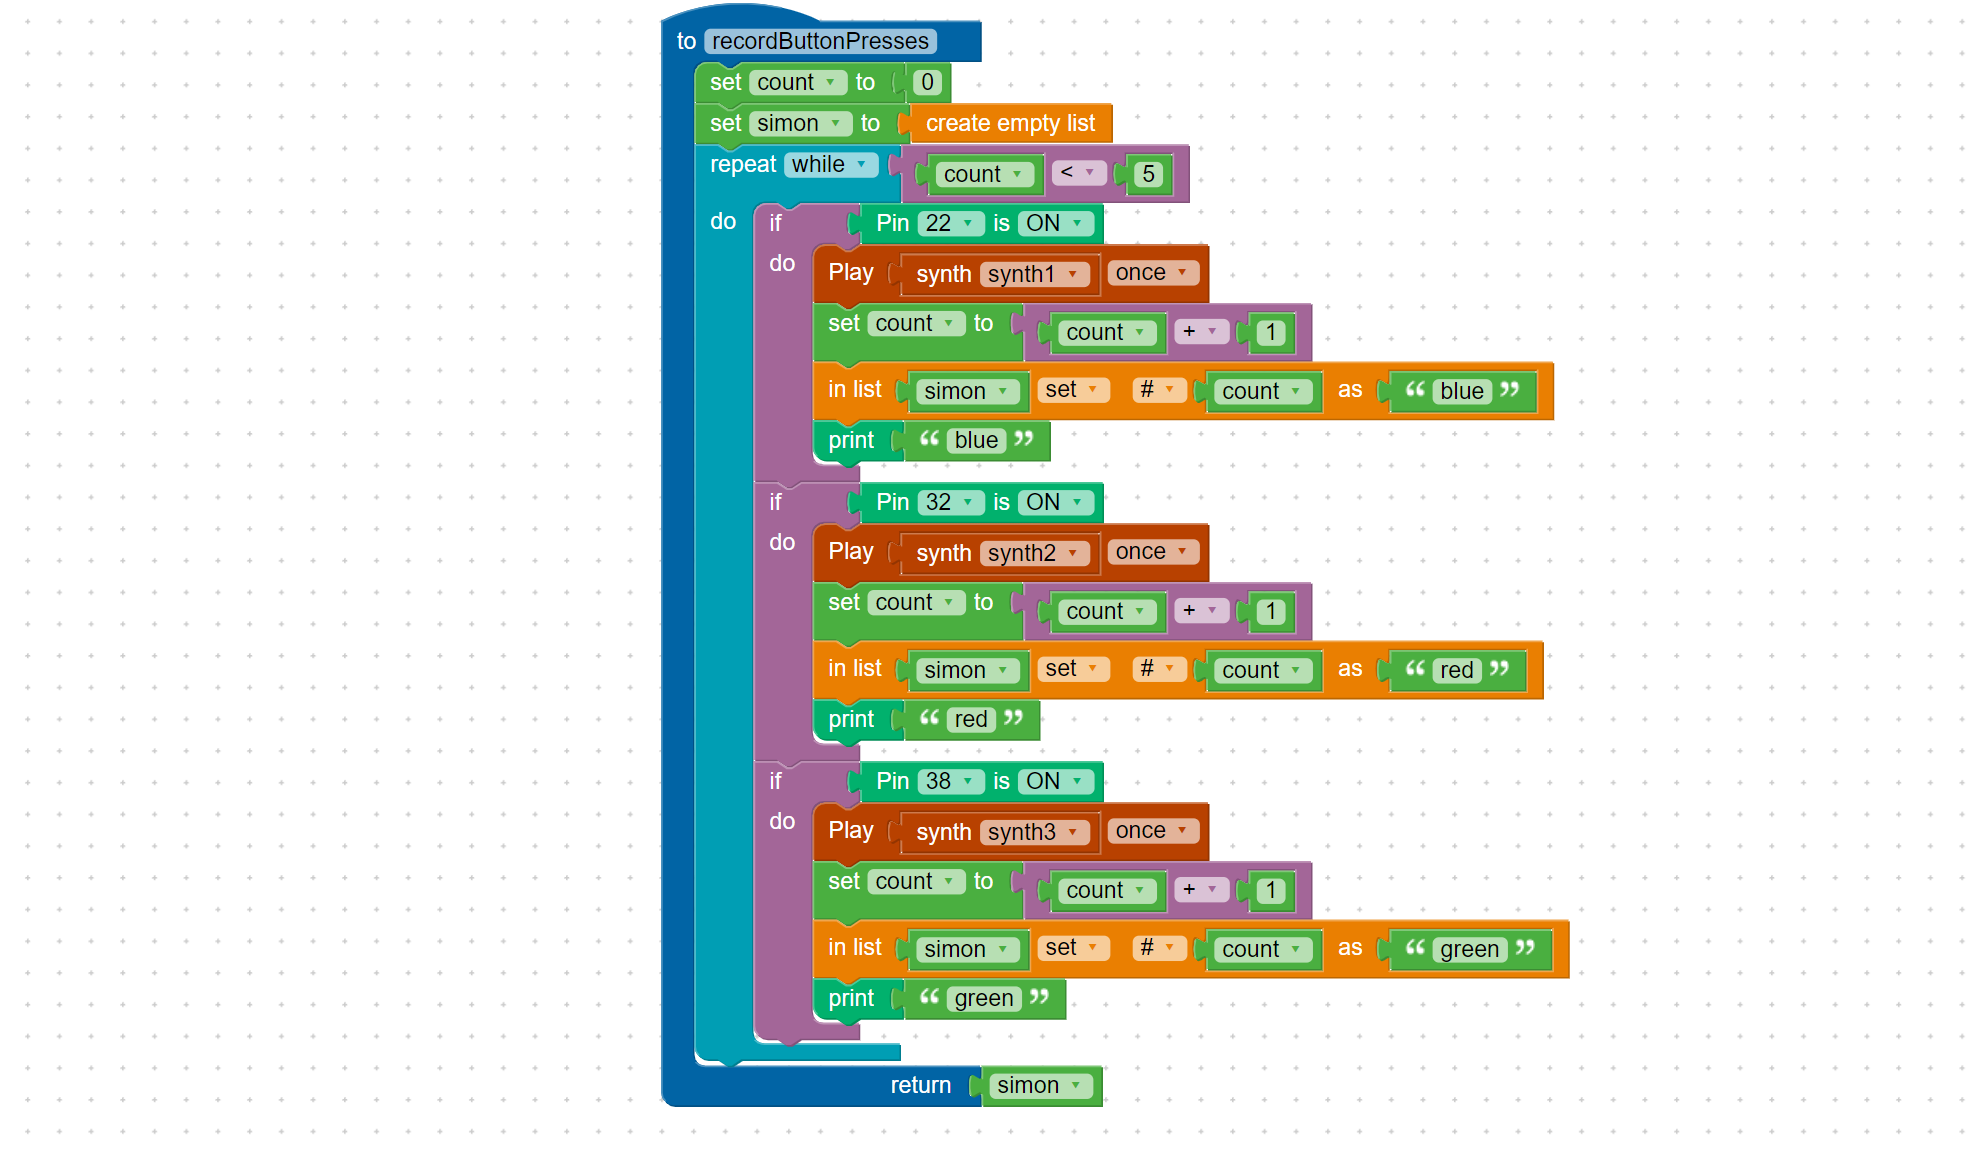
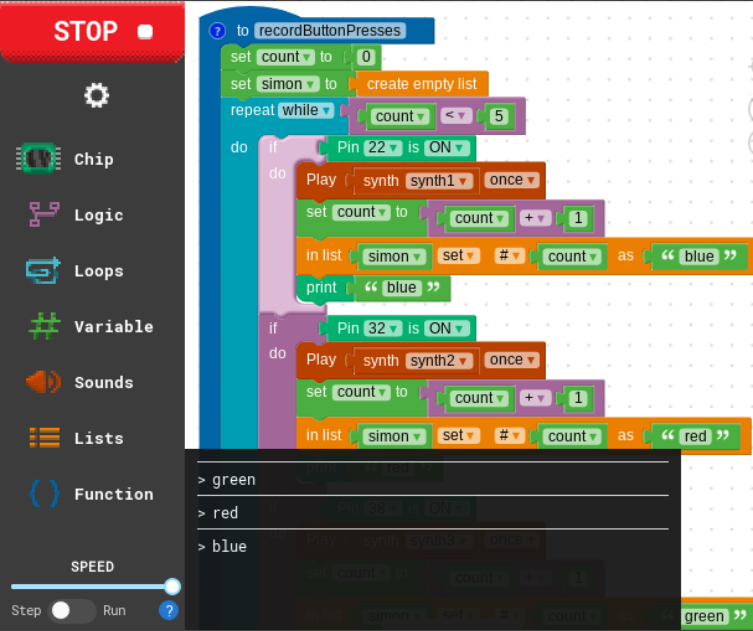
Students will be challenged with the instructions of building code, testing it with the print blocks, then removing the print blocks. With the print blocks, you are printing to the console to make sure that your code is working! Once the testing is complete, make sure they remove the print blocks. this is very complex code, and can take a while to get right and to debug.
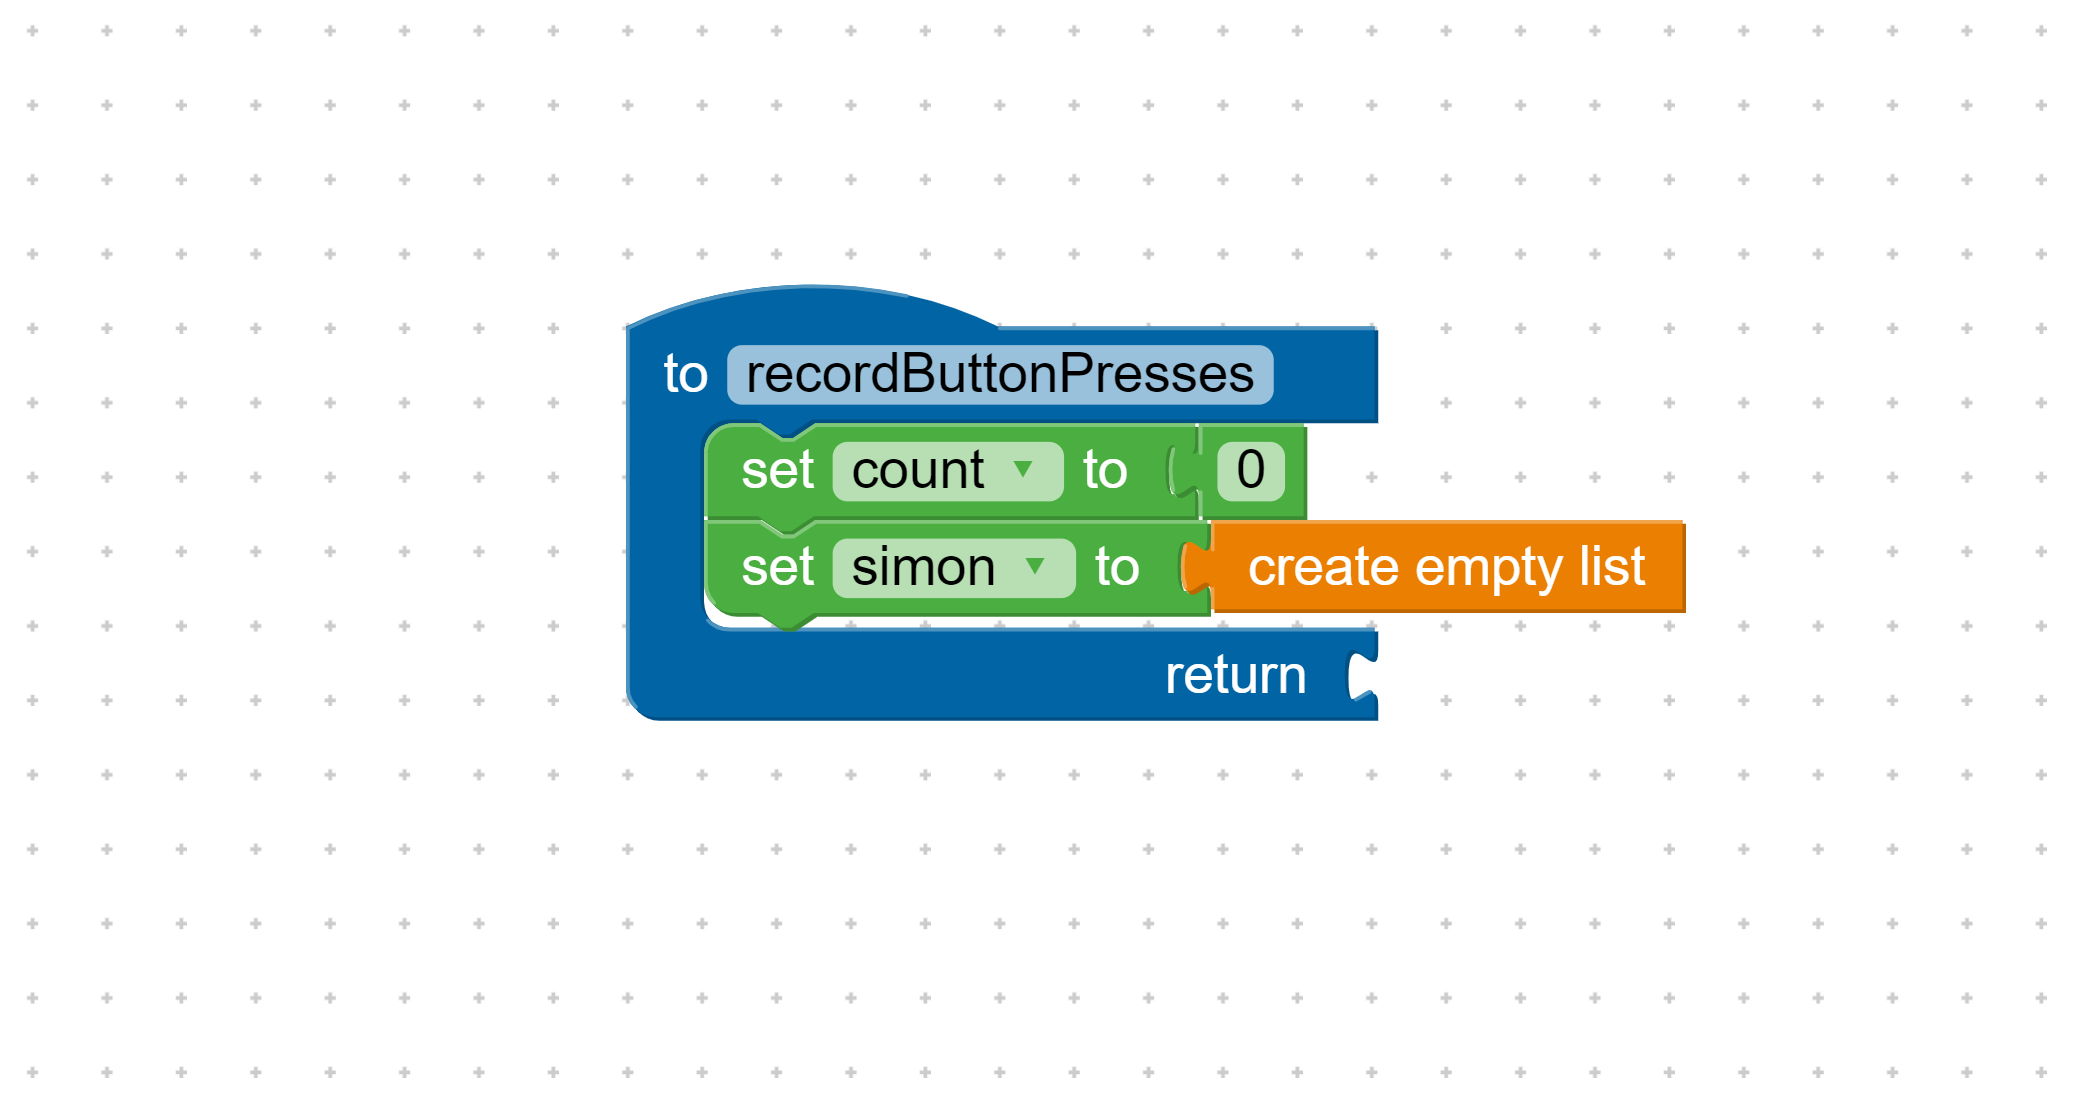
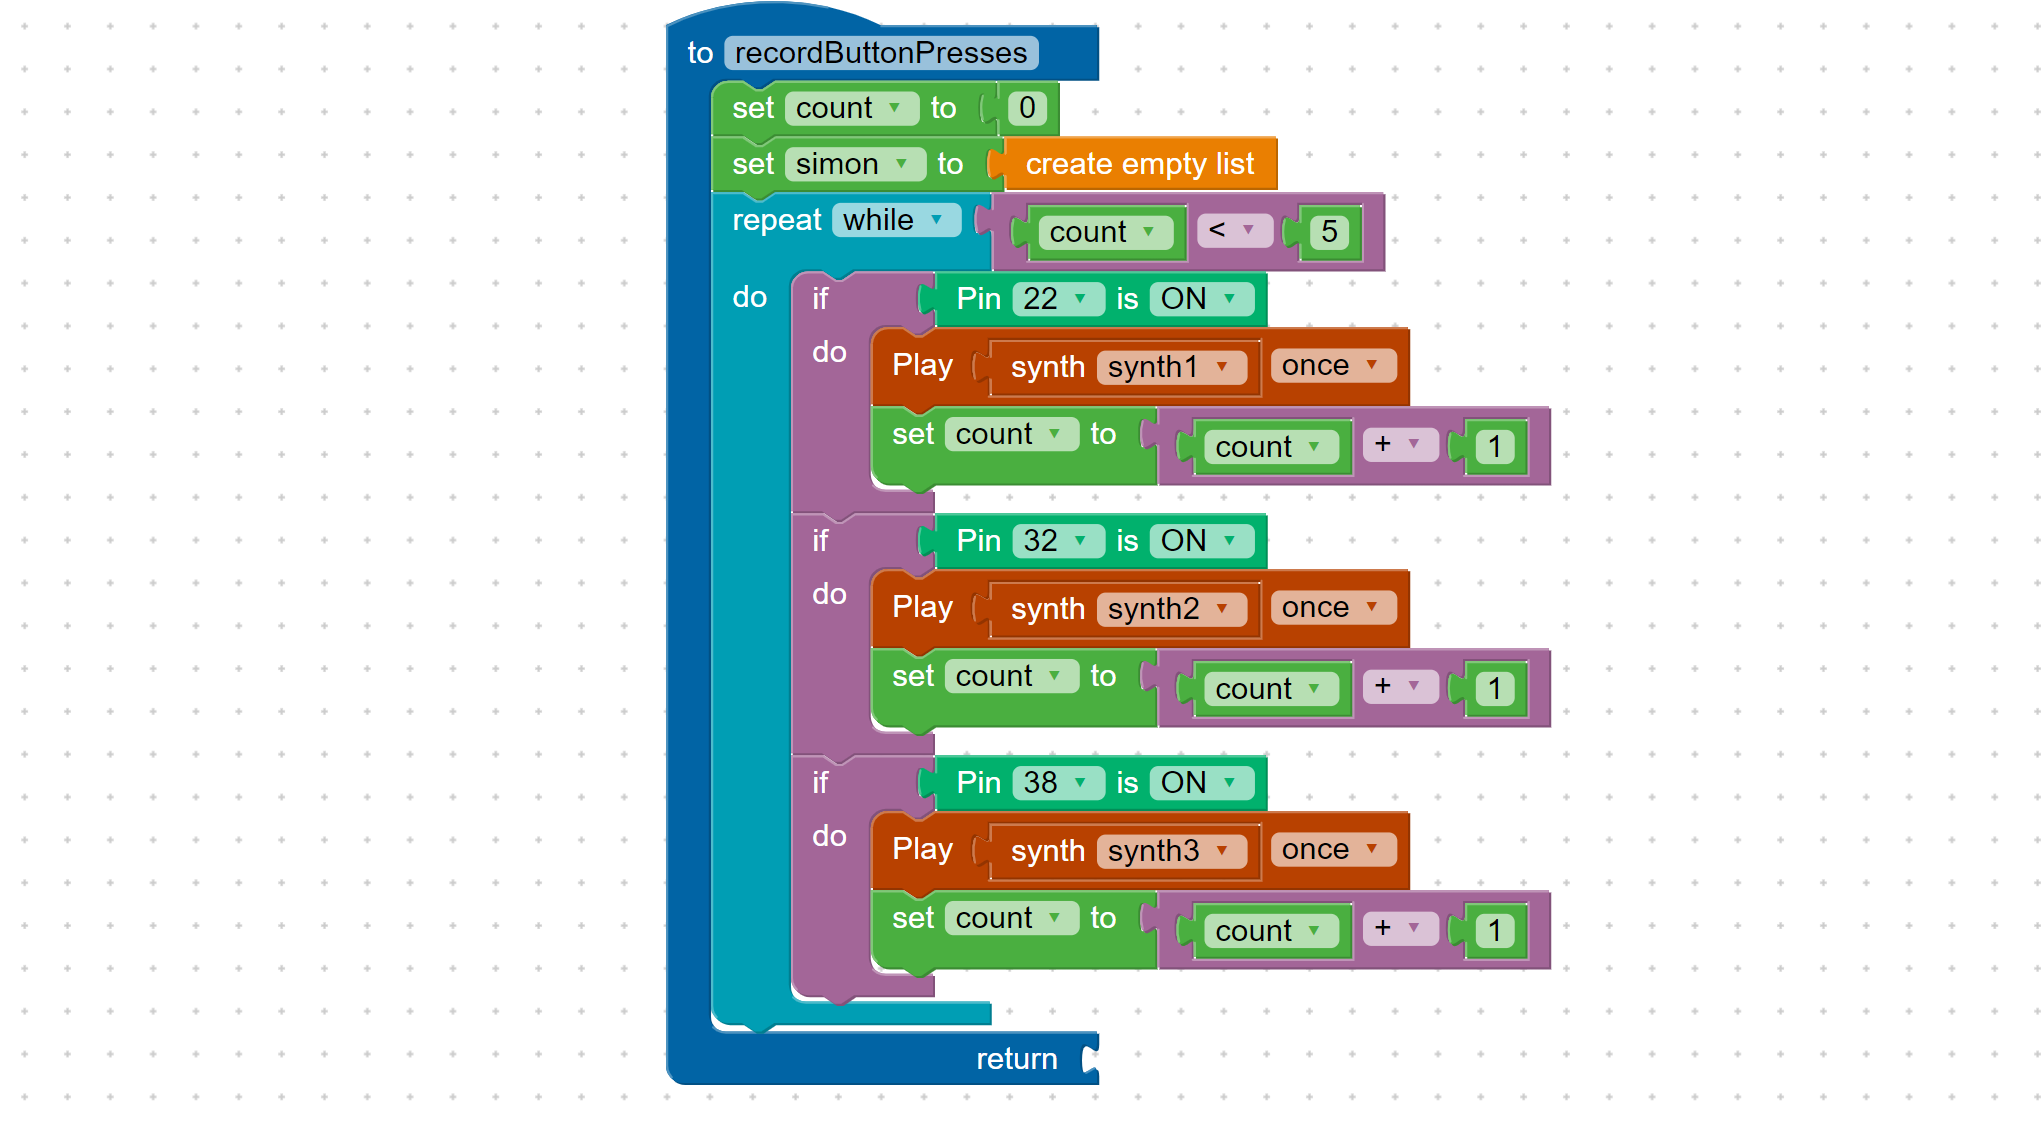
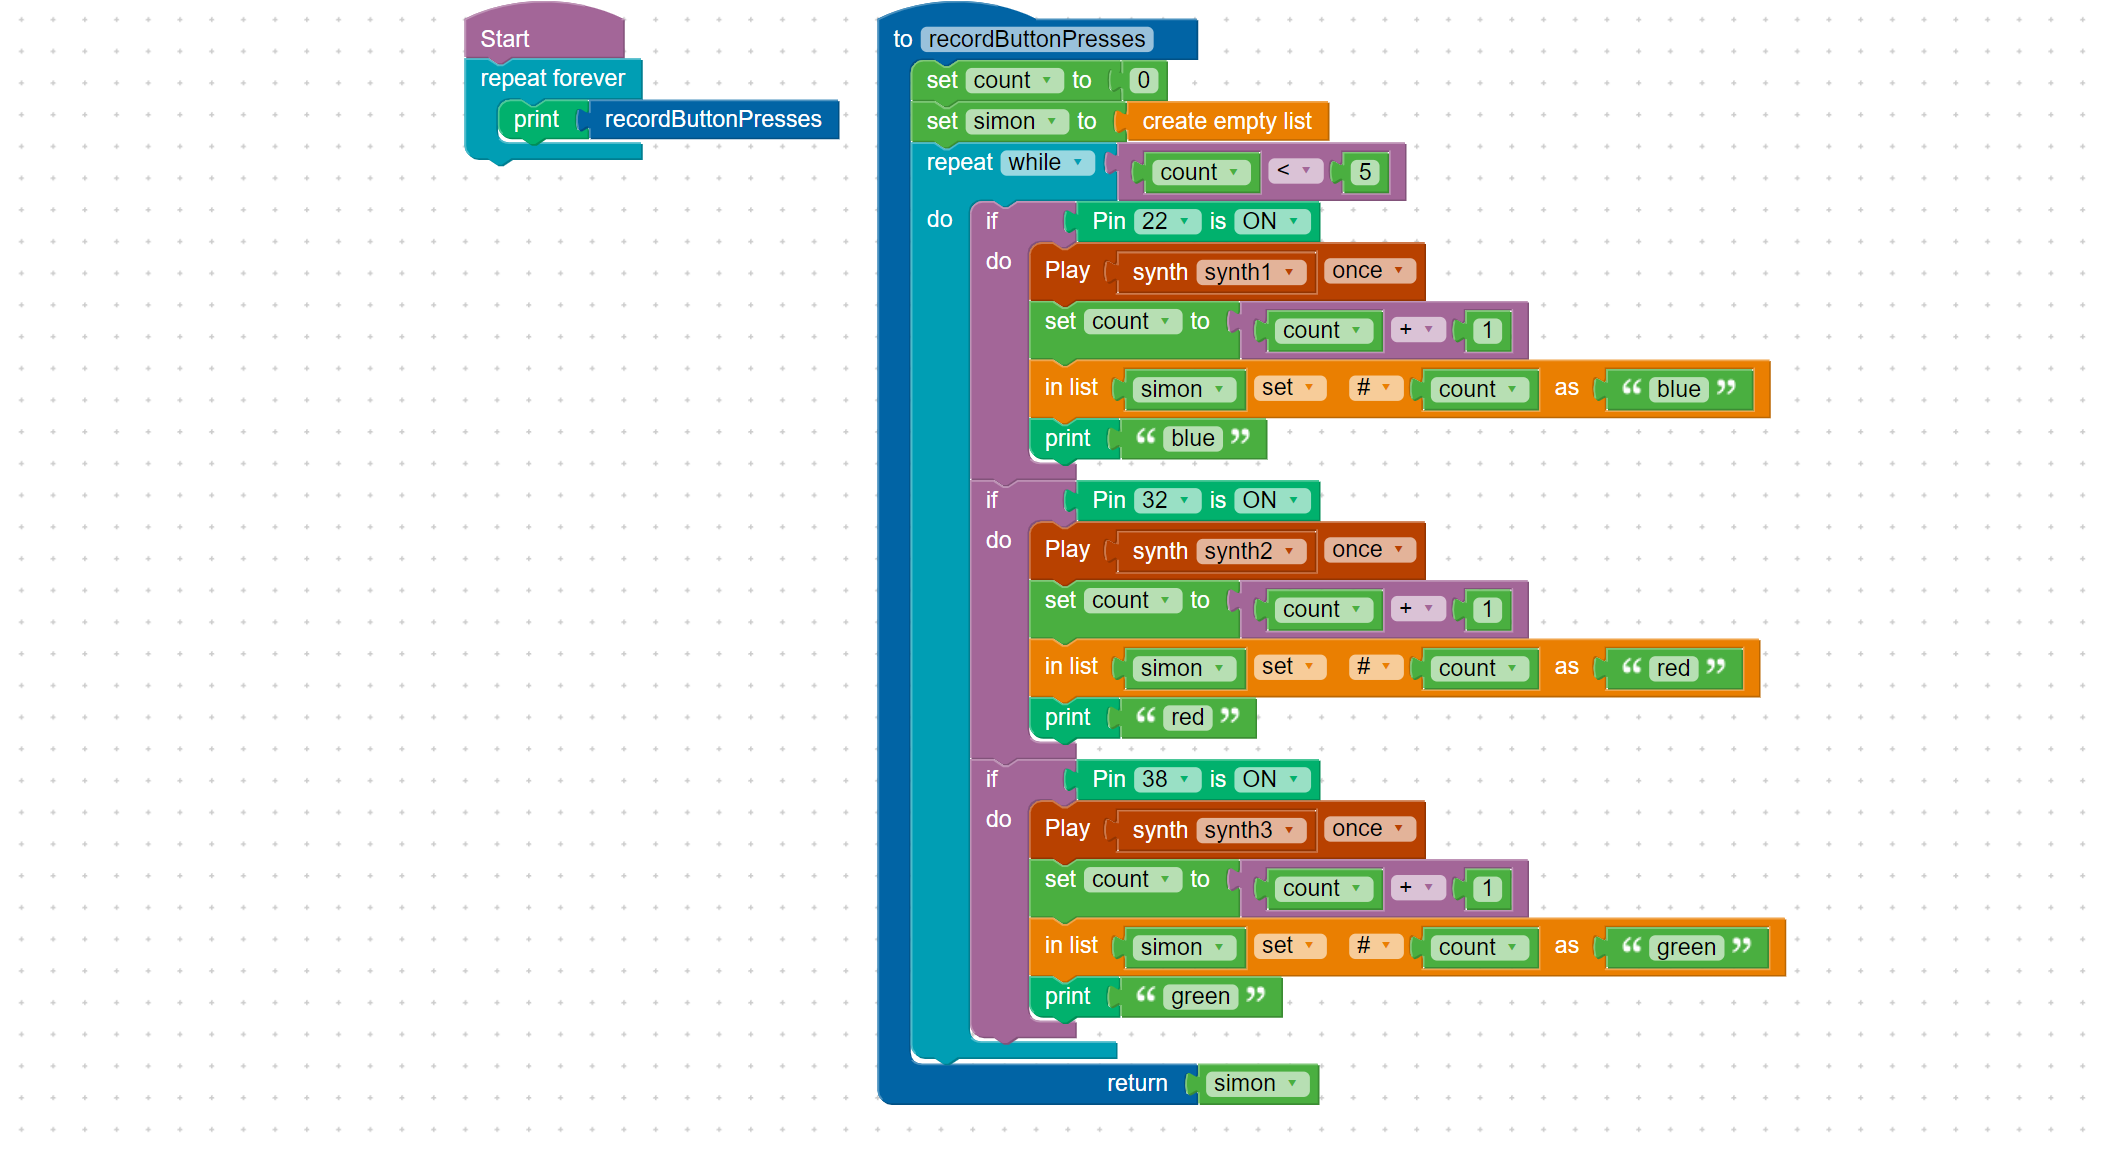
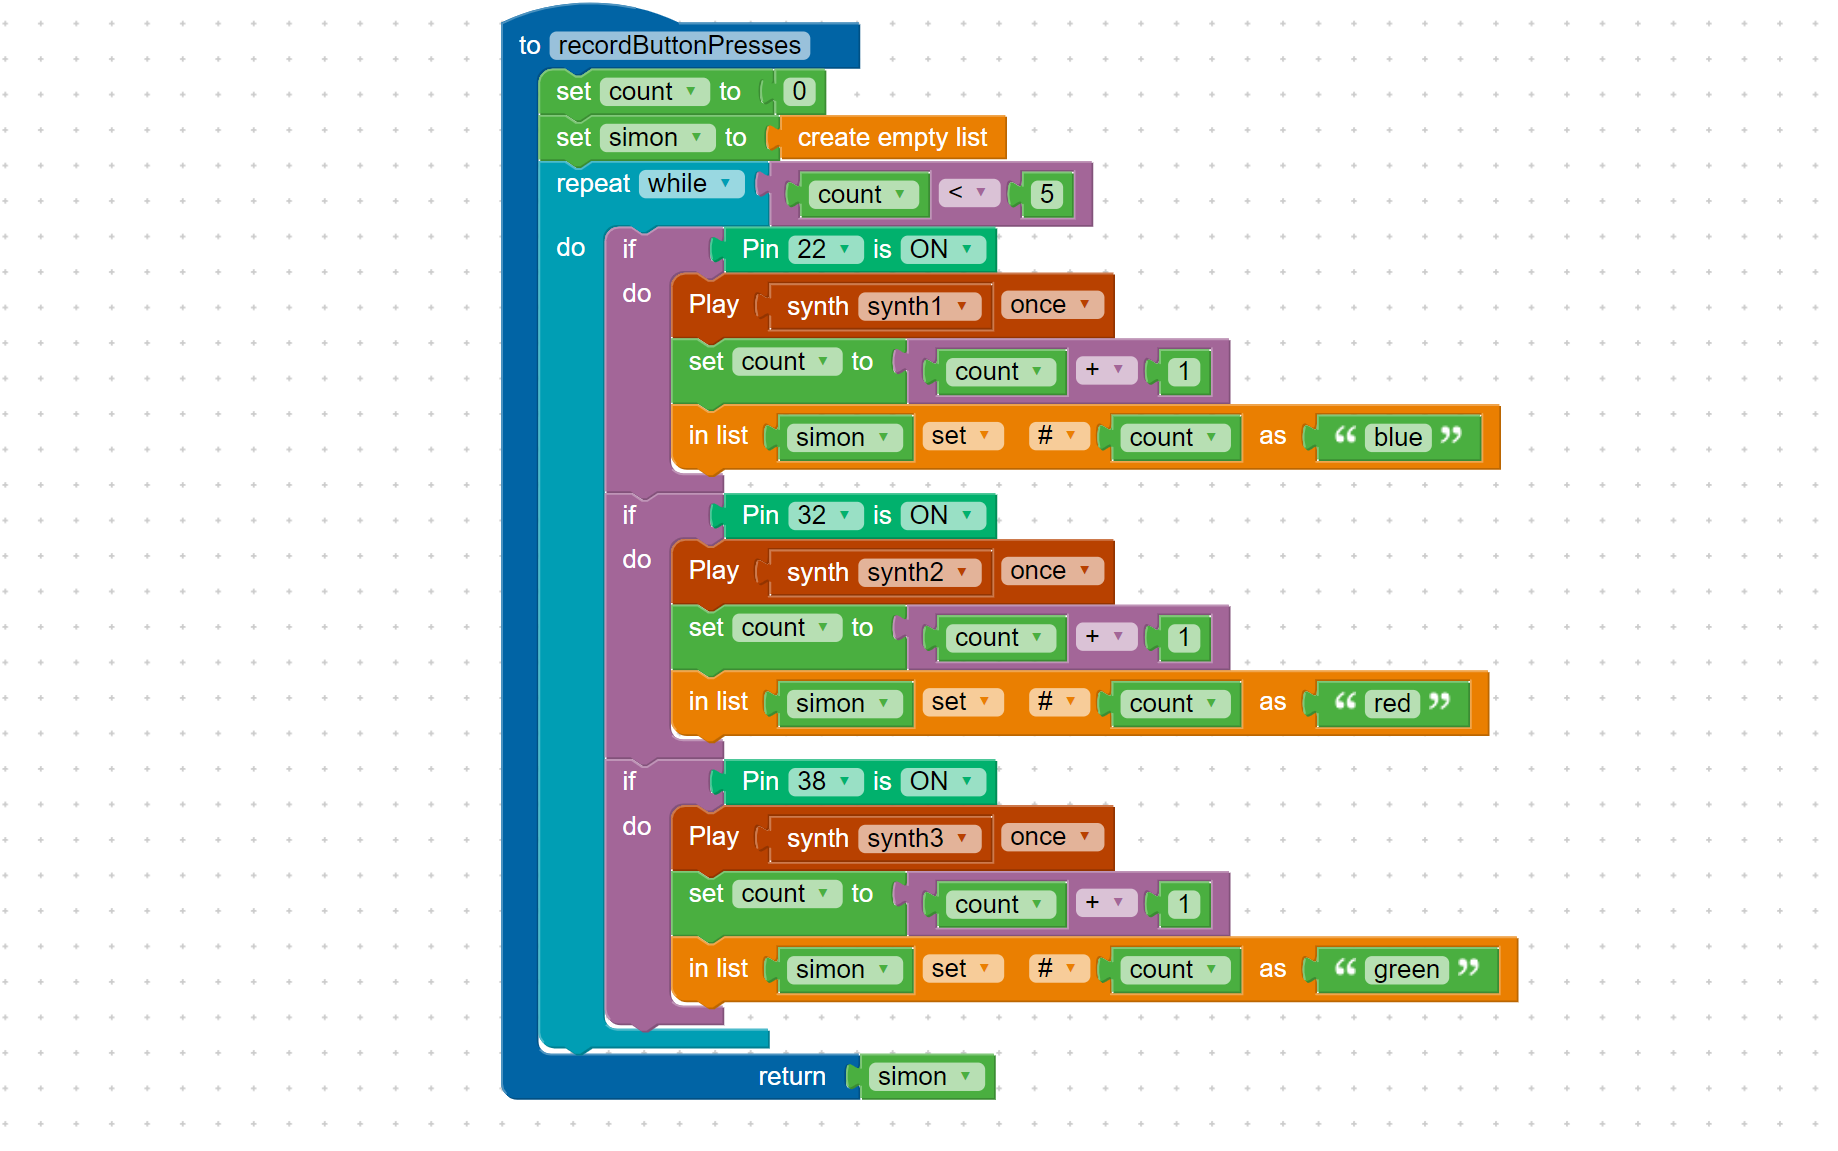
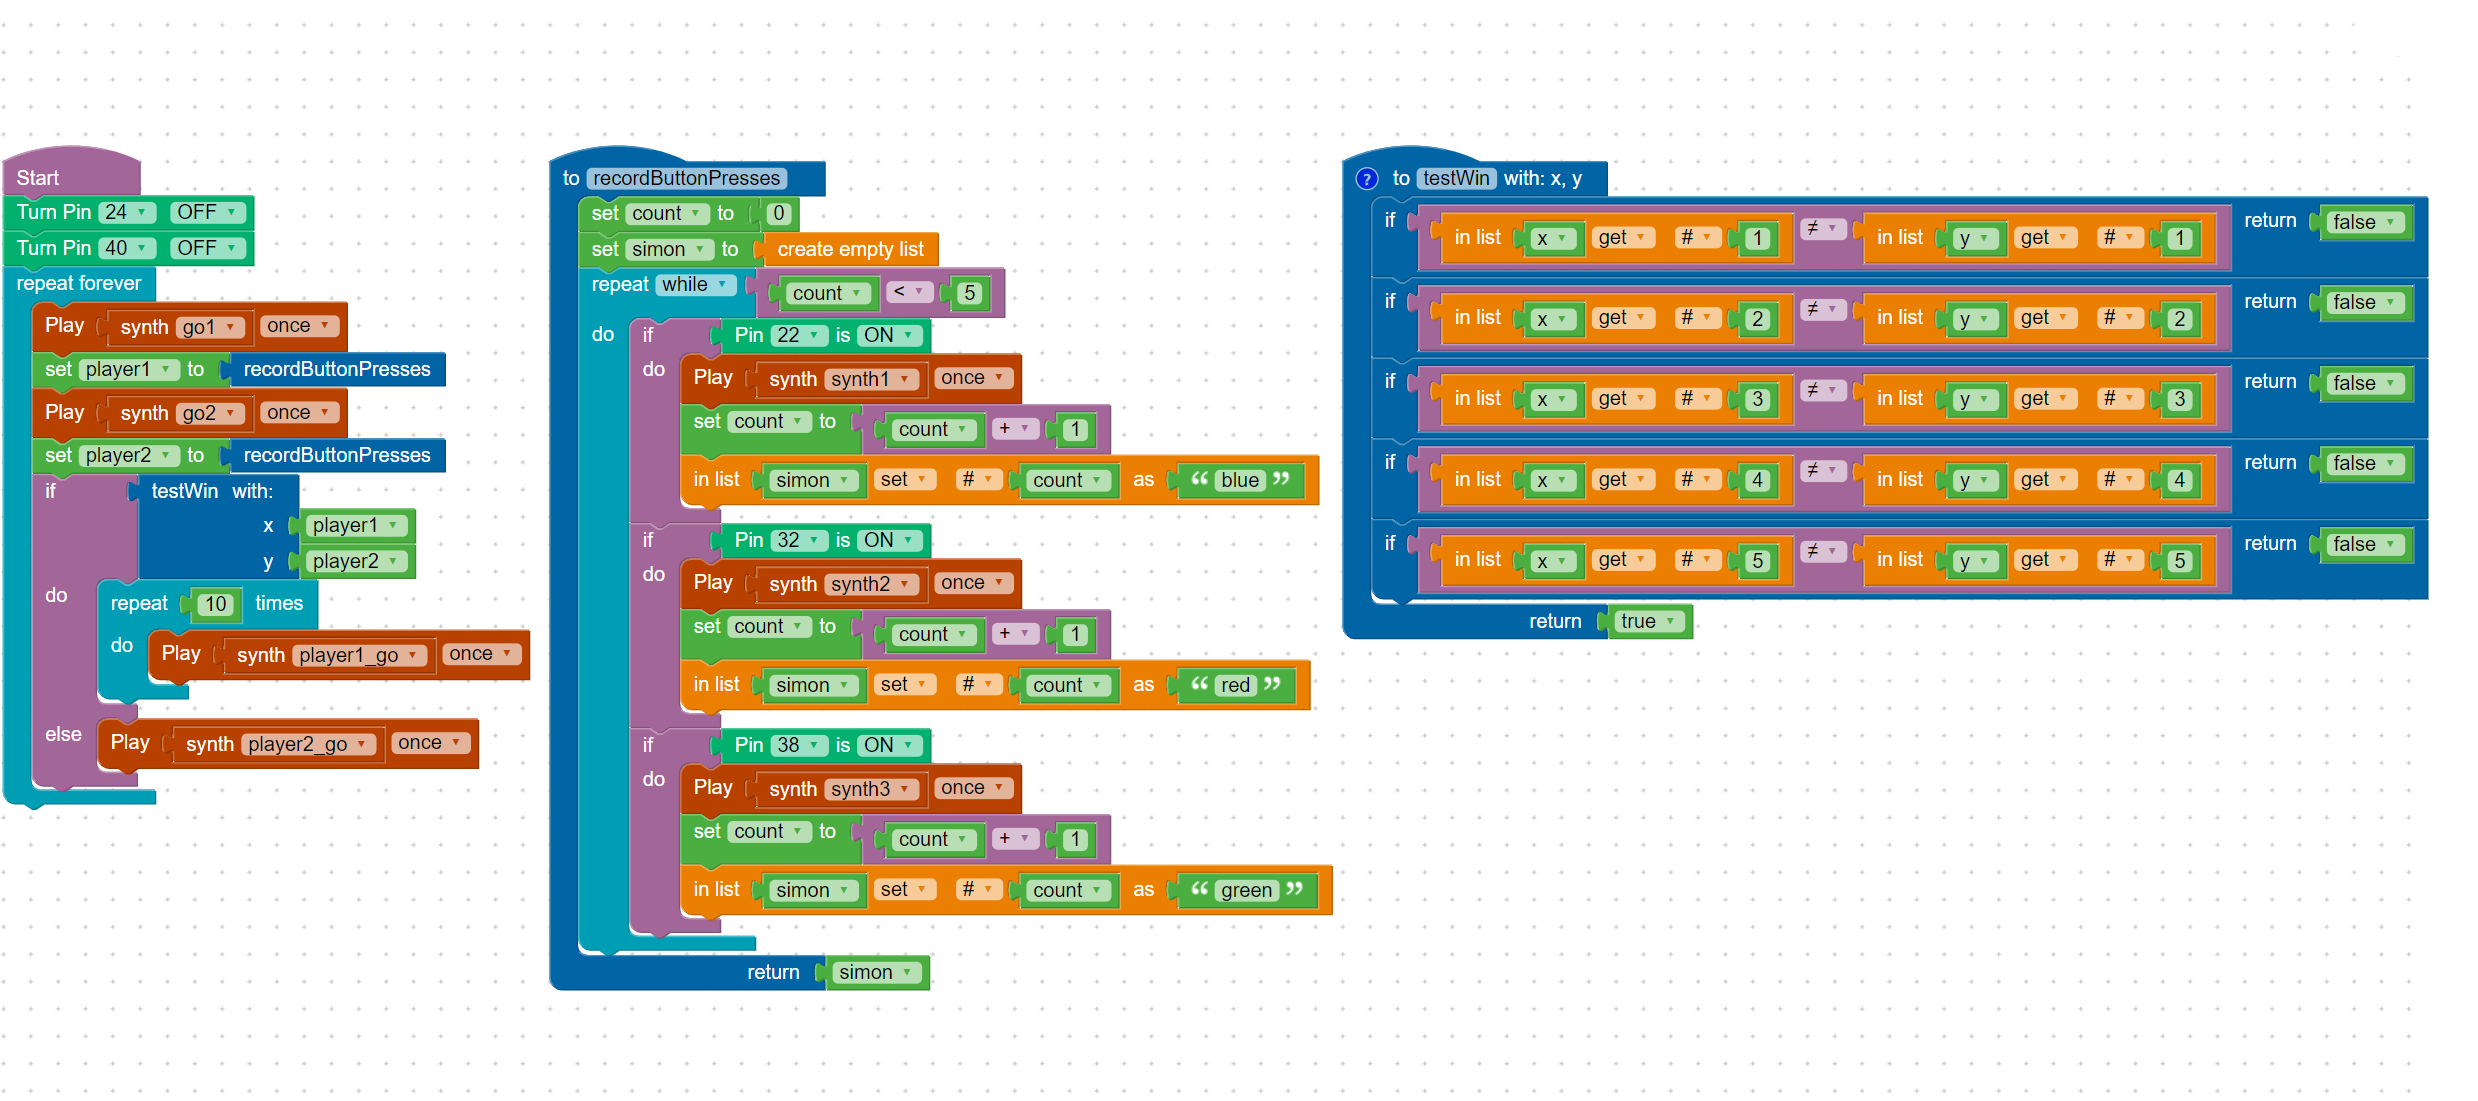
There are 3 three separate groupings of code blocks (each is a function). Make sure students understand that each must be built separately and they work together to run the game. Each function is given a unique name (recordButtonPresses and testWin).
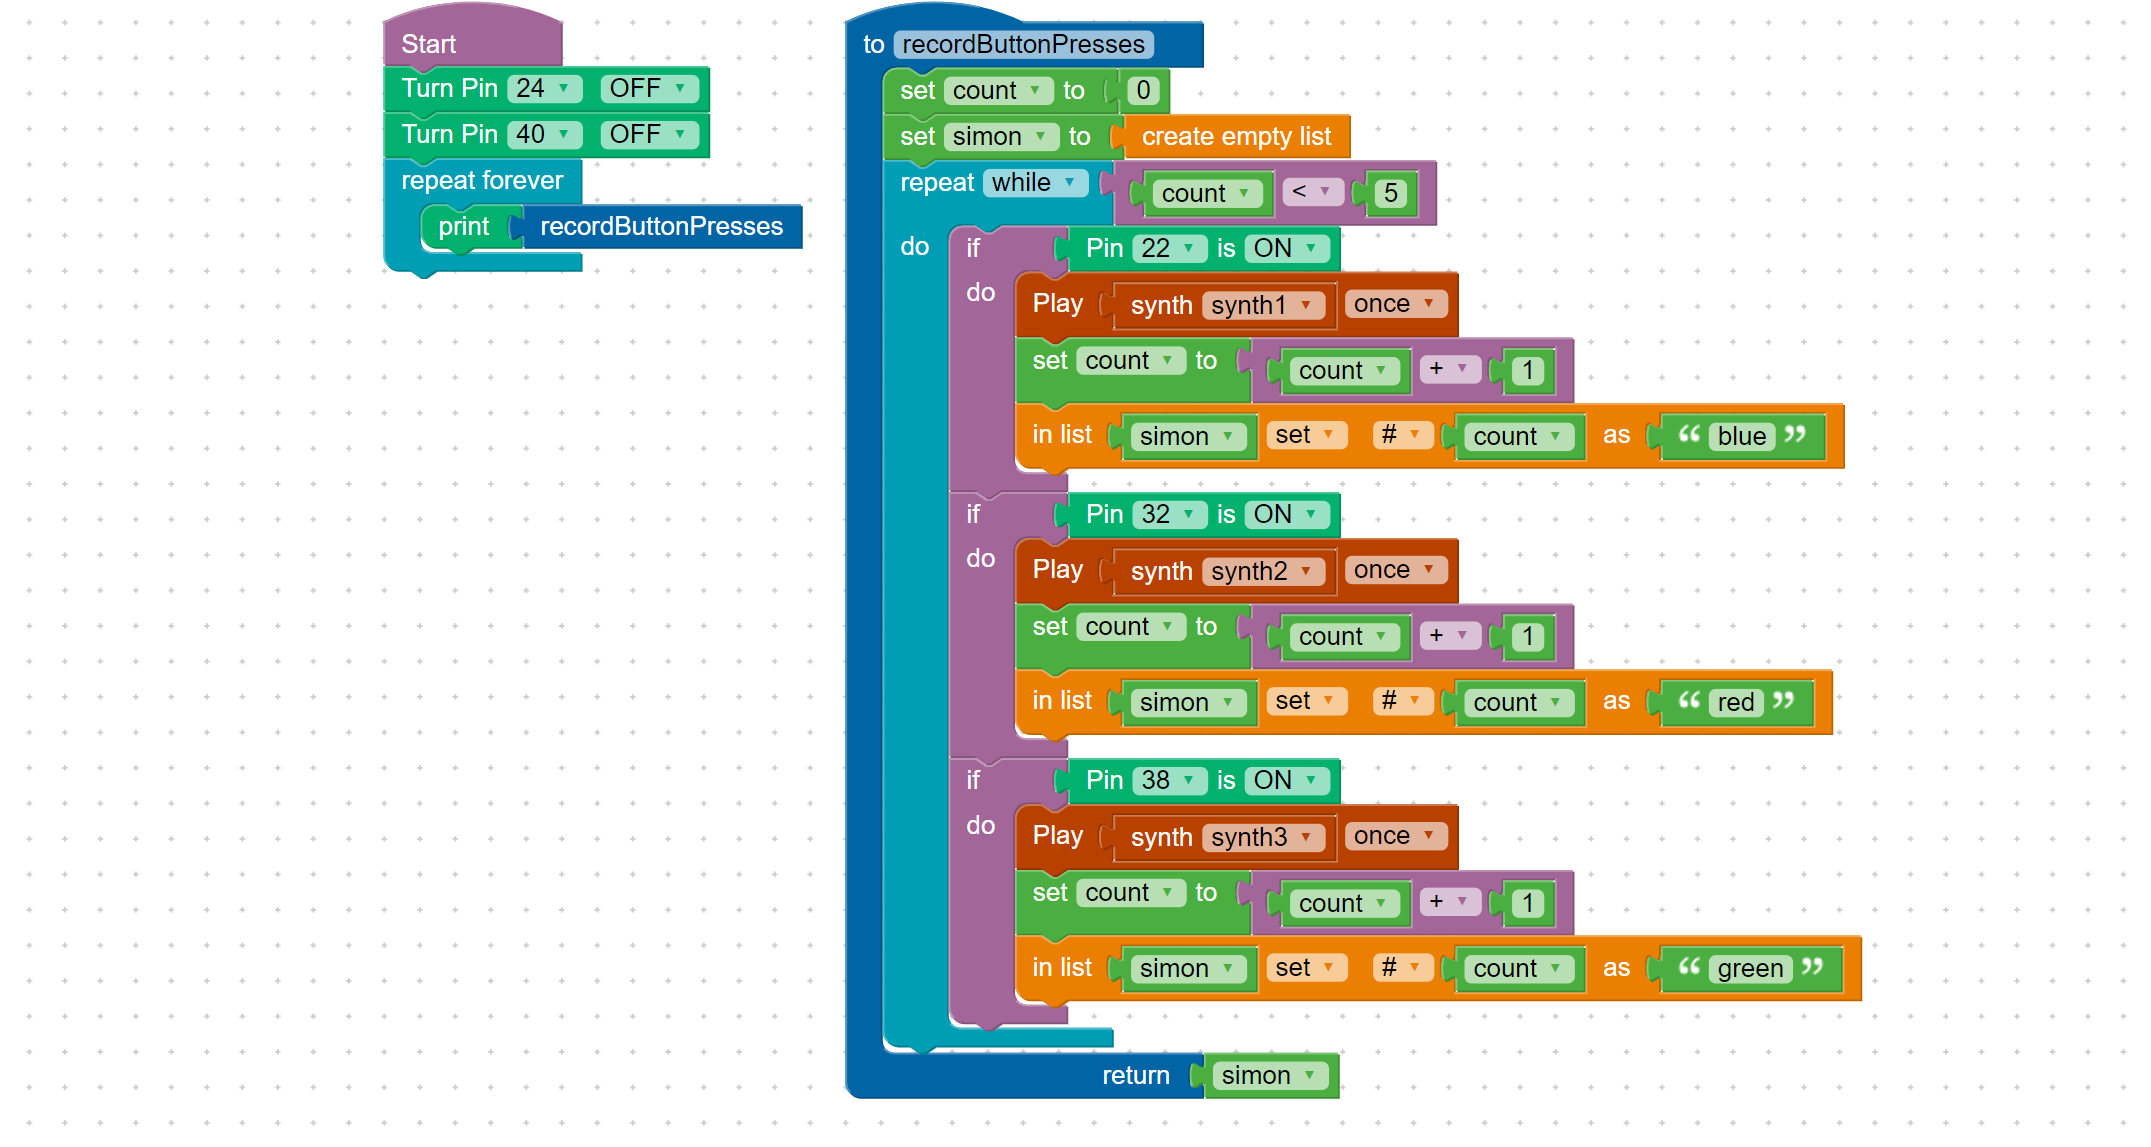
The concept of lists is introduced. A list is a storage place similar to variables, but it is for multiple items. In this example, the list is named ‘simon’ with the code block ‘set simon to create empty list’. This is like a list used in math class and you can think of it as items separated by commas.
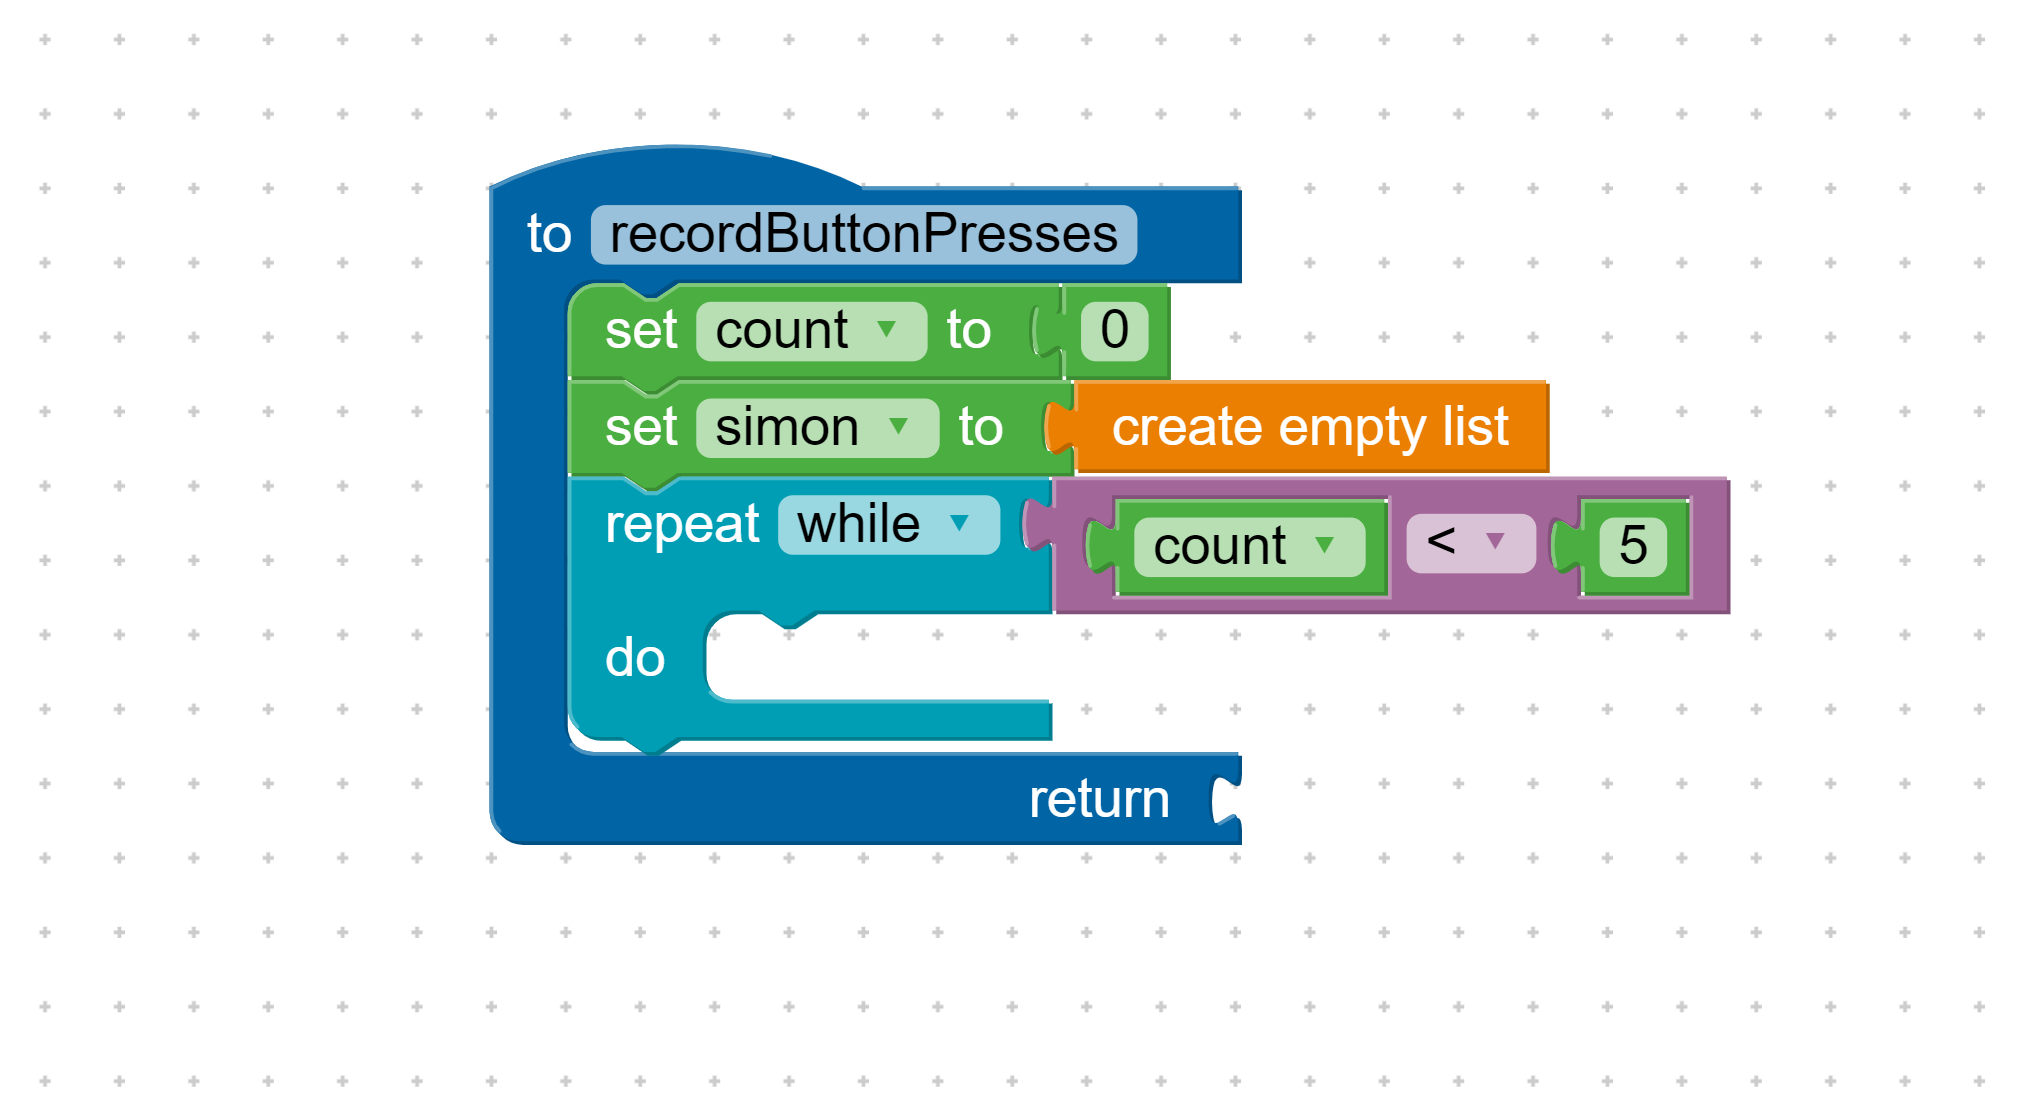
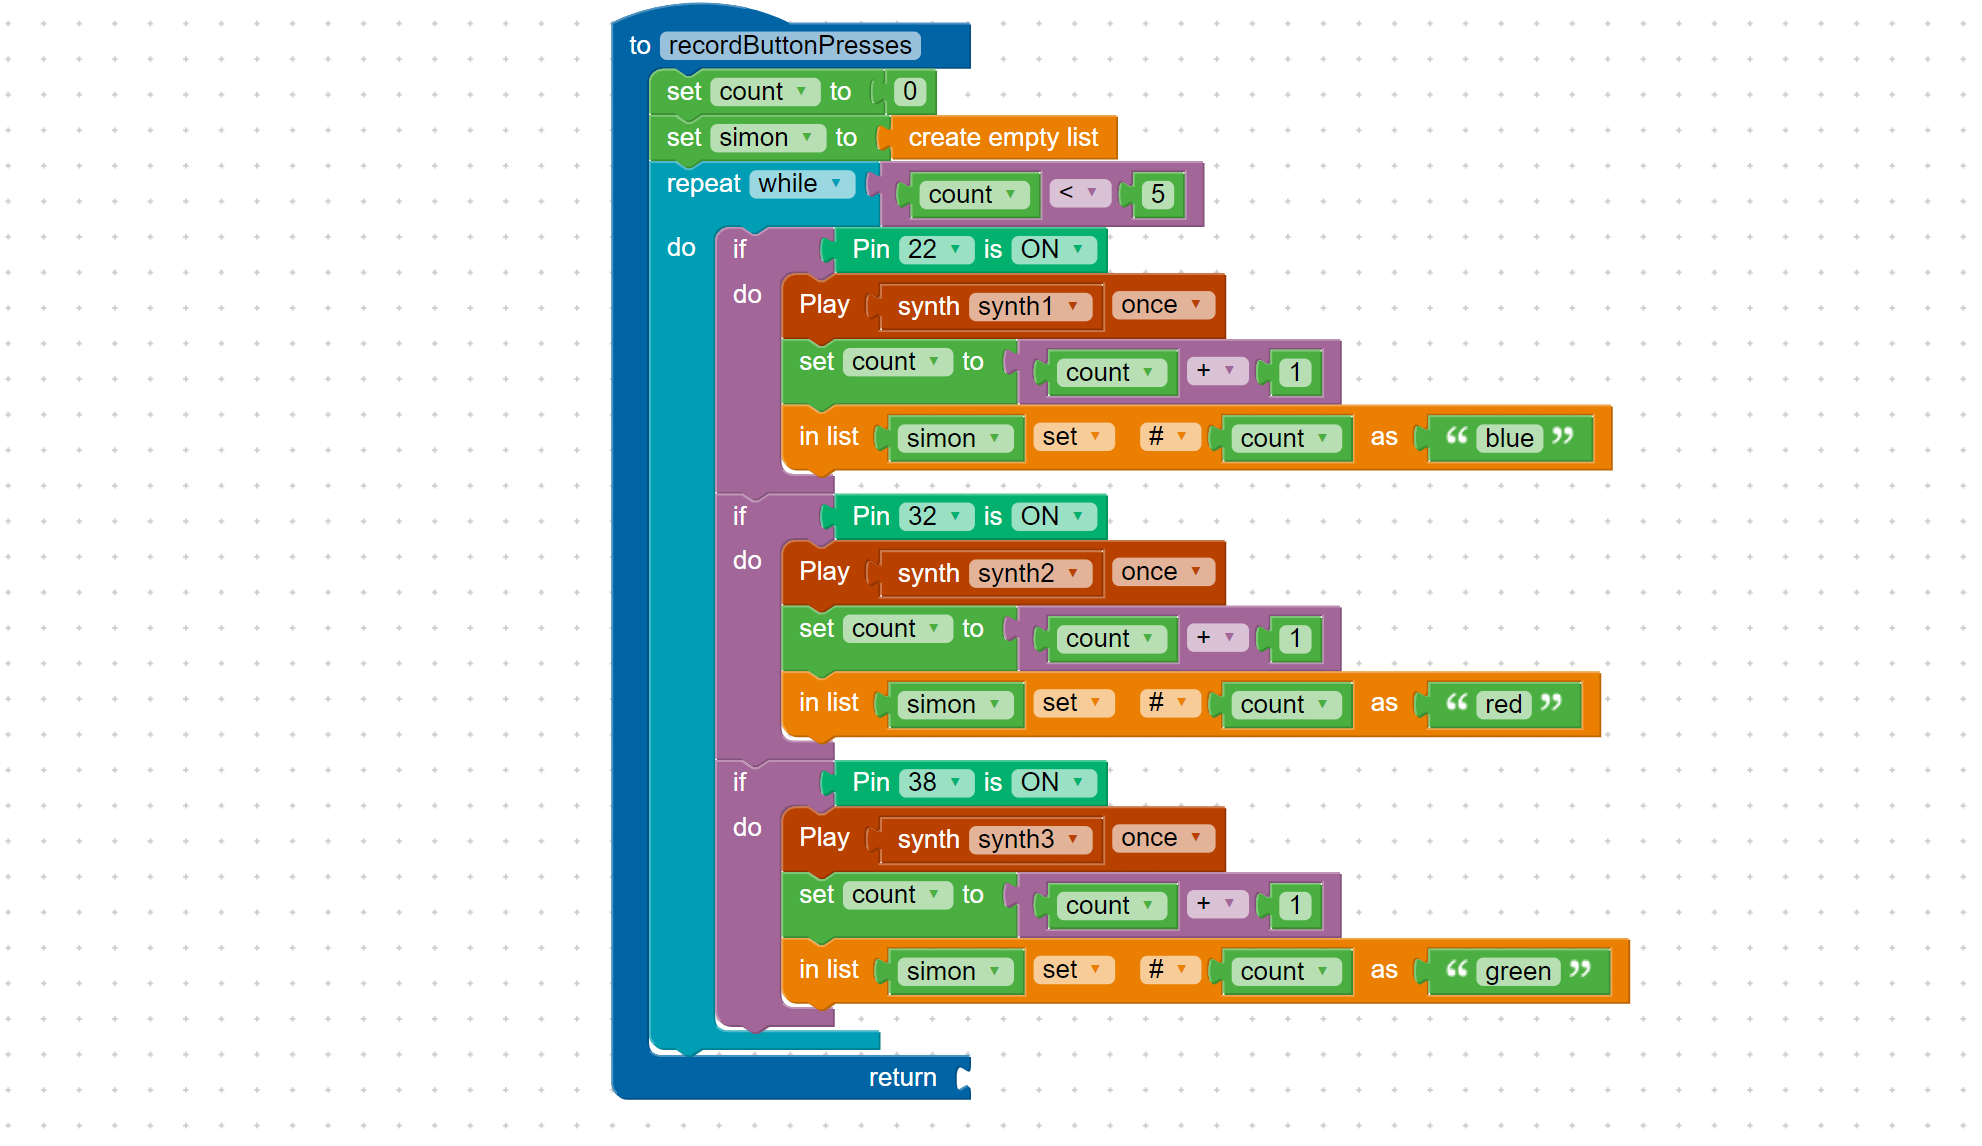
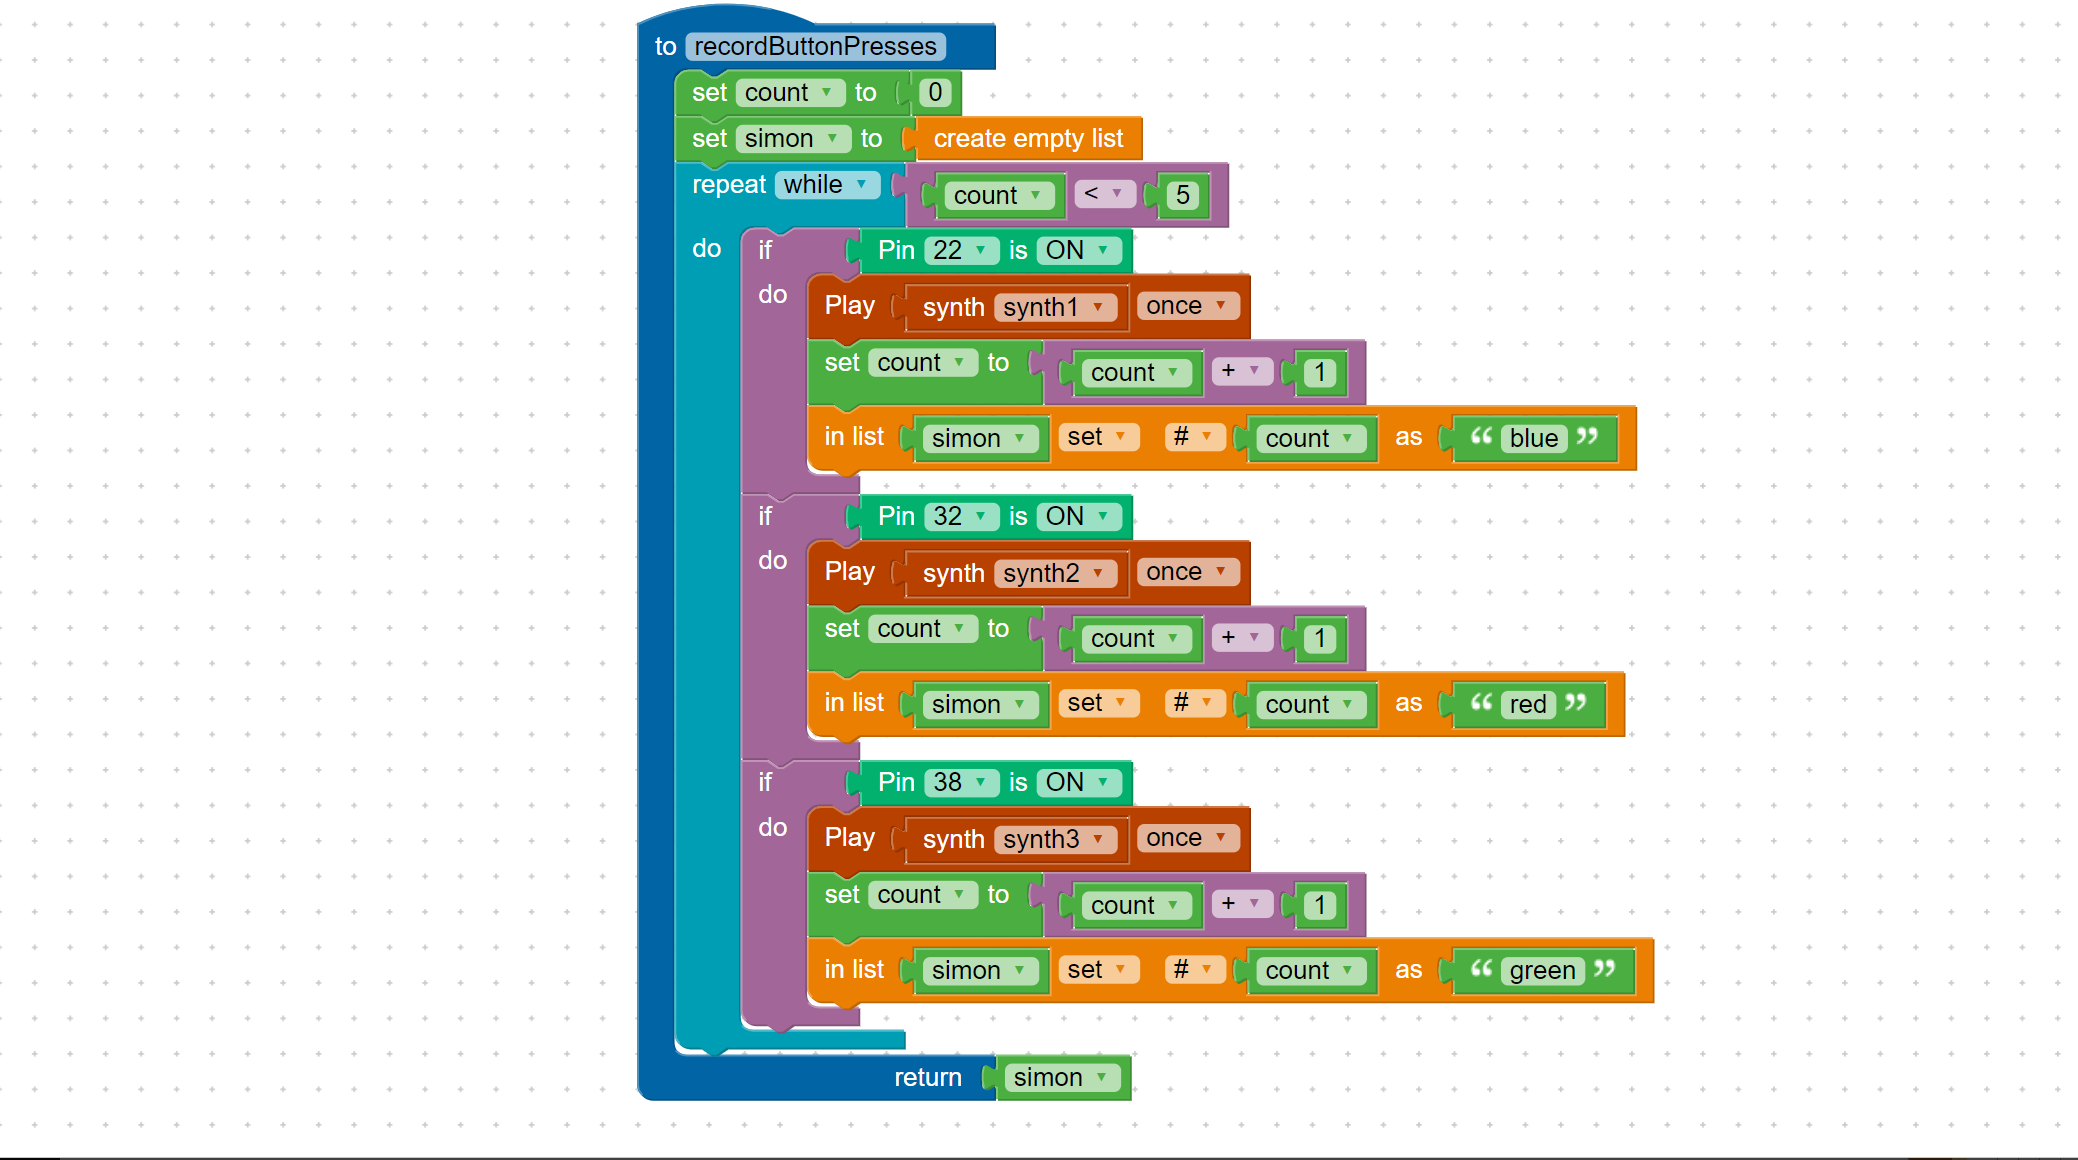
A variable name ‘count’ is used to determine the position of the item in the list period to go from one item to the next, count is incriminated with the code block set count to count plus one. A value is stored in the list with the code block in list Simon set hashtag count as green. If the value stored in count is 2, then the second item in the list would be green. Notice that the hashtag in front of count in this block, it is important as it indicates that count is being used for the position in the list.
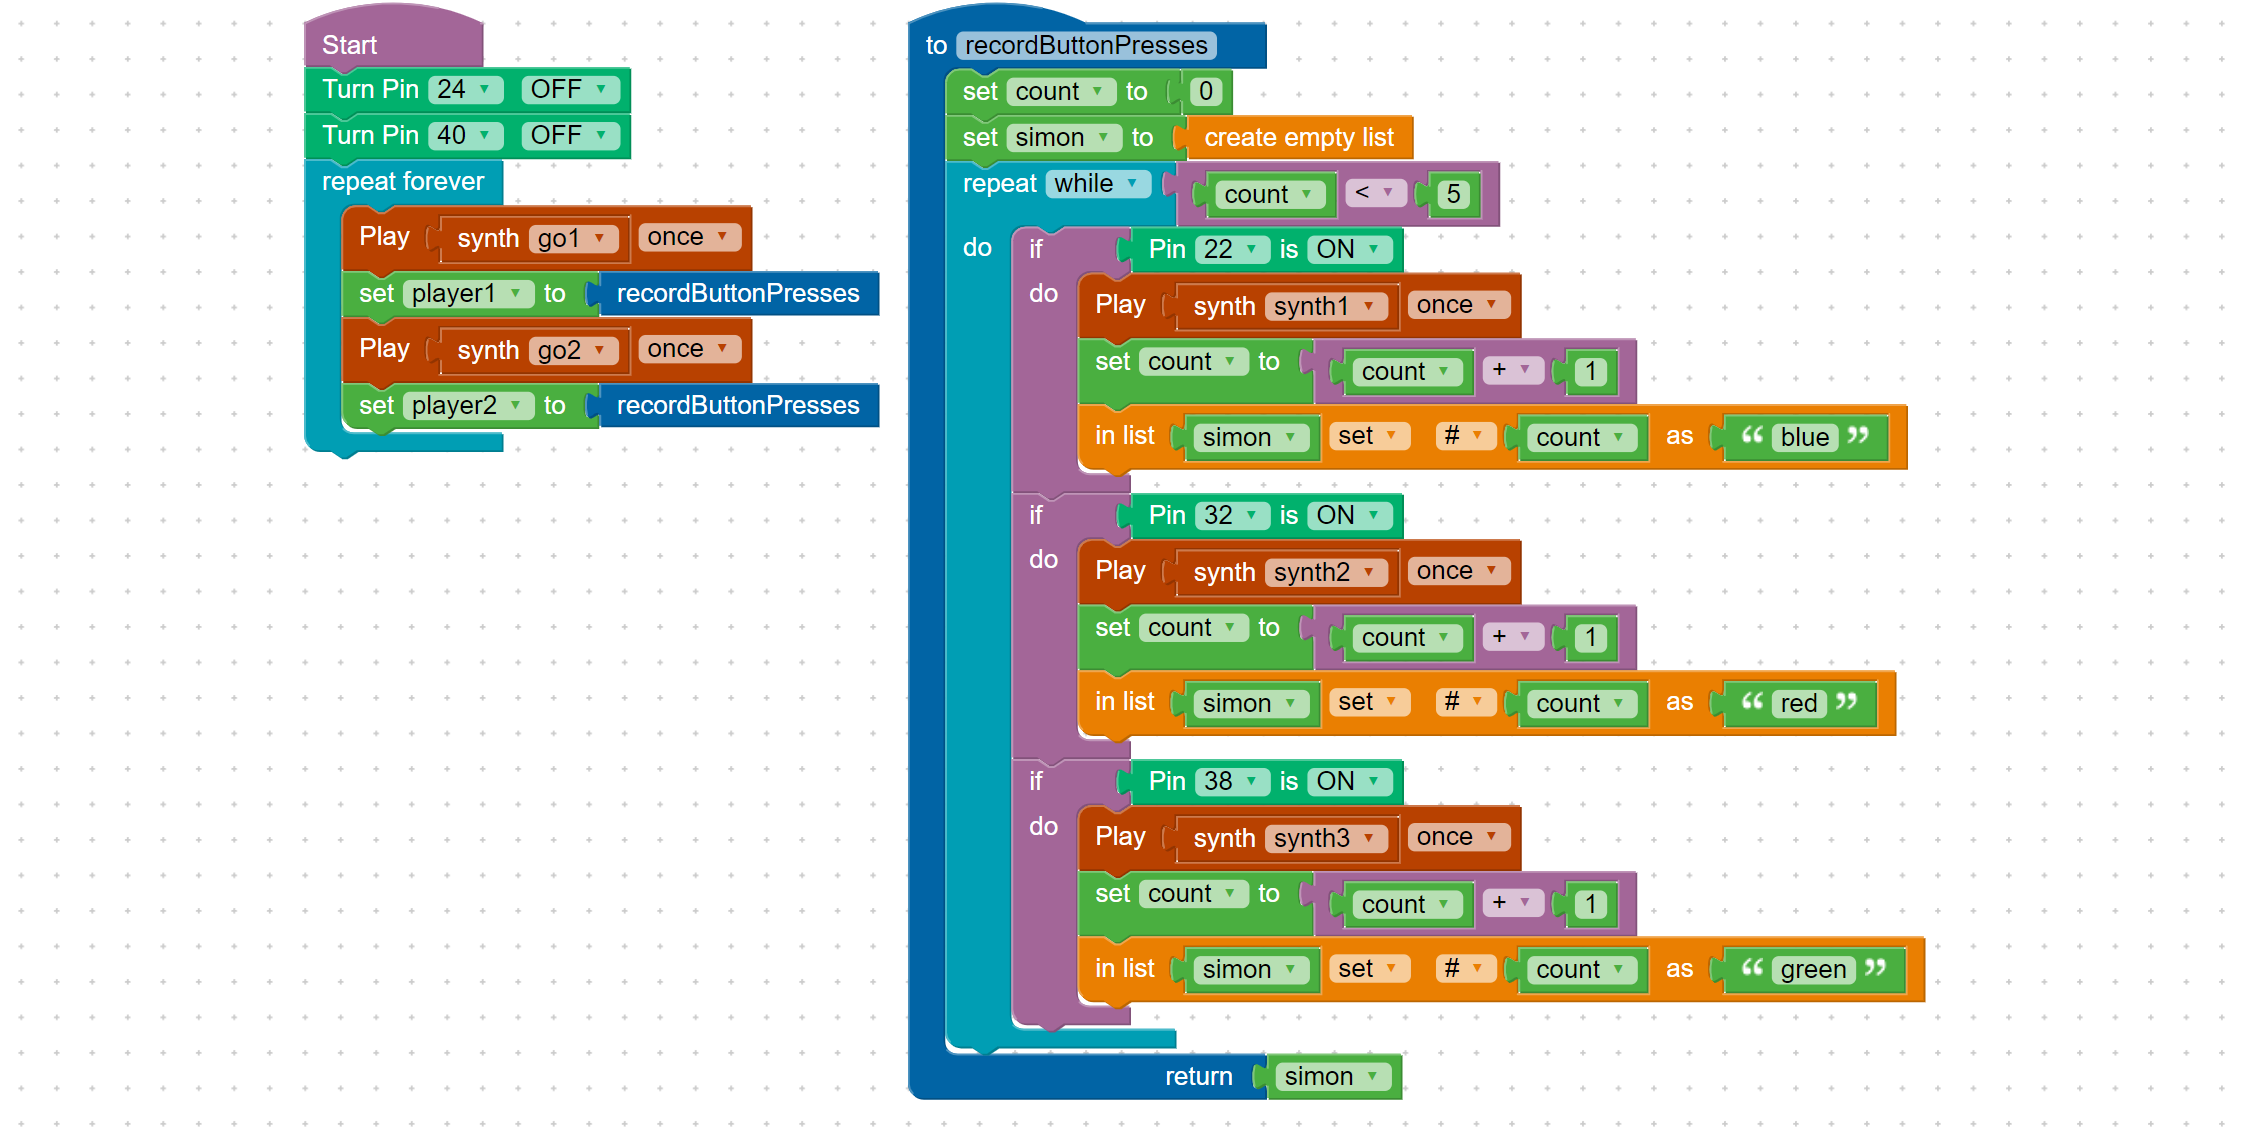
Two lists are actually being created. One is storing the button presses for player one and the other is storing the button presses for player two. This happens with the code blocks ‘set player1 to recordbuttonpresses’ and ‘set player 2 to recordbuttonpresses’.
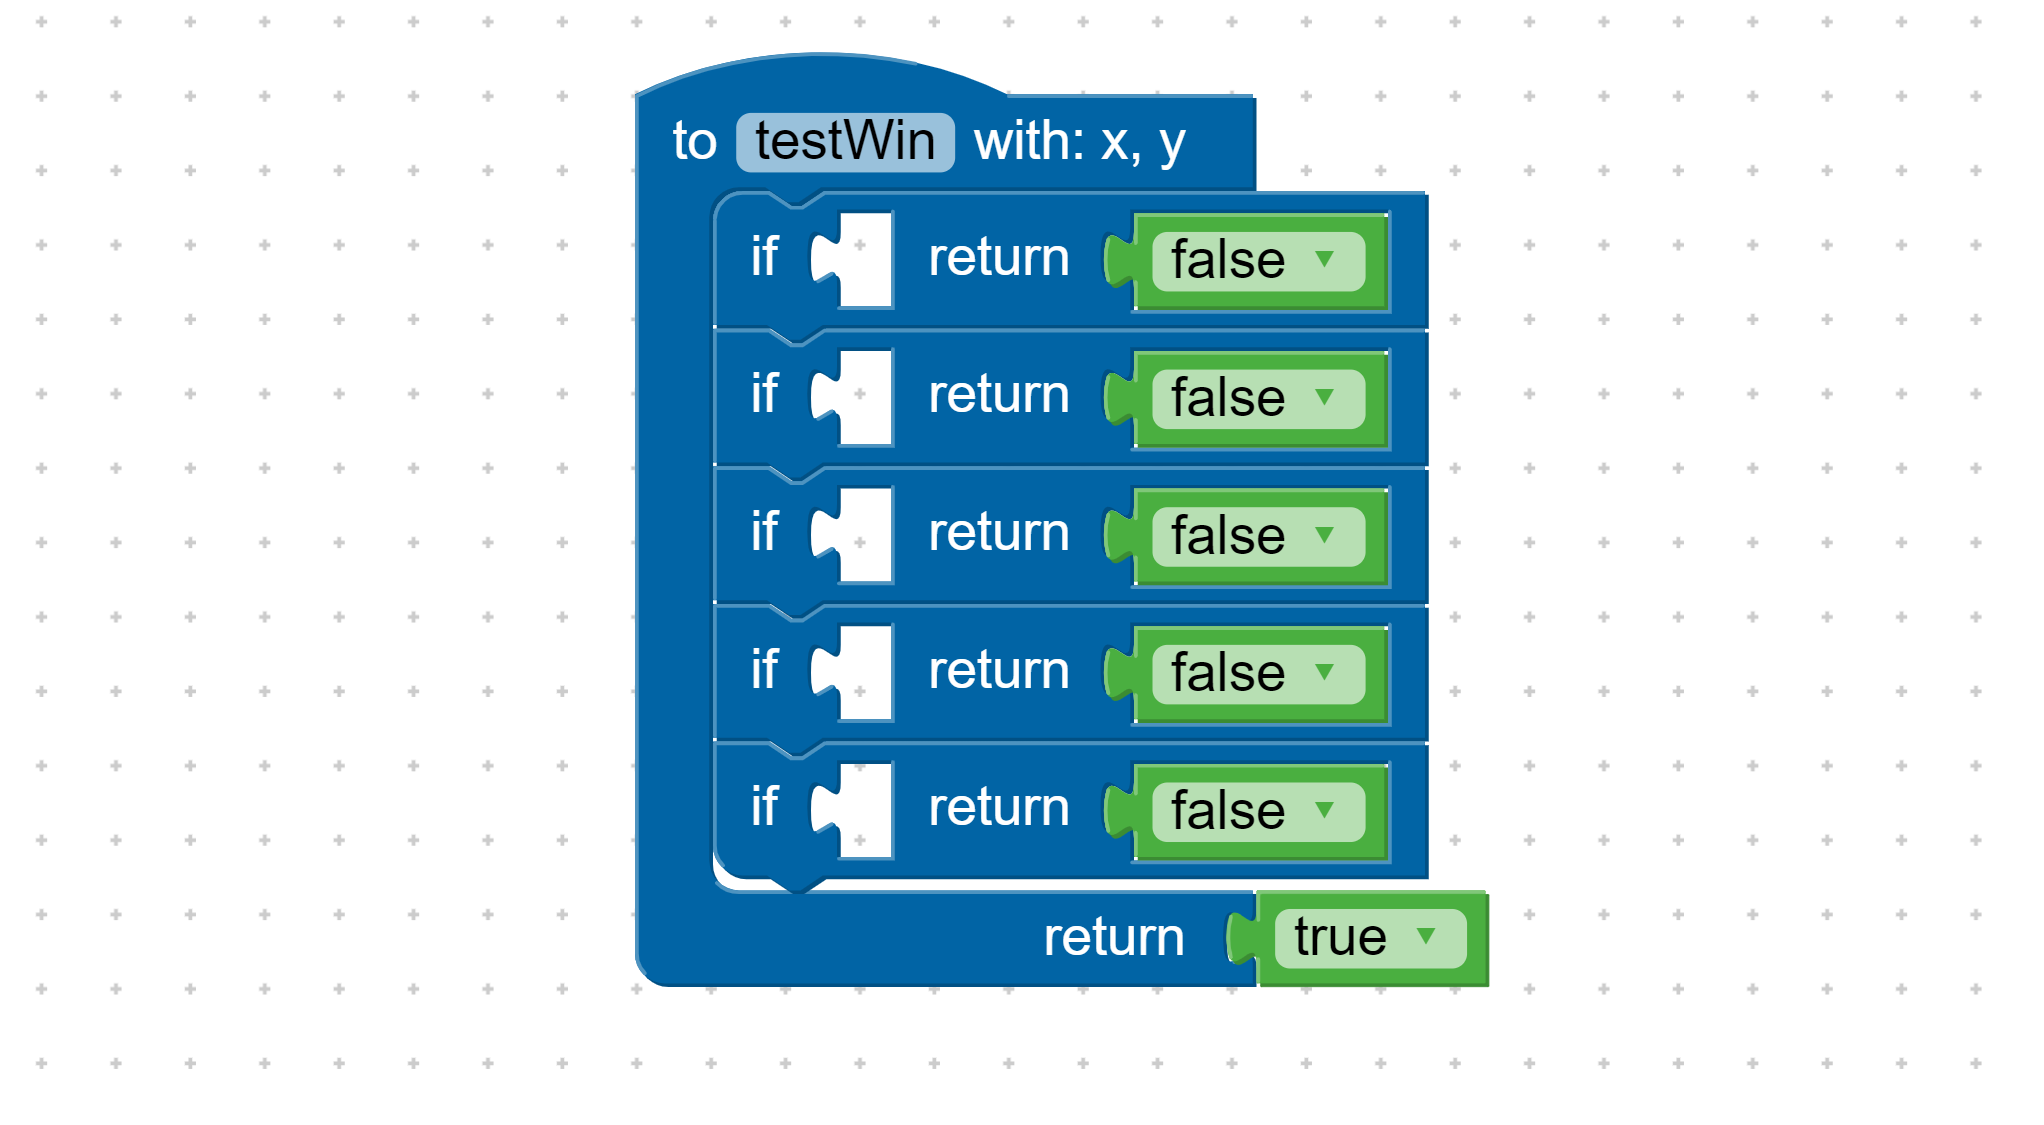
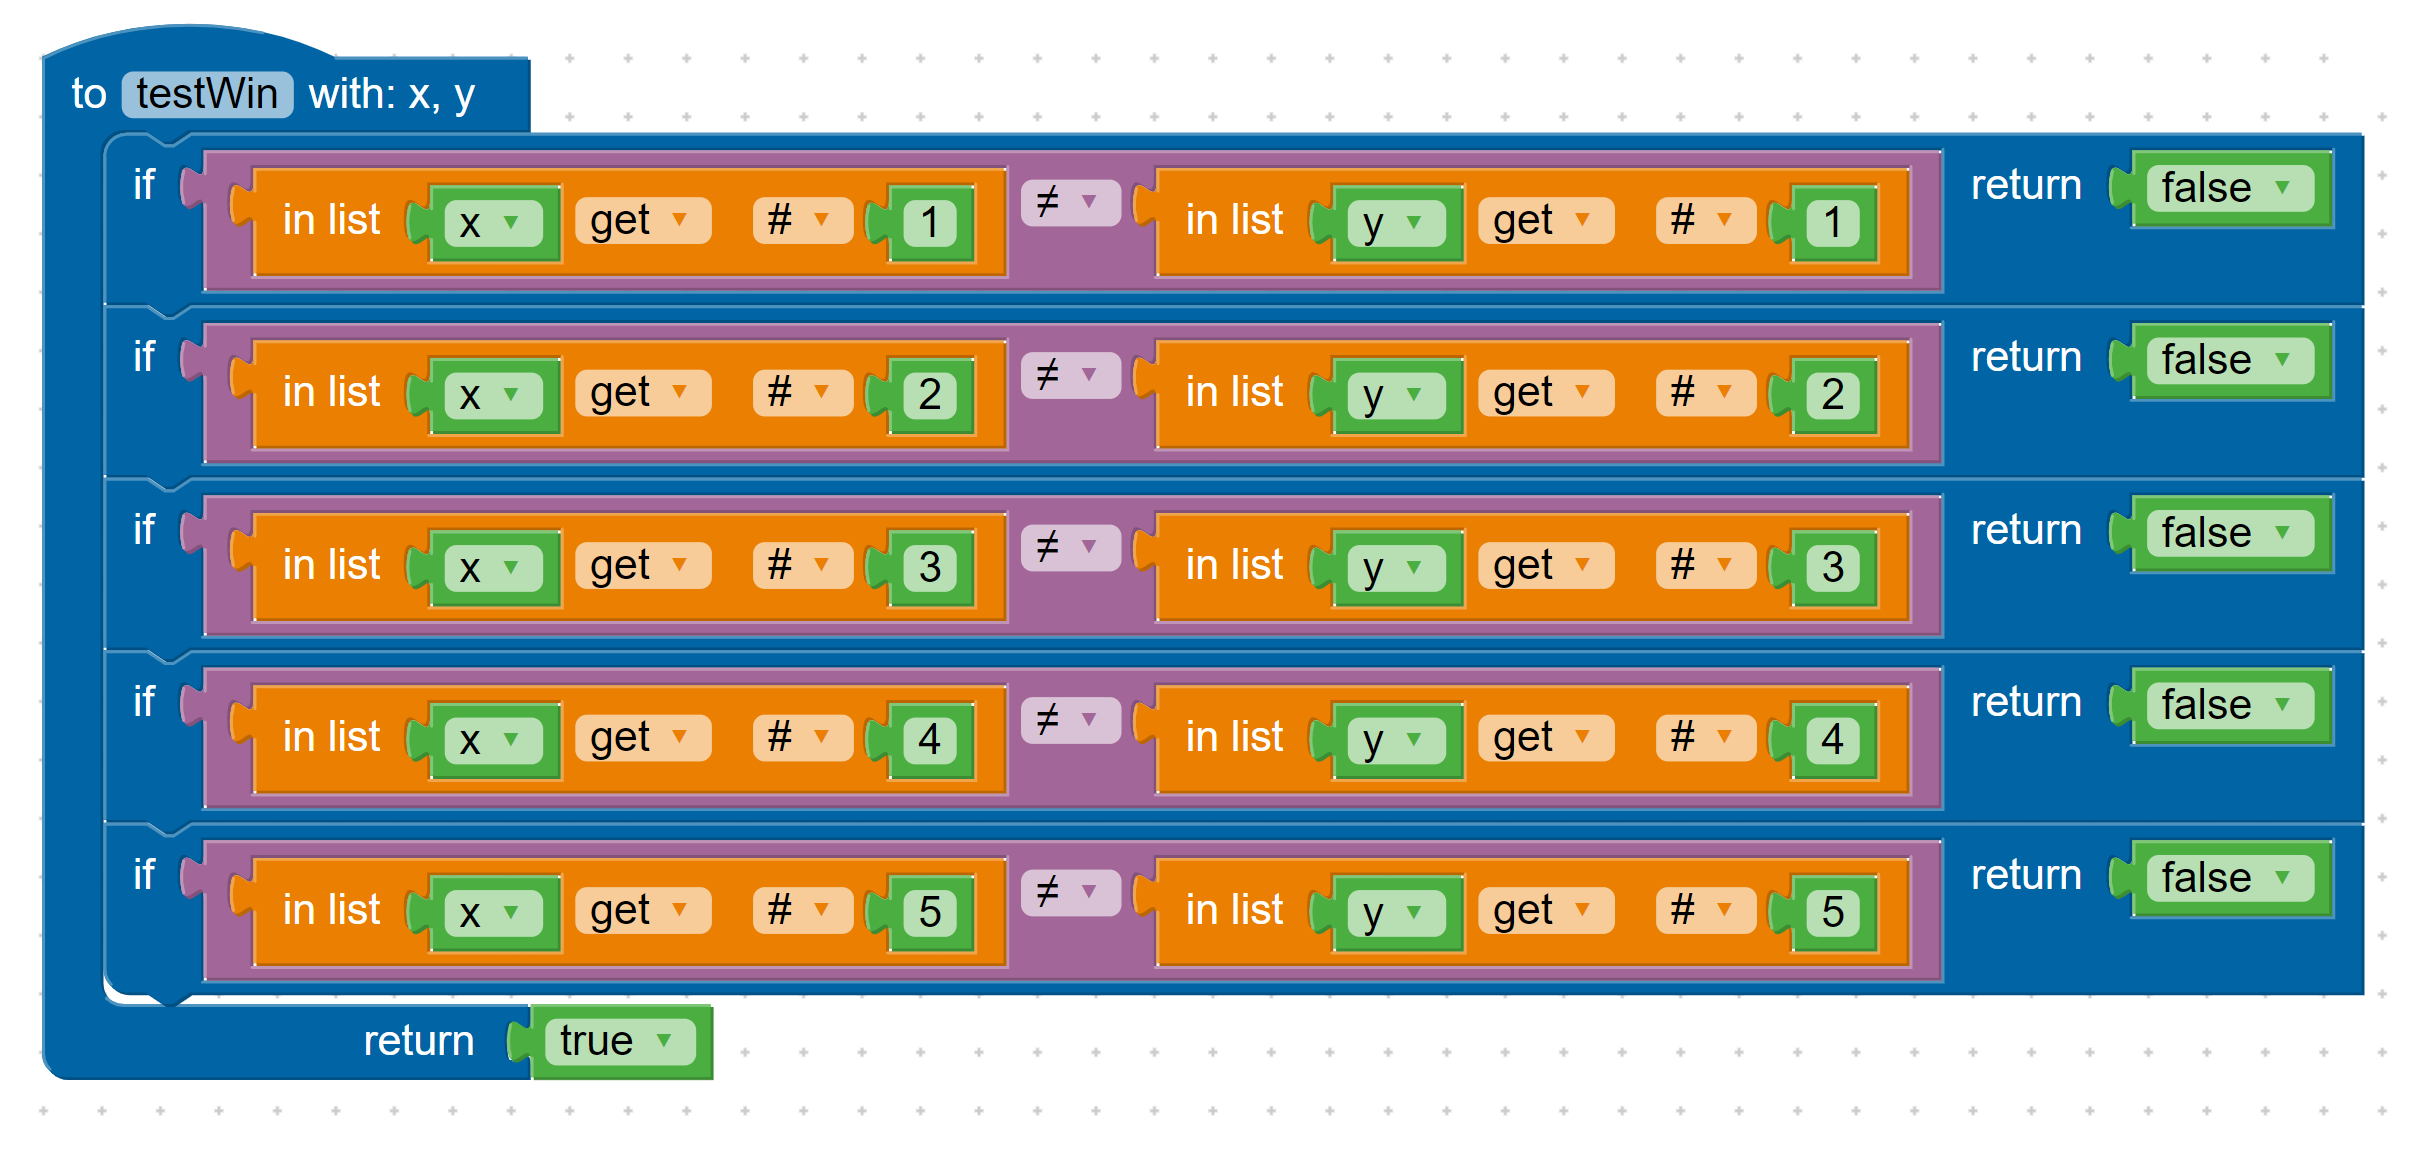
Items are retrieved and compared from the list in the testWin function. This function is run with two variables, x & y; x is the list created for player 1 and y is the list created for player 2. The code ‘in list x get #1’ is retrieving the first item in list x. A comparison is made with the full block if (in list x get #1) Not Equal to (in list Y get #1) return false. This can be interpreted as if the first item in list x is not equal to the first item in list y, then exit this function and send ‘false’ back to the code block that ran testWin. When all 5 positions are compared, if they are all equal, then send ‘true’ back to the code block that ran testWin.
In the Main function, the code block ‘If testWin with x player 1, y player 2’ runs the testWin function and receives back a value of either true or false. That value is used to determine whether the buzzer sounds indicating no match, or the musical notes are played indicating a good match.
Our customer support specialists are on hand to ensure your implementation of Piper runs seamlessly. View Support Docs or Contact Support
PROJECT STEPS
Step 1 Set up the stuff
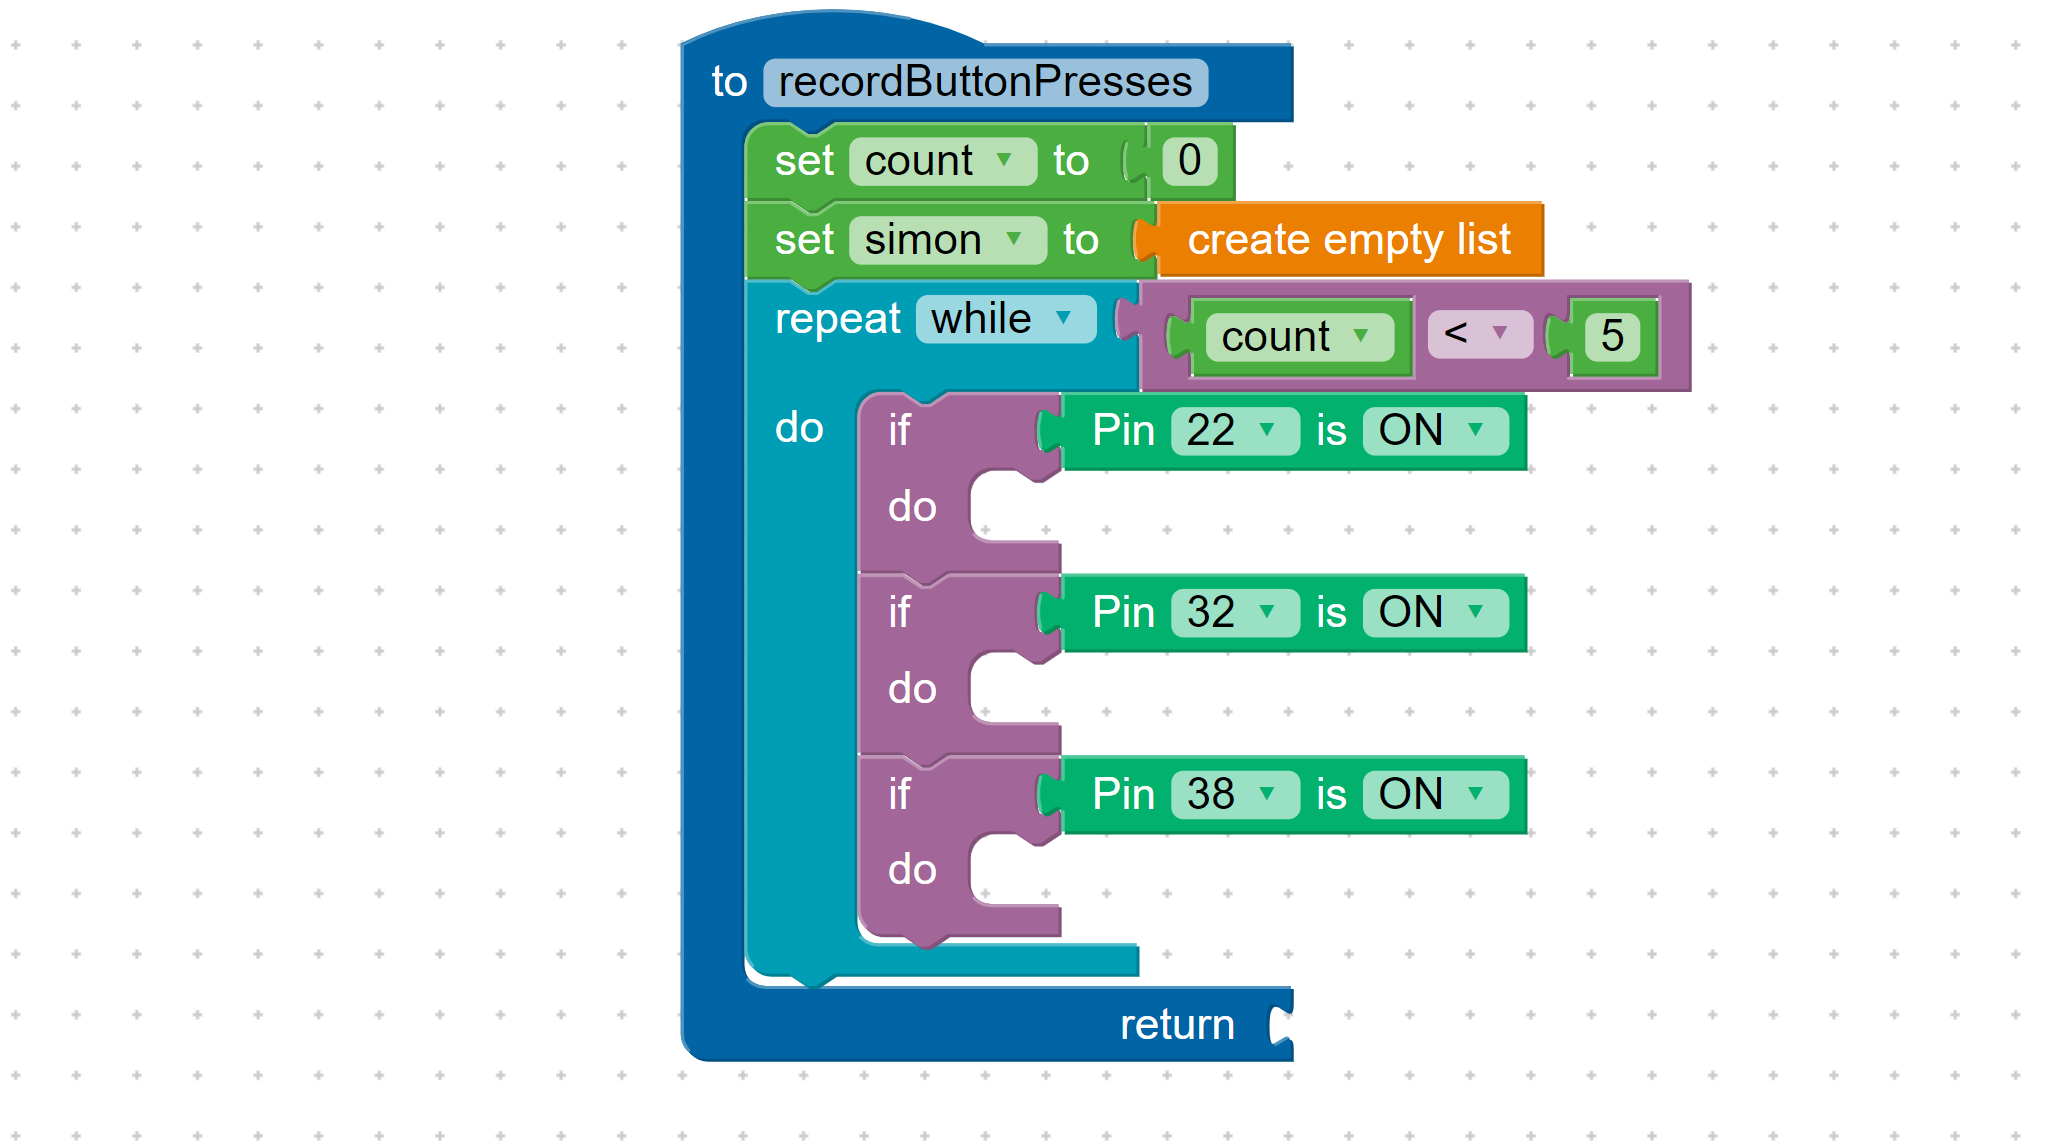
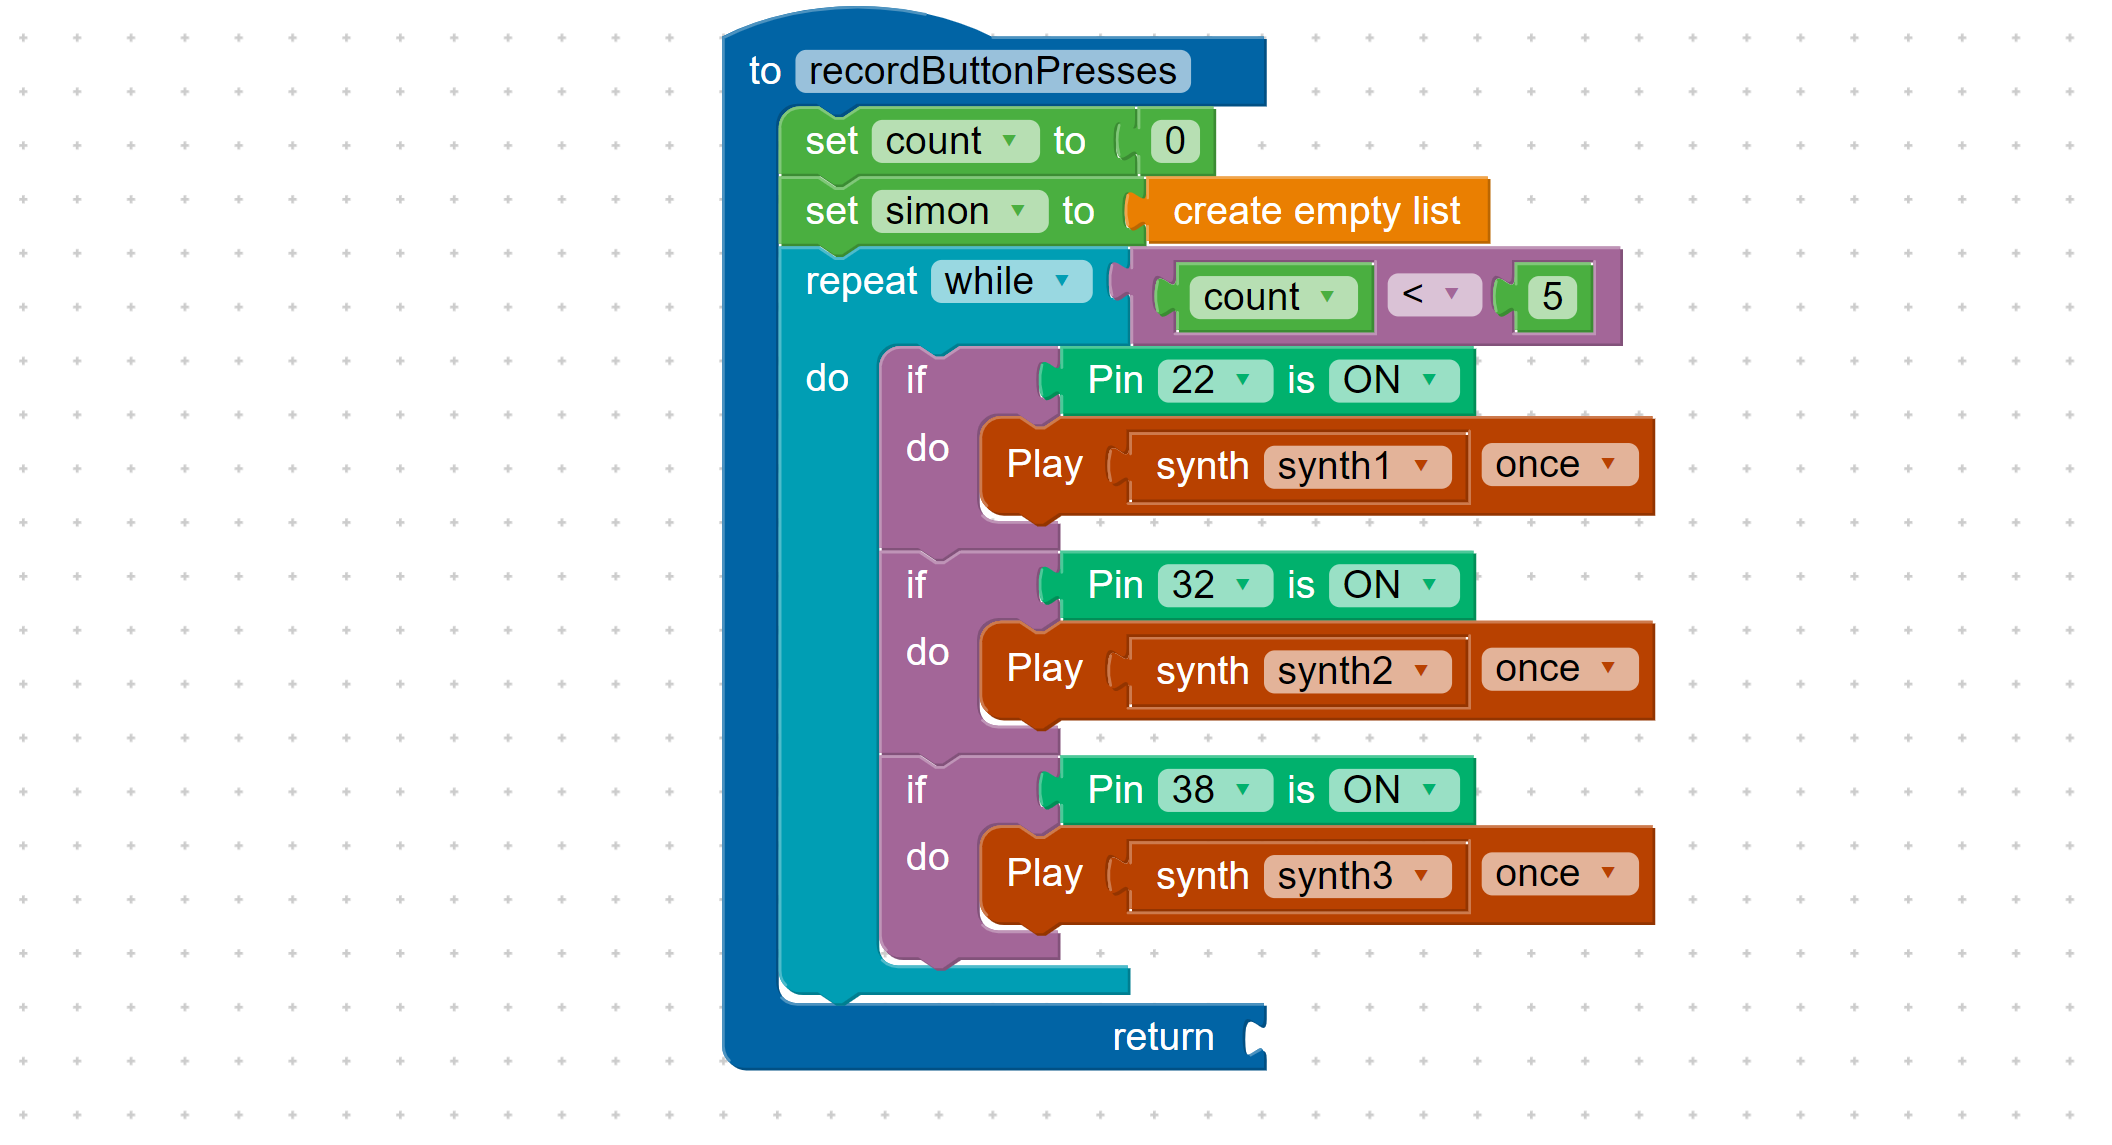
Plug in the three buttons and match the wires with pins: 22 and 24, 30 and 32, 38 and 40.
 Look for the graphic above
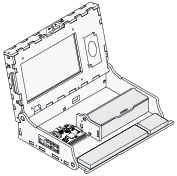 Piper Computer Kit
 6 Wires (2 green, 2 red, 2 blue)
 3 Buttons