 Look for the graphic above
Snake eyes! Learn how to simulate a dice roll by making a random number generator.
This is a game of chance which simulates rolling of dice by using a random number generator. The code checks to see what number was ‘rolled’ and turns on a corresponding LED. The step-by-step instructions in the tutorial guide students through the process of building the circuit and writing the code.
 Piper Computer Kit
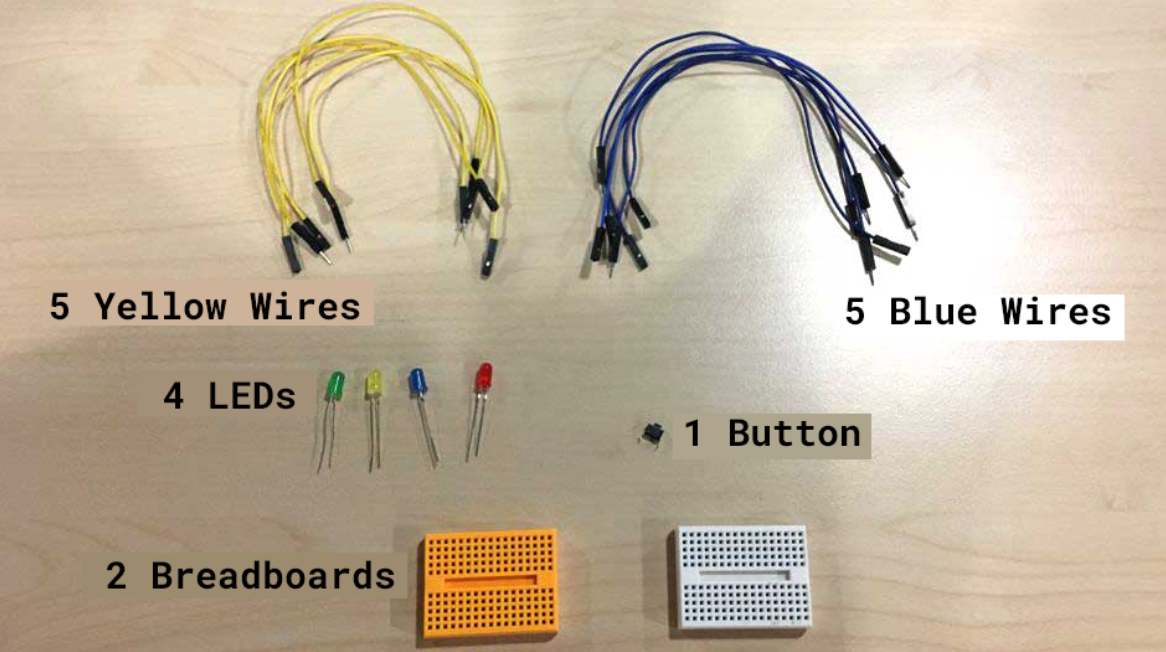
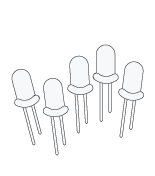 4 LEDs (red, blue, yellow, green)
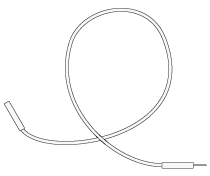 10 Wires (5 yellow, 5 blue)
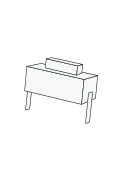 Push Button
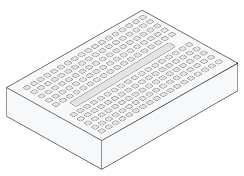 Breadboard
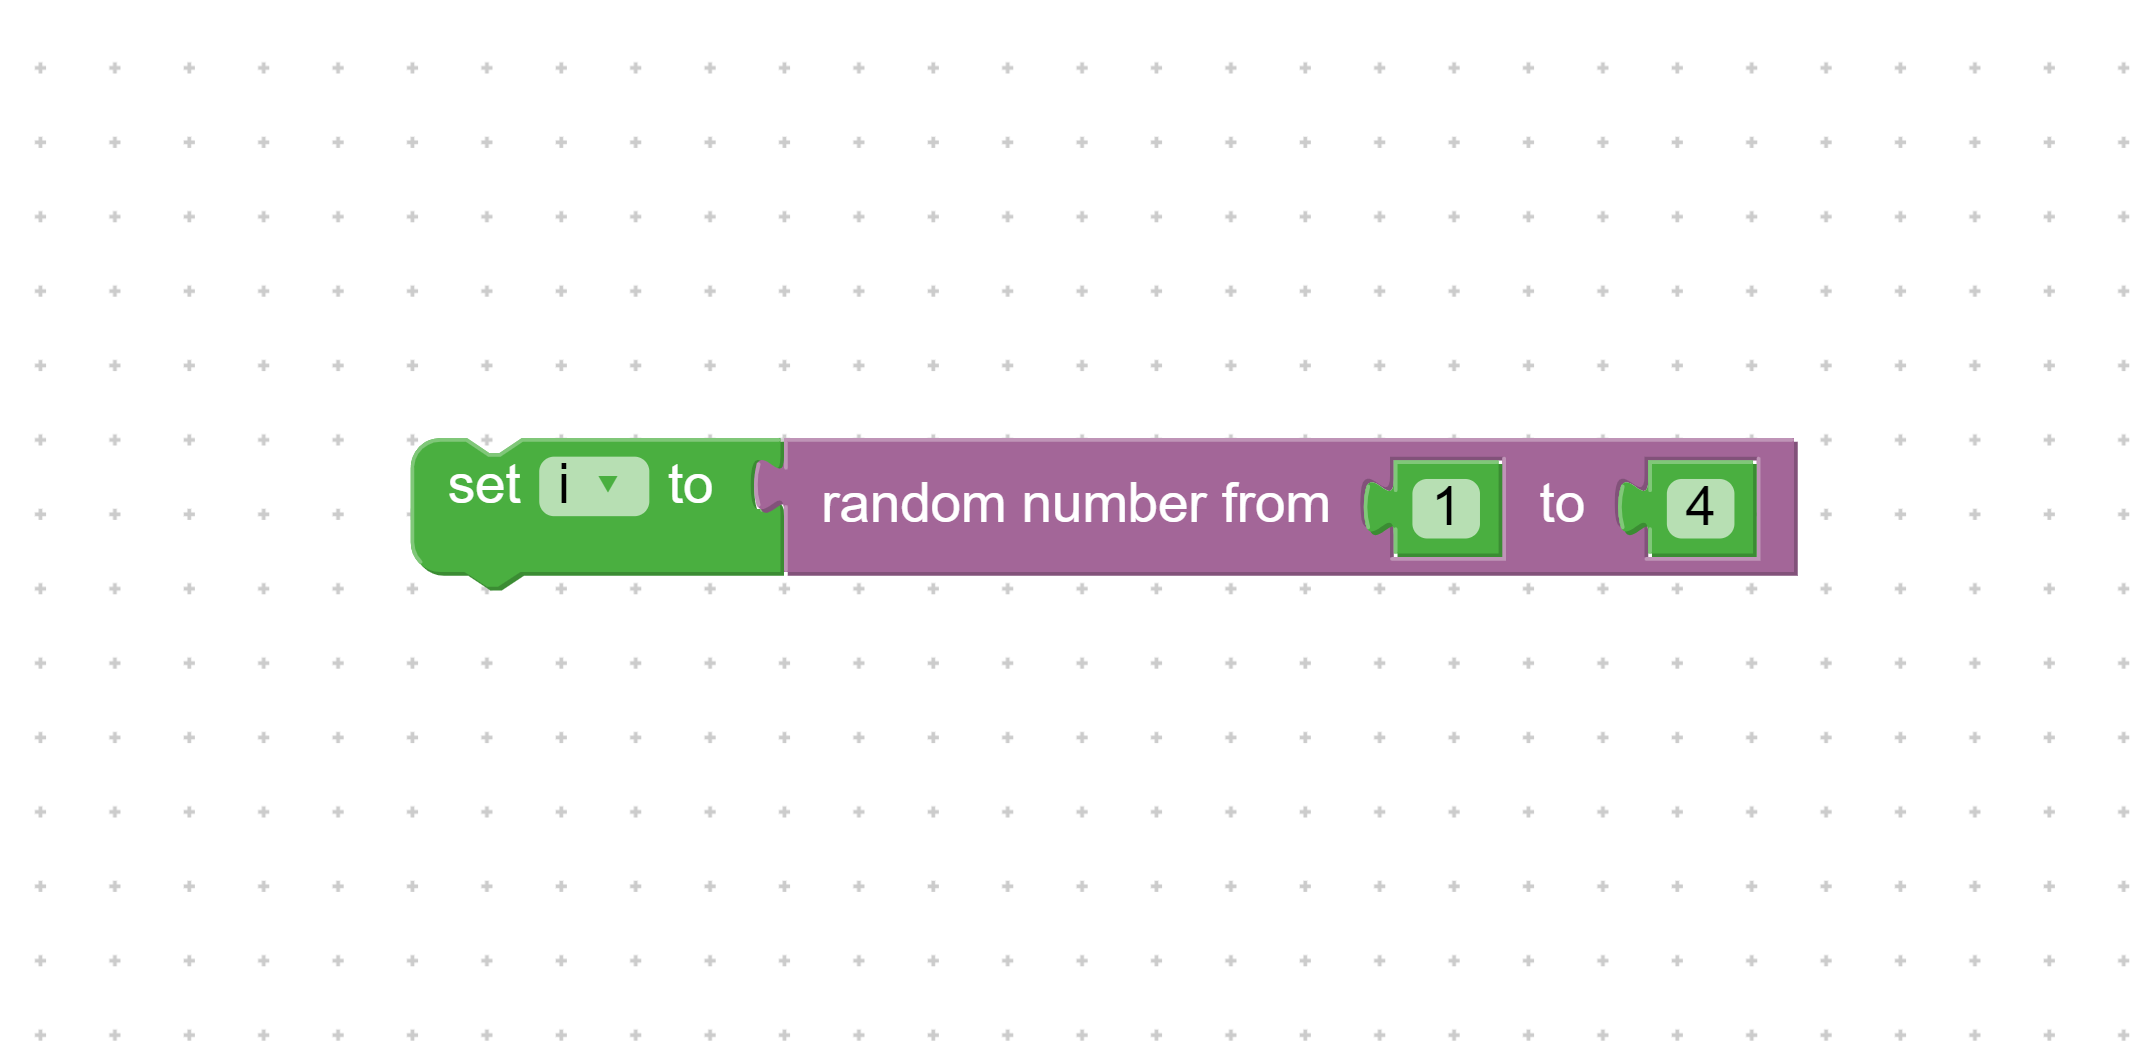
In this project, students will program a probability tool that will randomly light an LED with the press of a button. Probability is a key skill to build games of chance! A random number generator block is used to provide the probability. Students set the low and high values of the random number to 1 and 4, and thus they always receive a value between those numbers. Other key skills in this project are variables, conditionals, timer, states and debugging.
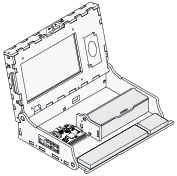
Take out the inventory you see in the picture below.
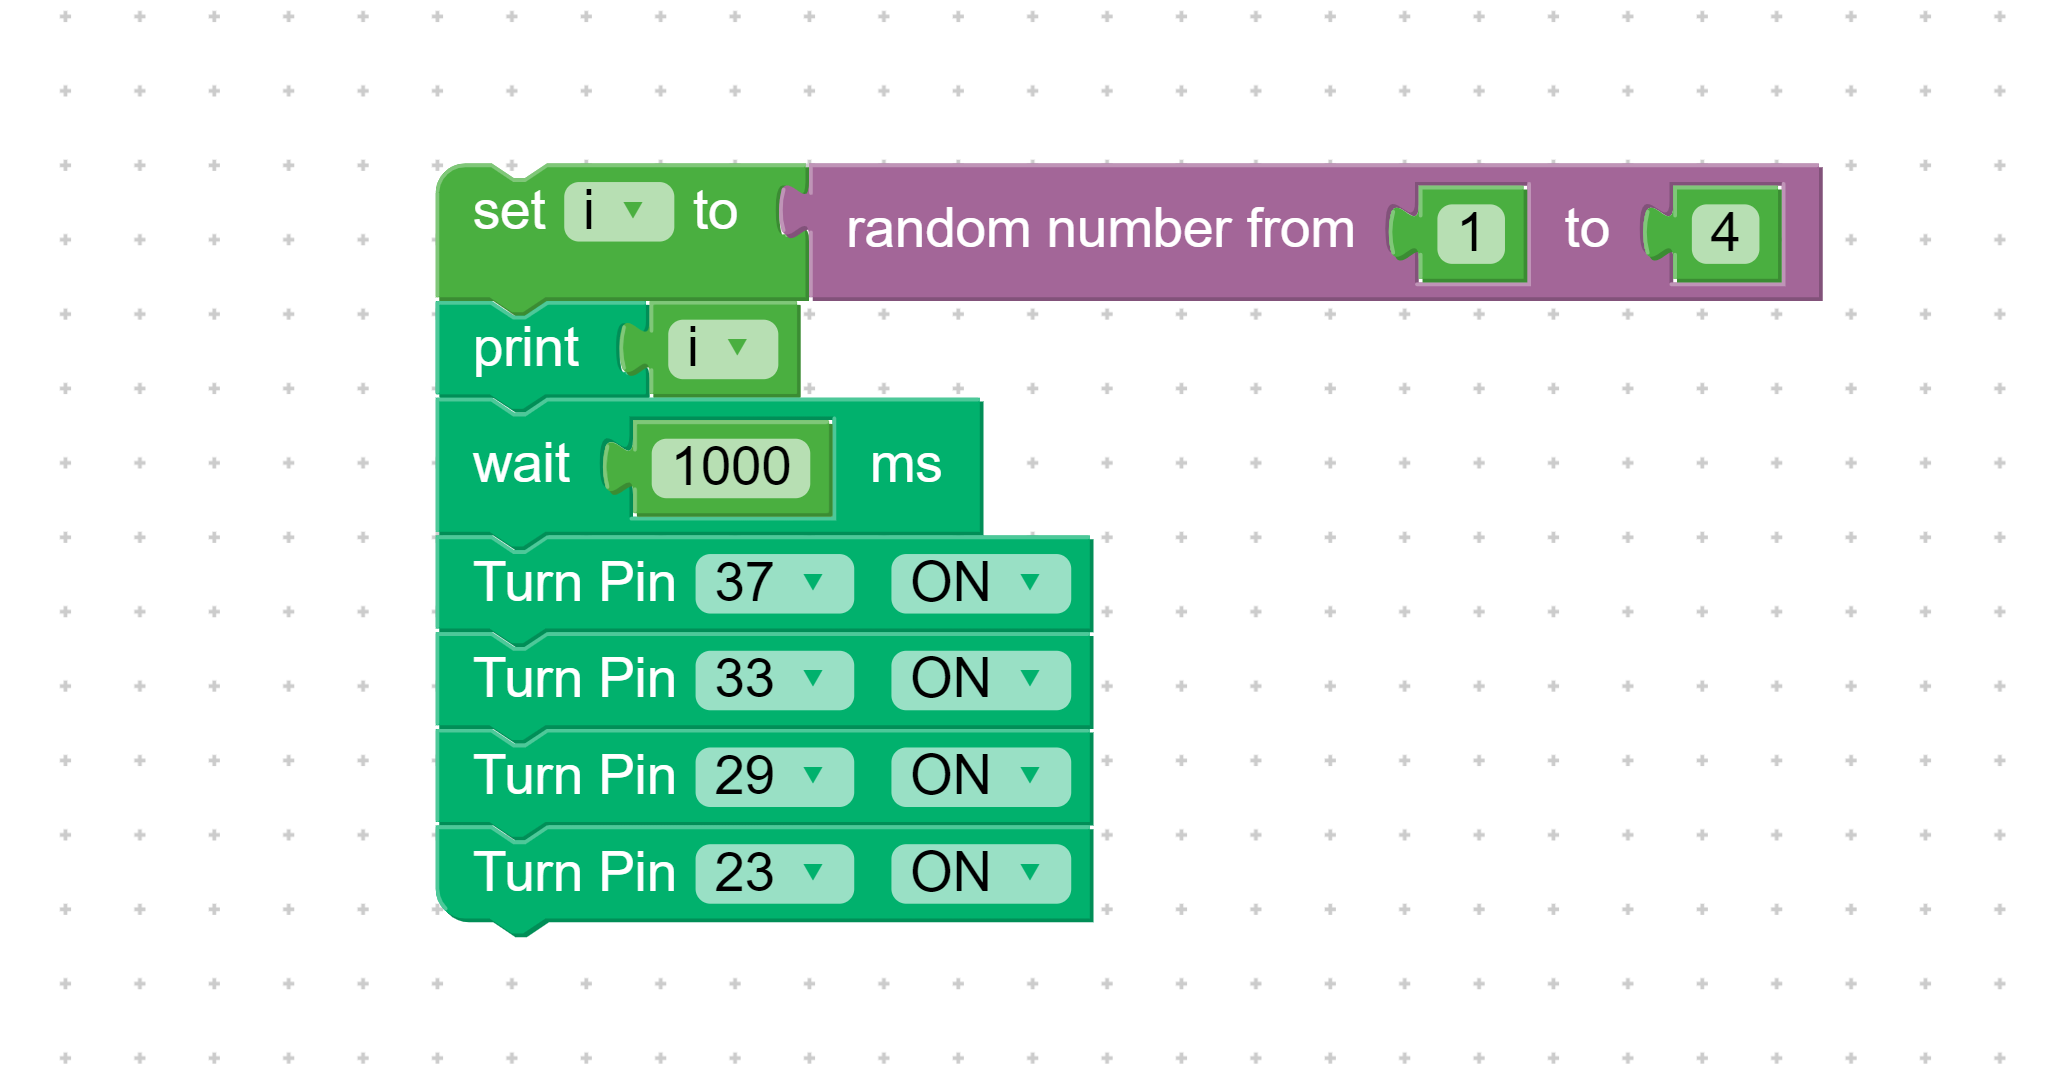
We will generate a random number and assign it to the variable i.
We will print the random number using a Print block. Add a Wait block so we have time to see it.
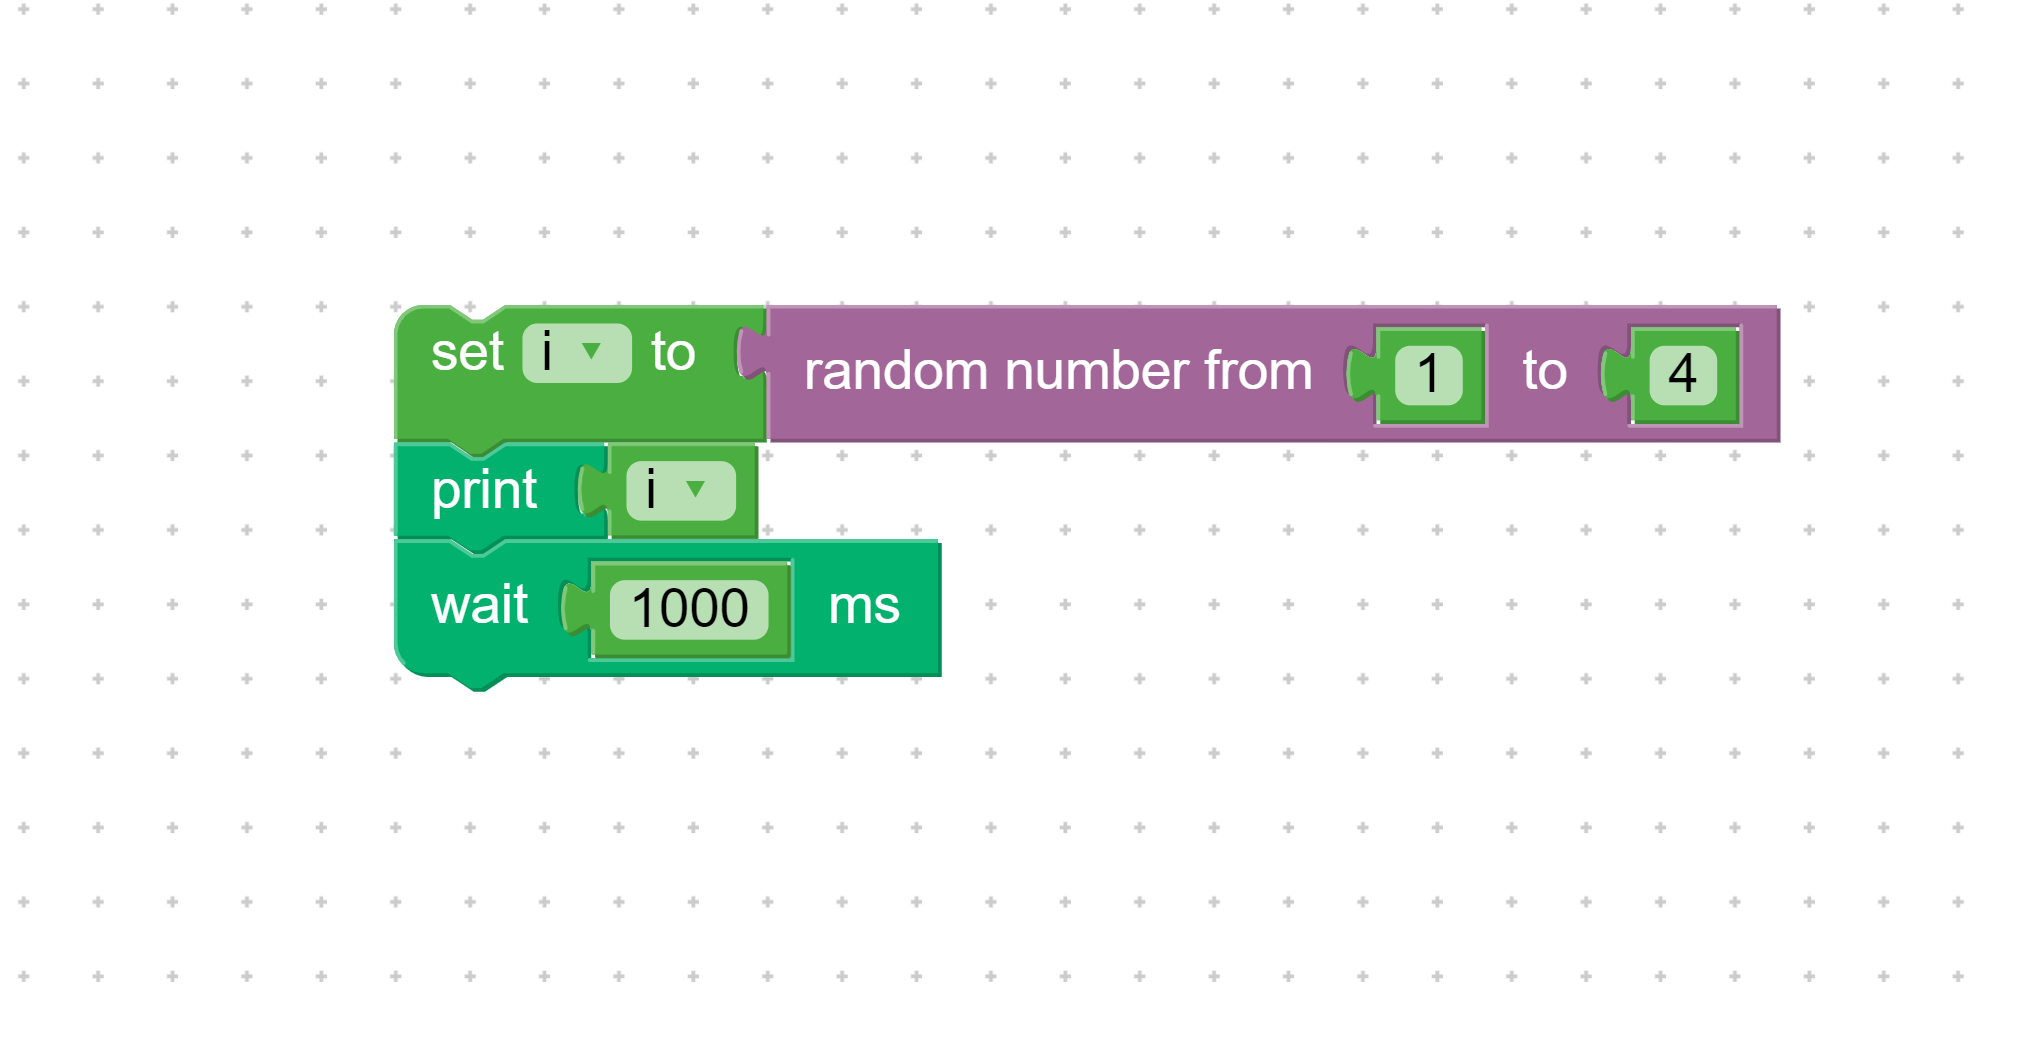
Now turn on the console and run your code. What you see is the random number!
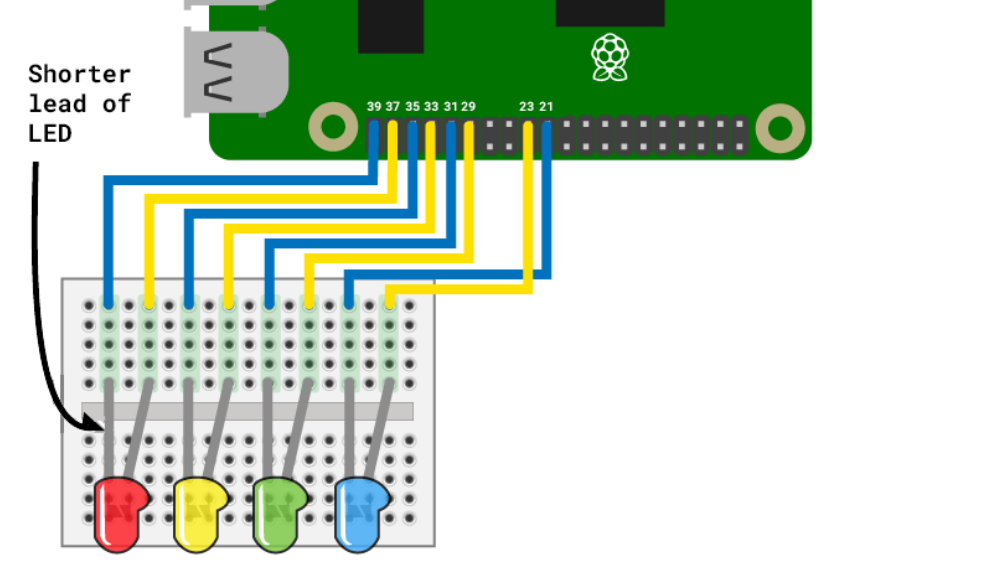
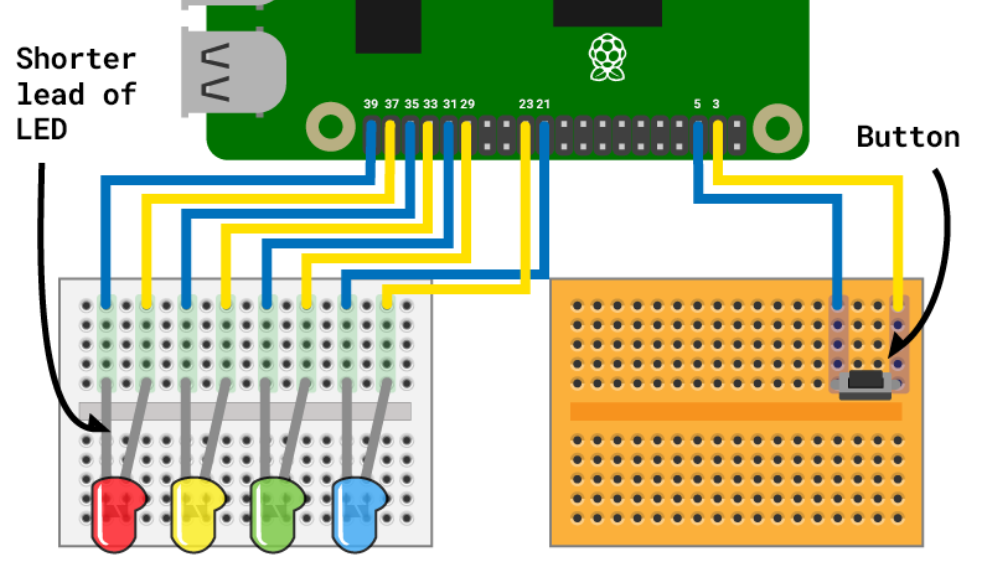
Now wire your LEDs.
Turn on all your LEDs to test them with this code.
For now delete the other pin statements, we'll use the red LED first.
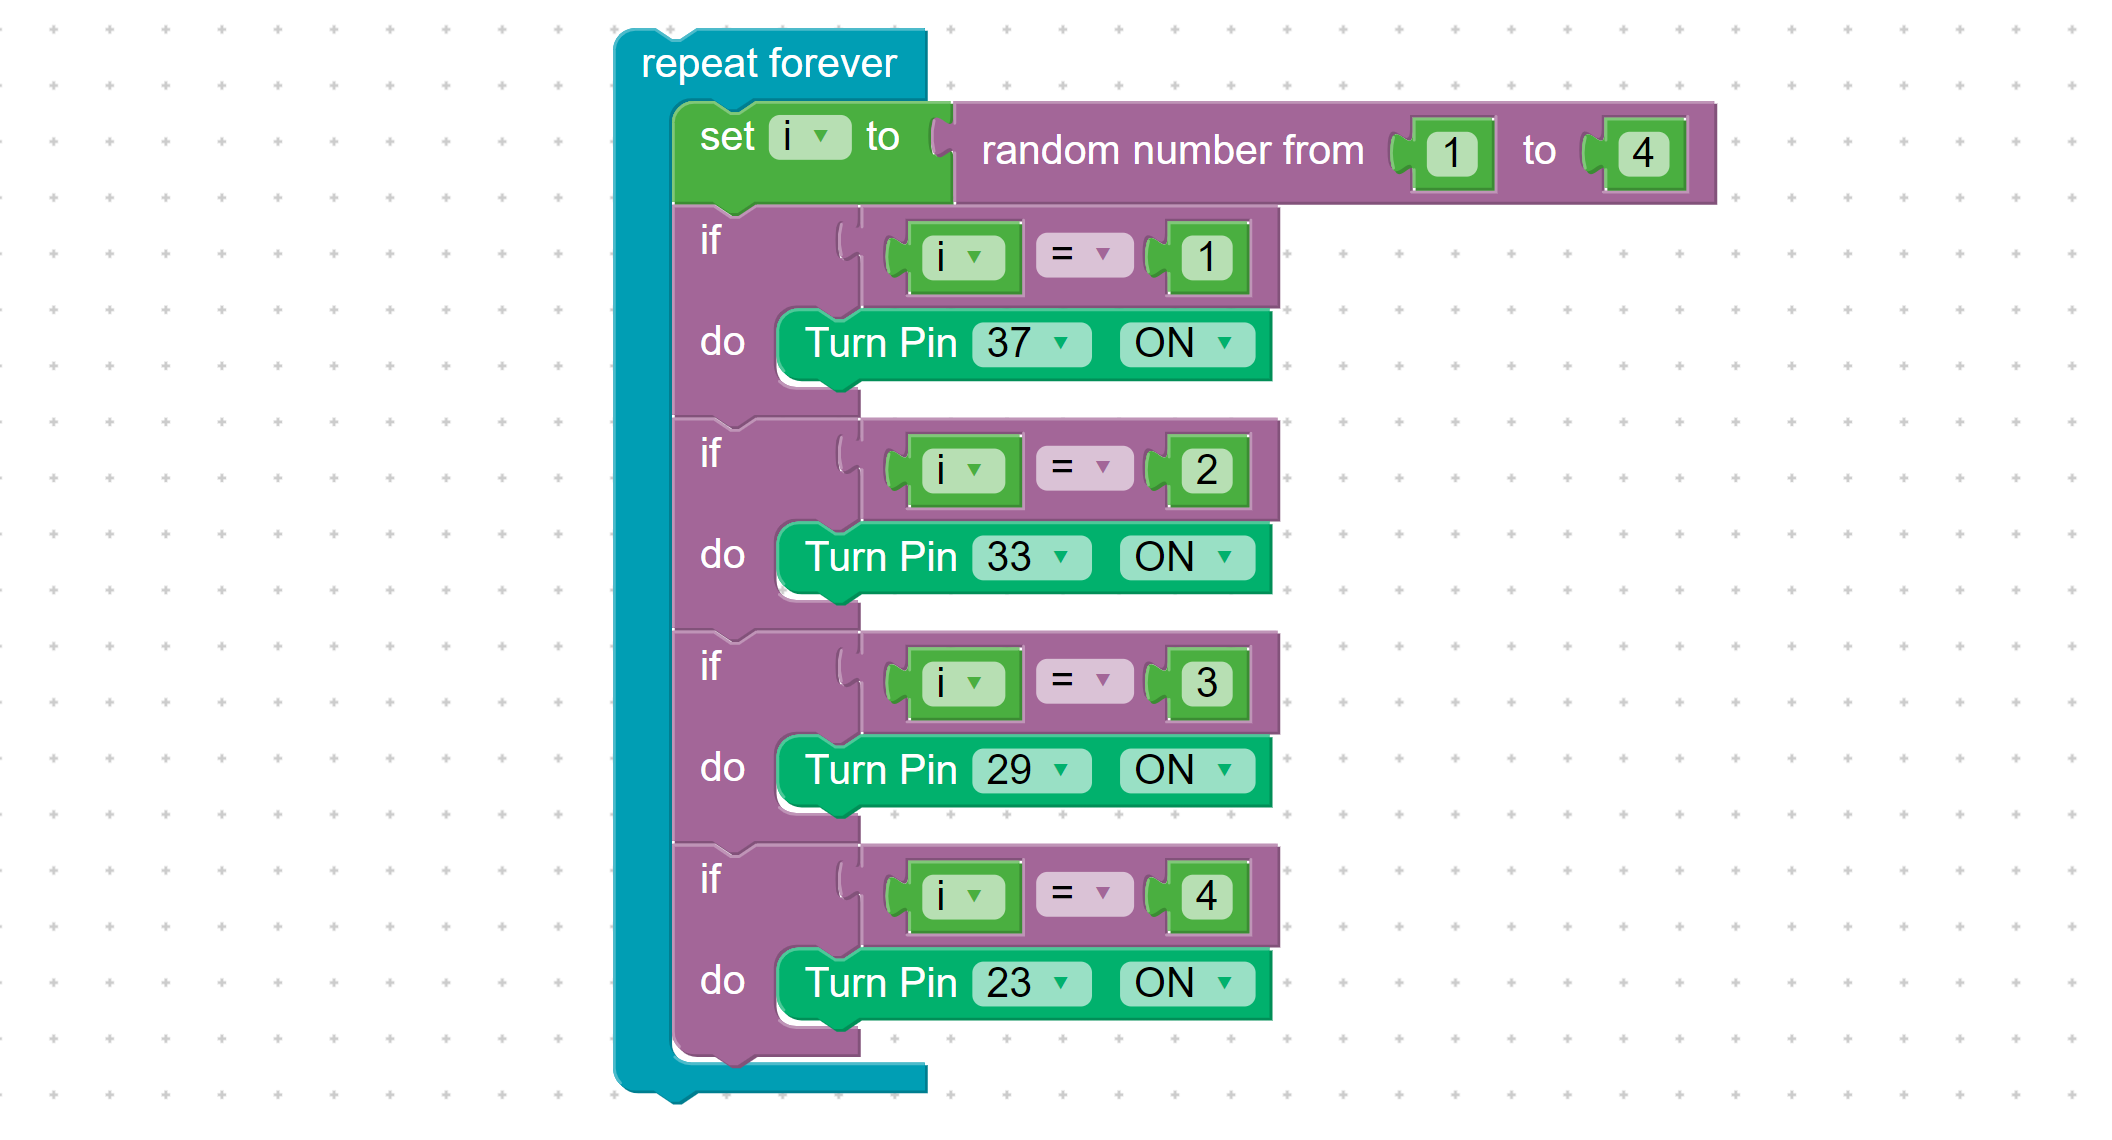
Now using an If statement, we will turn on the red LED when the random number is 1.
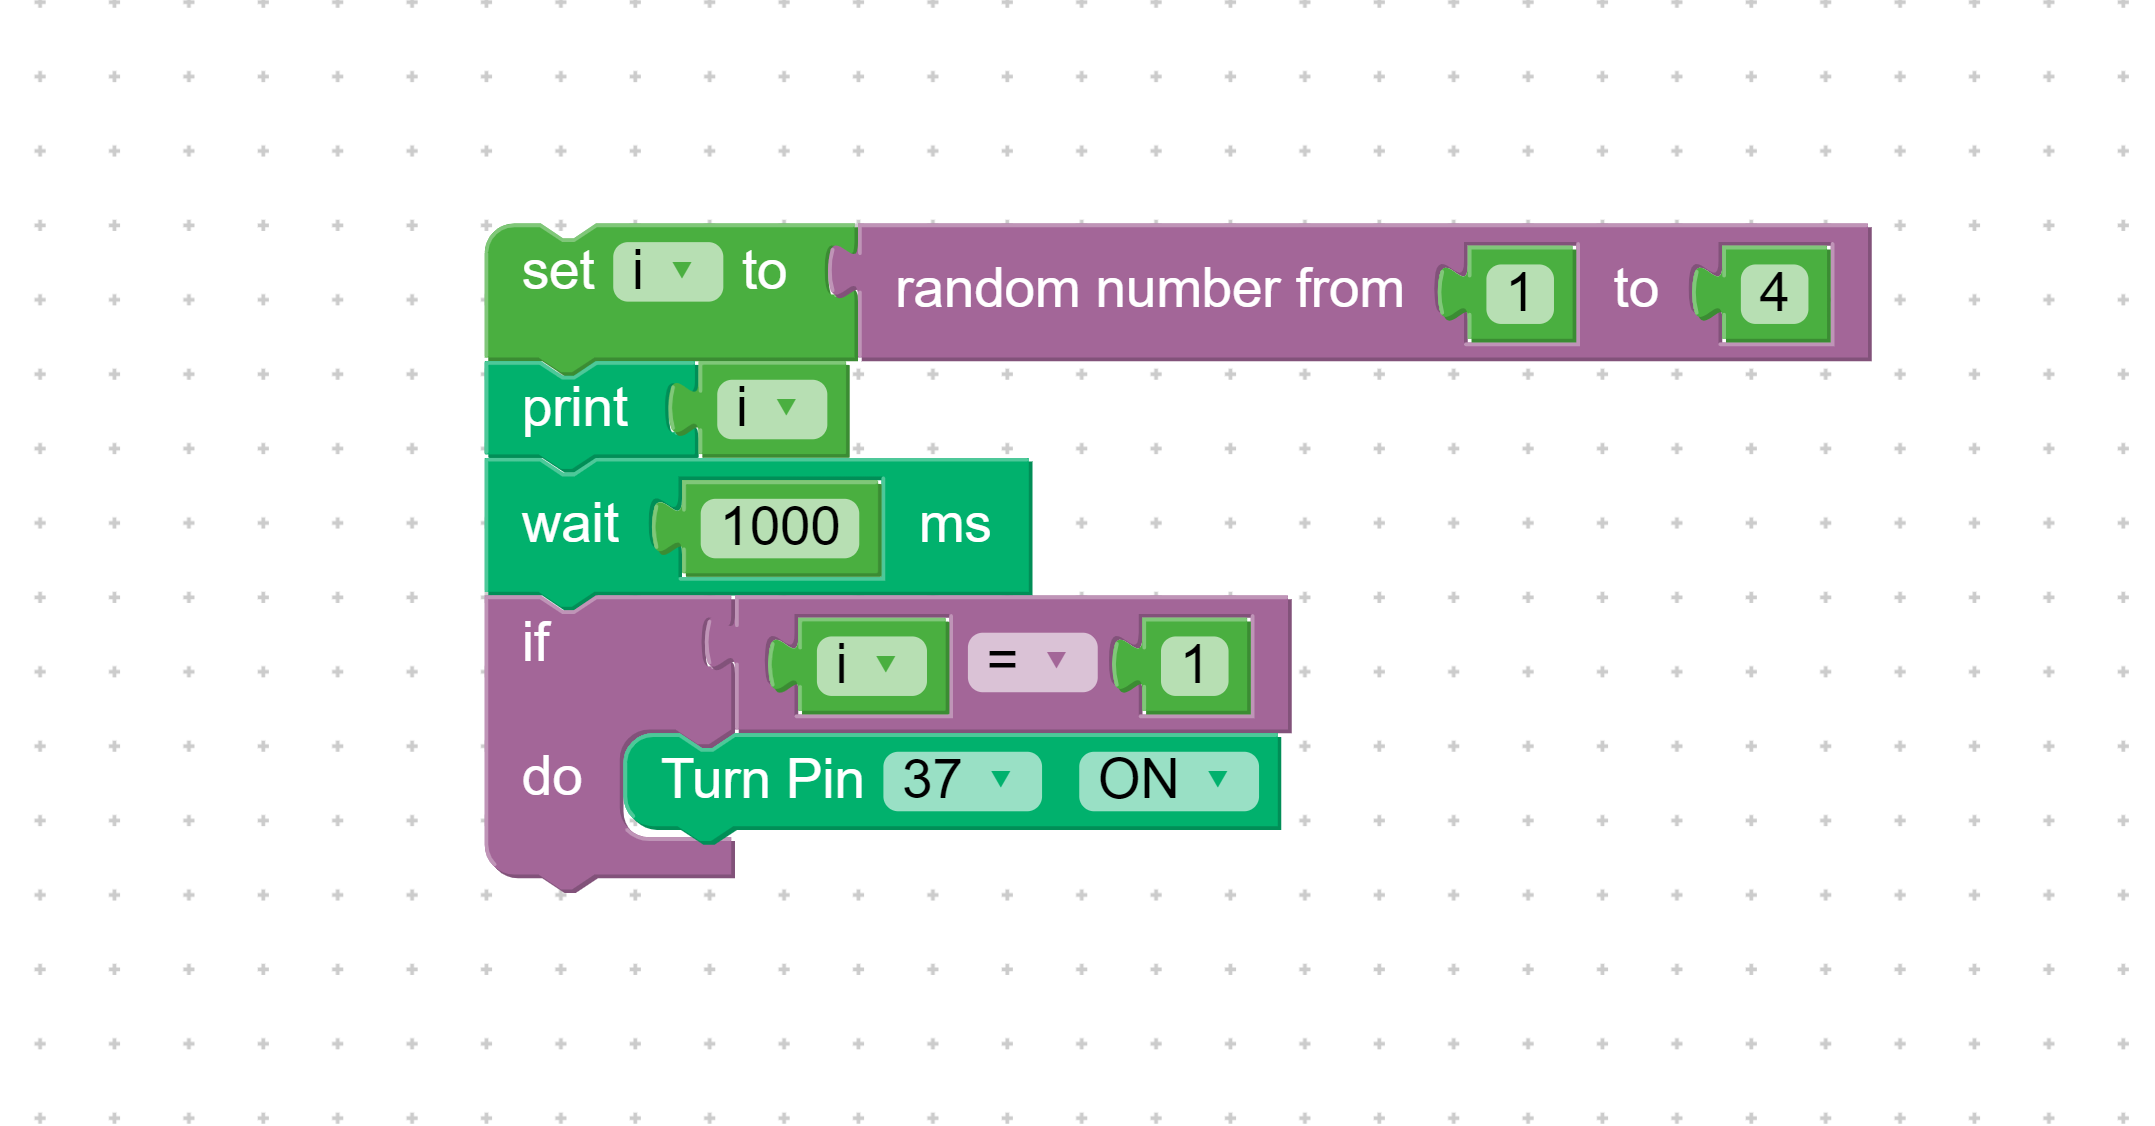
We can delete the Print and Wait statements since we're done testing for now.
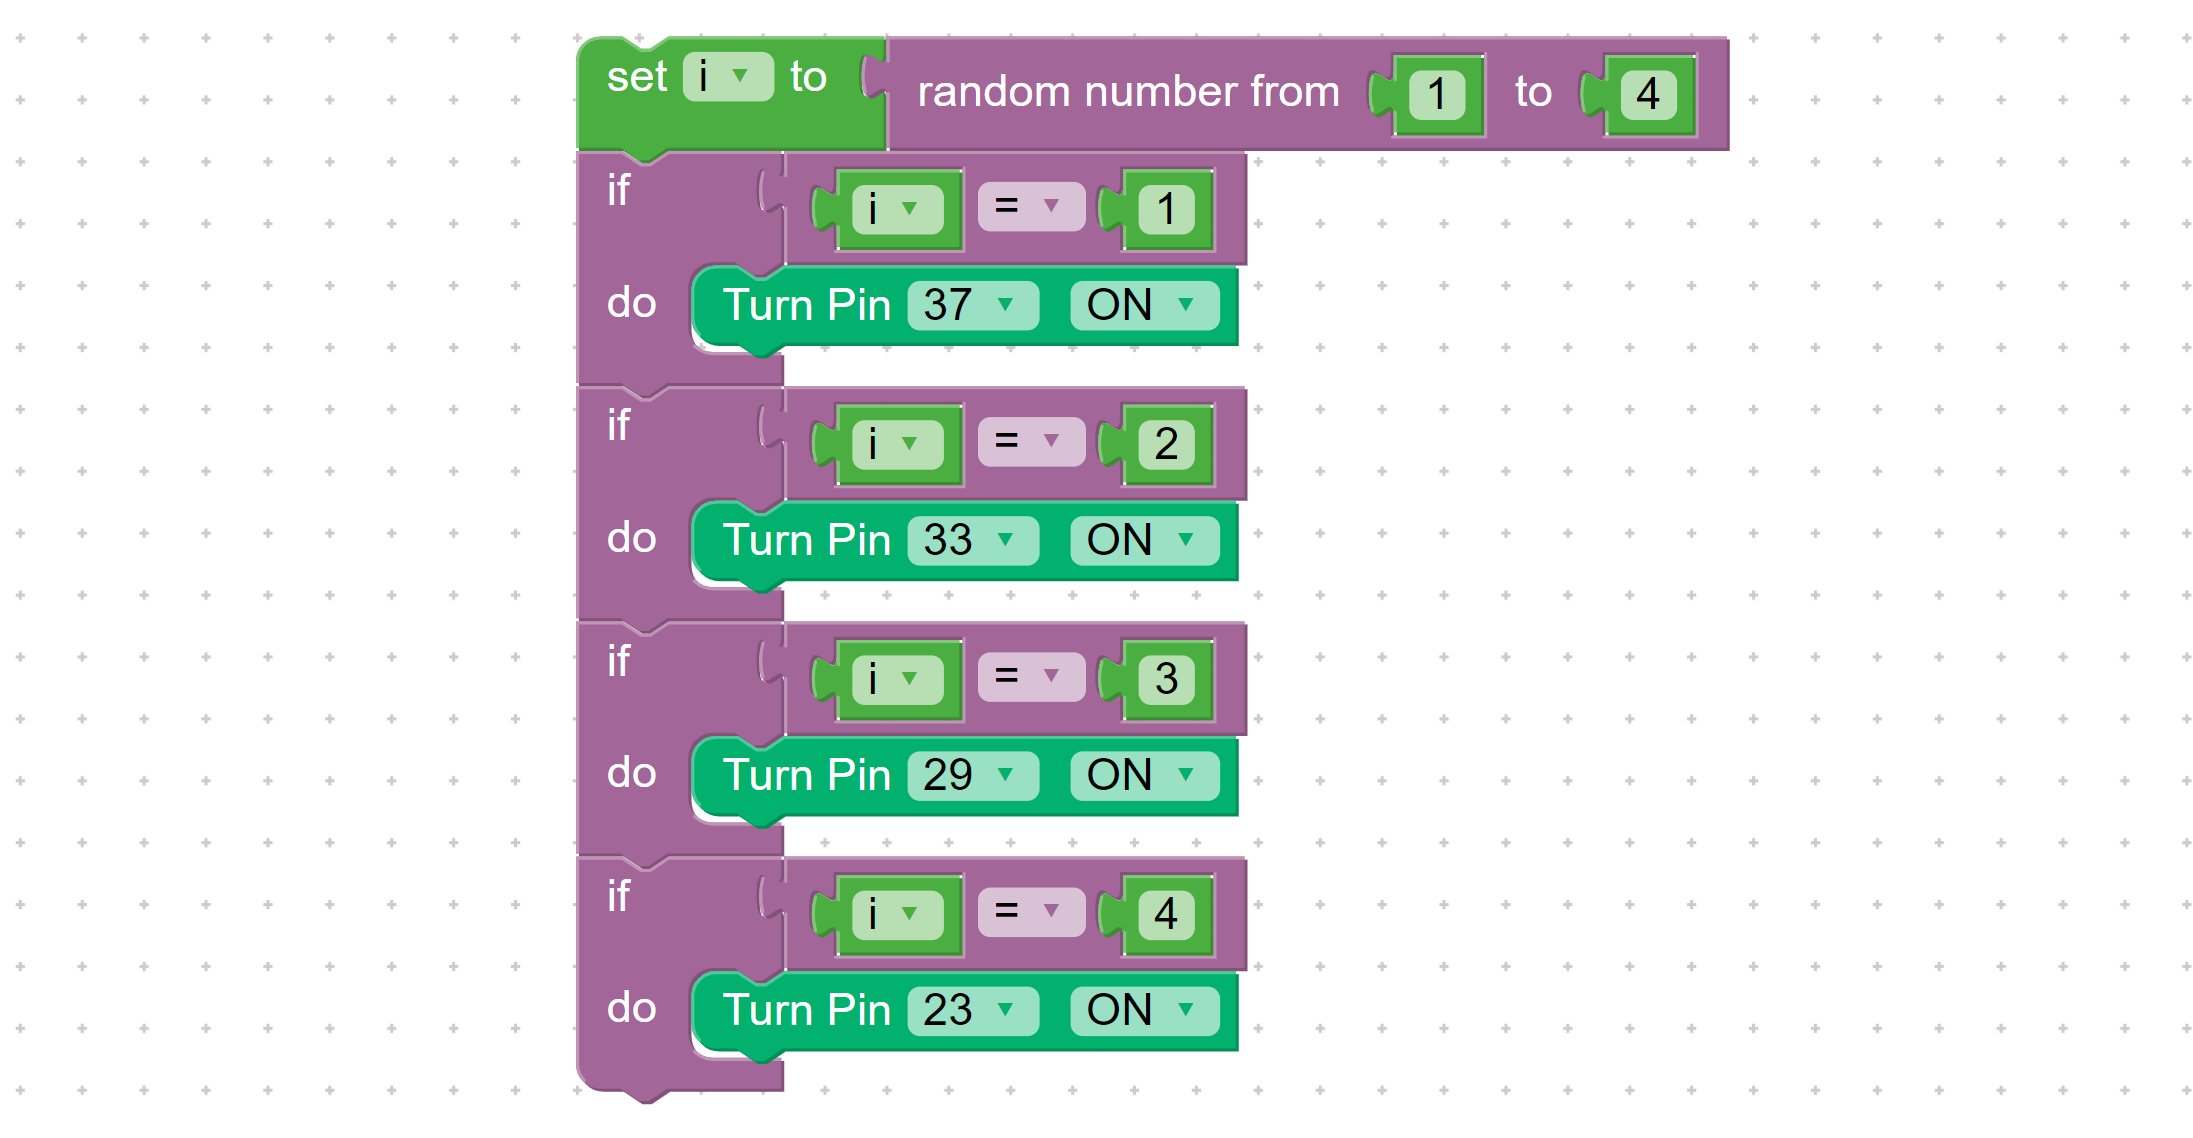
Now, right-click and duplicate the If statement 3 times, and attach the If statements to the block above.
Great. Now make the new pins 33, 29, and 23. Make the new If blocks check numbers 2, 3, and 4. Test it!
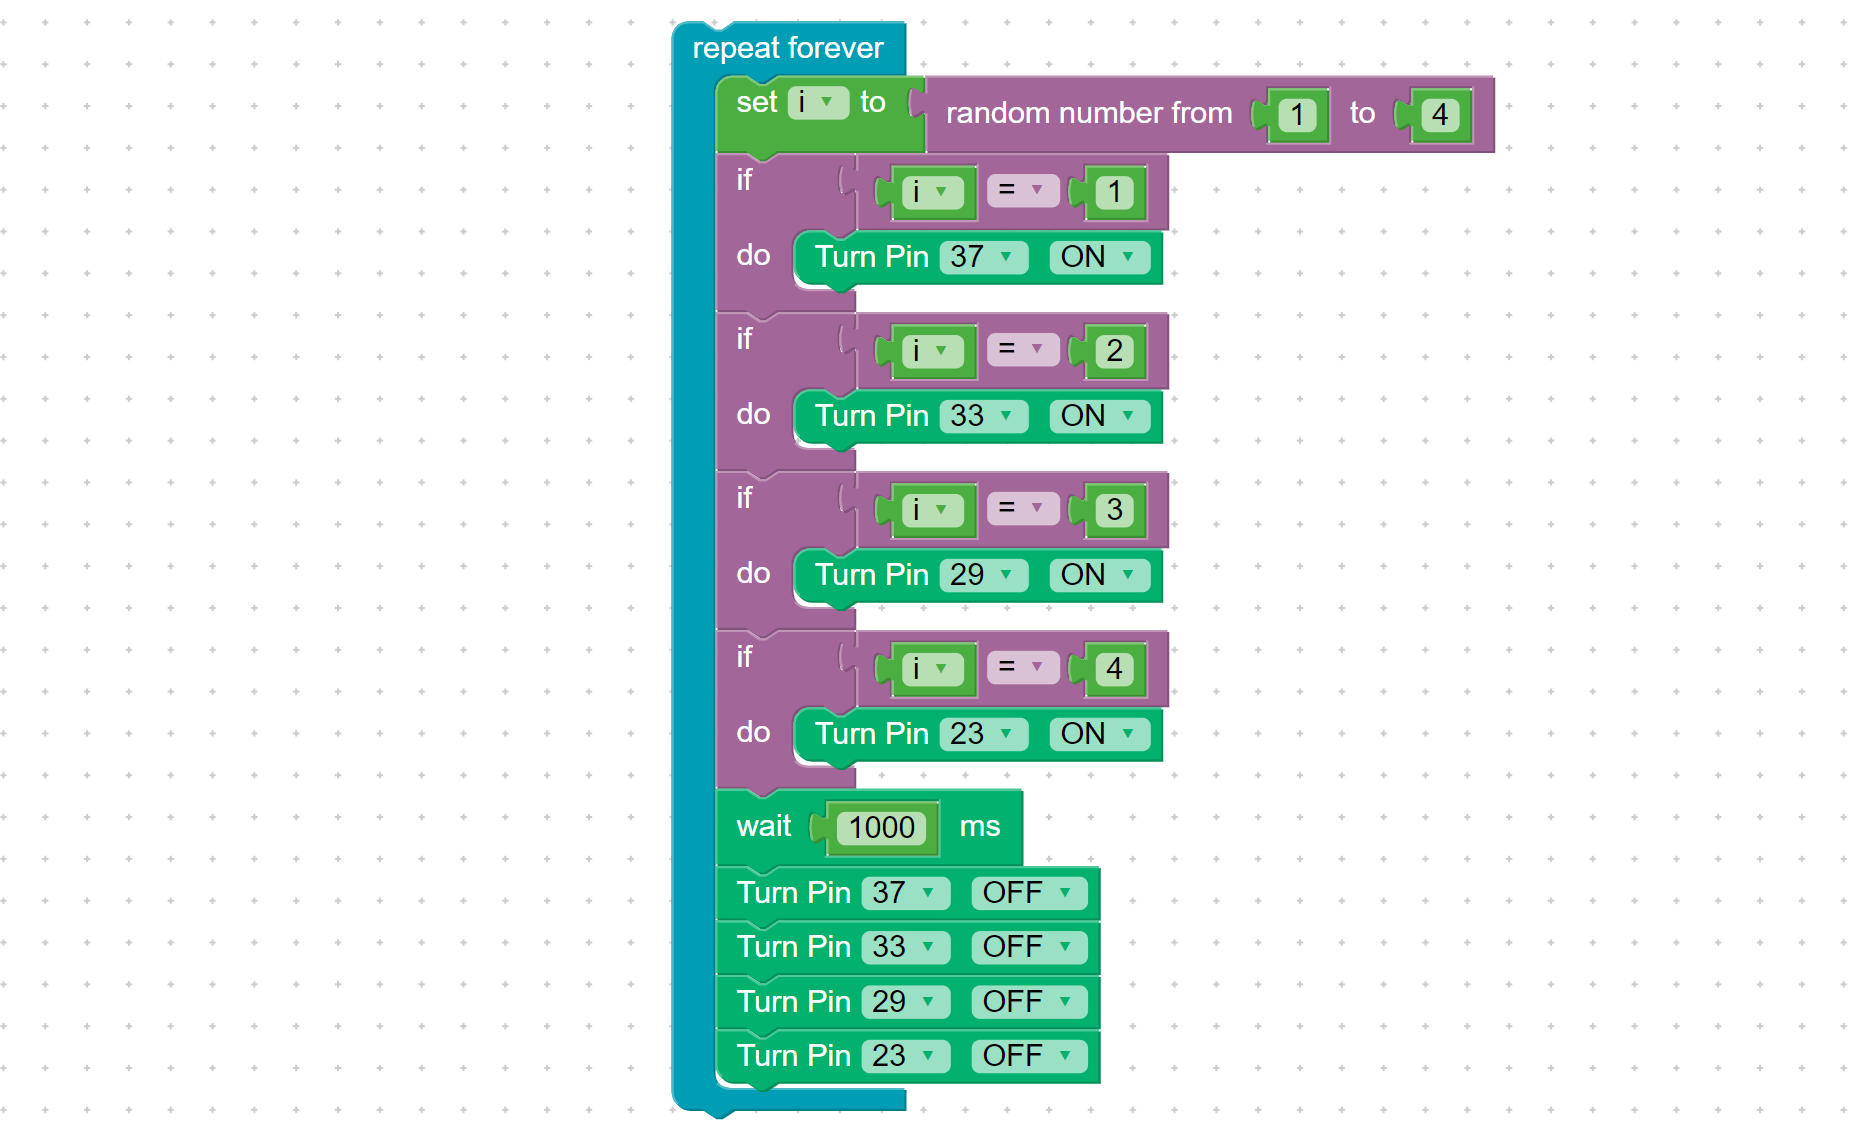
Now add a Repeat Forever block. Run this code. What happens?
We have to turn off the LEDs. Add a Wait block and 4 Pin Off blocks. Test it!
Add a button to your randomizer.
To make the button work, wrap the inner code in an If statement that checks pin 3. Test it!
Press Start and enjoy it!