Look for the graphic above
Fiery or Icy? This temperature sensor project is #mood
Students will learn how to wire and program a temperature sensor to read temperatures and display emojis based on the readings. Home heaters use a temperature sensor to tell the heater to turn on if it gets too cold. If it gets too warm, it tells the heater to turn off. This way, your house stays comfy!
 Piper Computer Kit
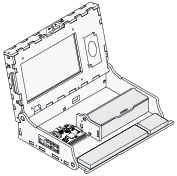
 Temperature Sensor
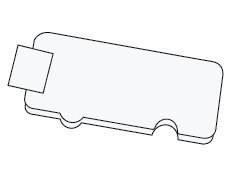
 Breadboard
 4 Wires (green, yellow, red, black)
 4-Pin Jumper Cable
Newer Sensor Explorer Kits are now shipping with a 4-pin cable that has a white wire instead of a green wire. When you see the green wire in a wiring diagram, just connect the white wire instead.
Students will deepen their understanding of temperature, forms of energy, and quantitative/qualitative data while continuing their use of sensors and piper code.
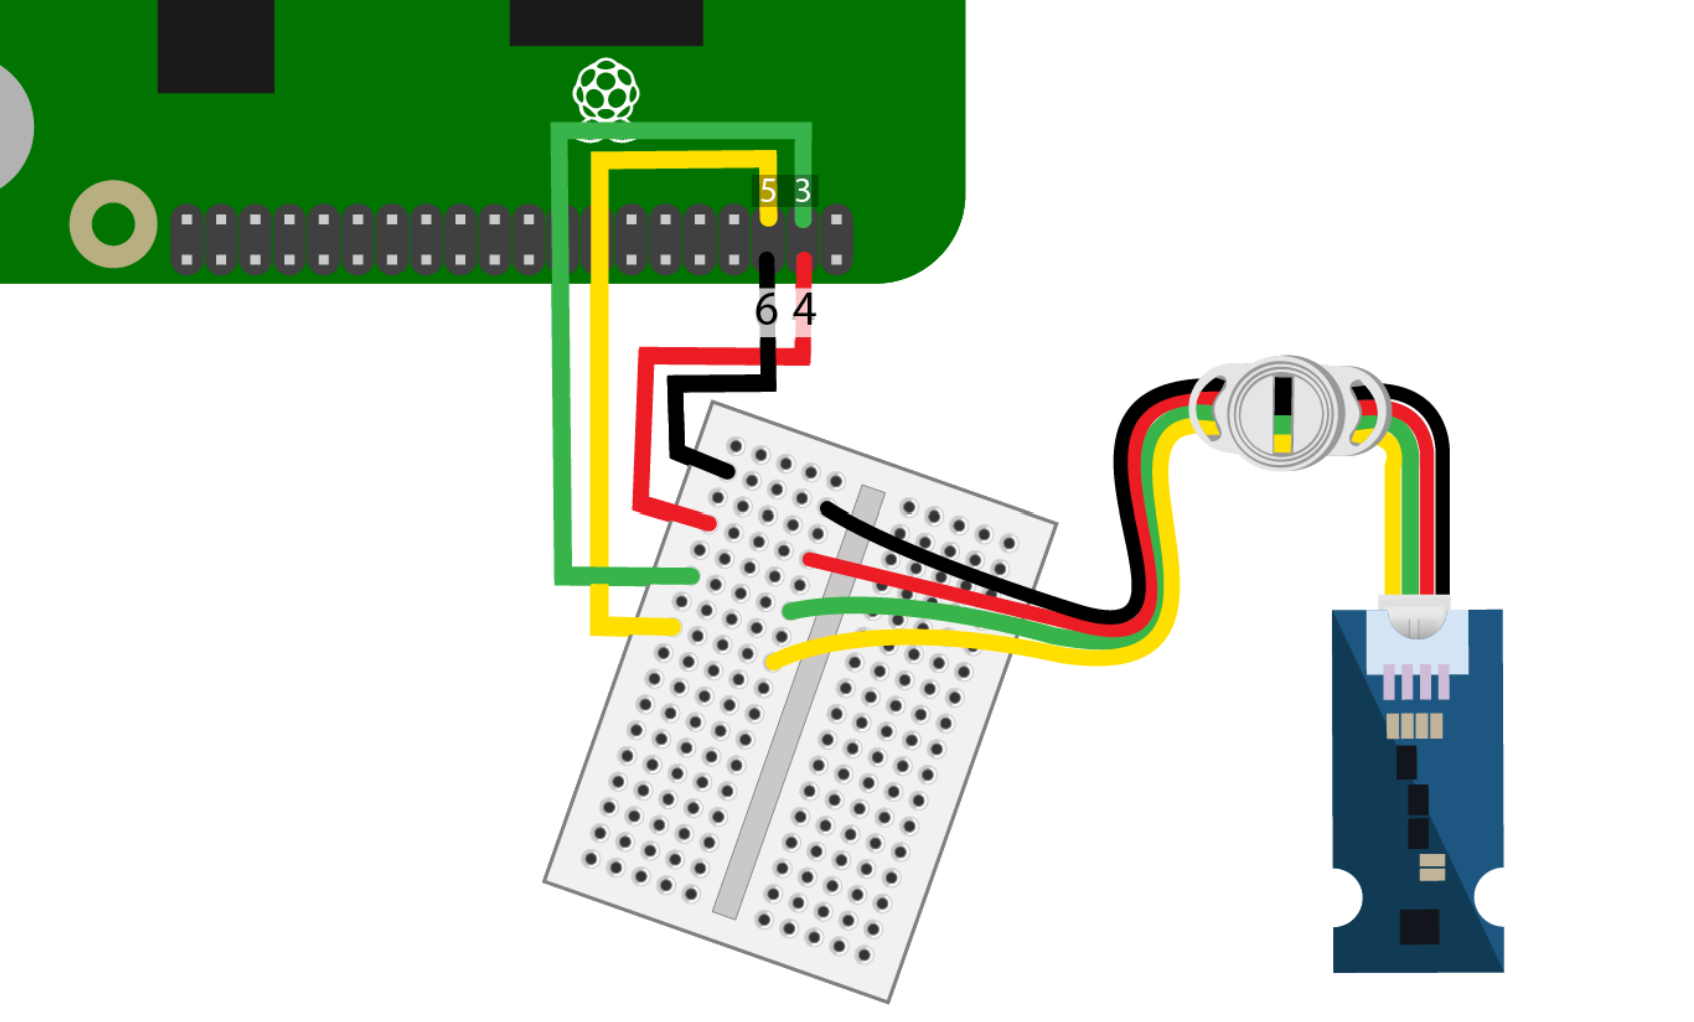
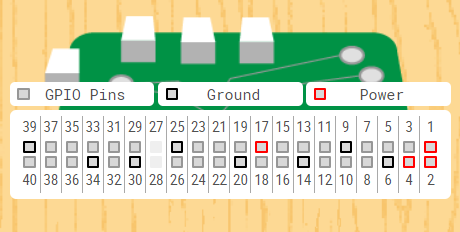
In this project, you will create a ther-mood-stat using the Temperature Sensor. First, wire up your sensor to the Raspberry Pi using the diagram and the pin map below.
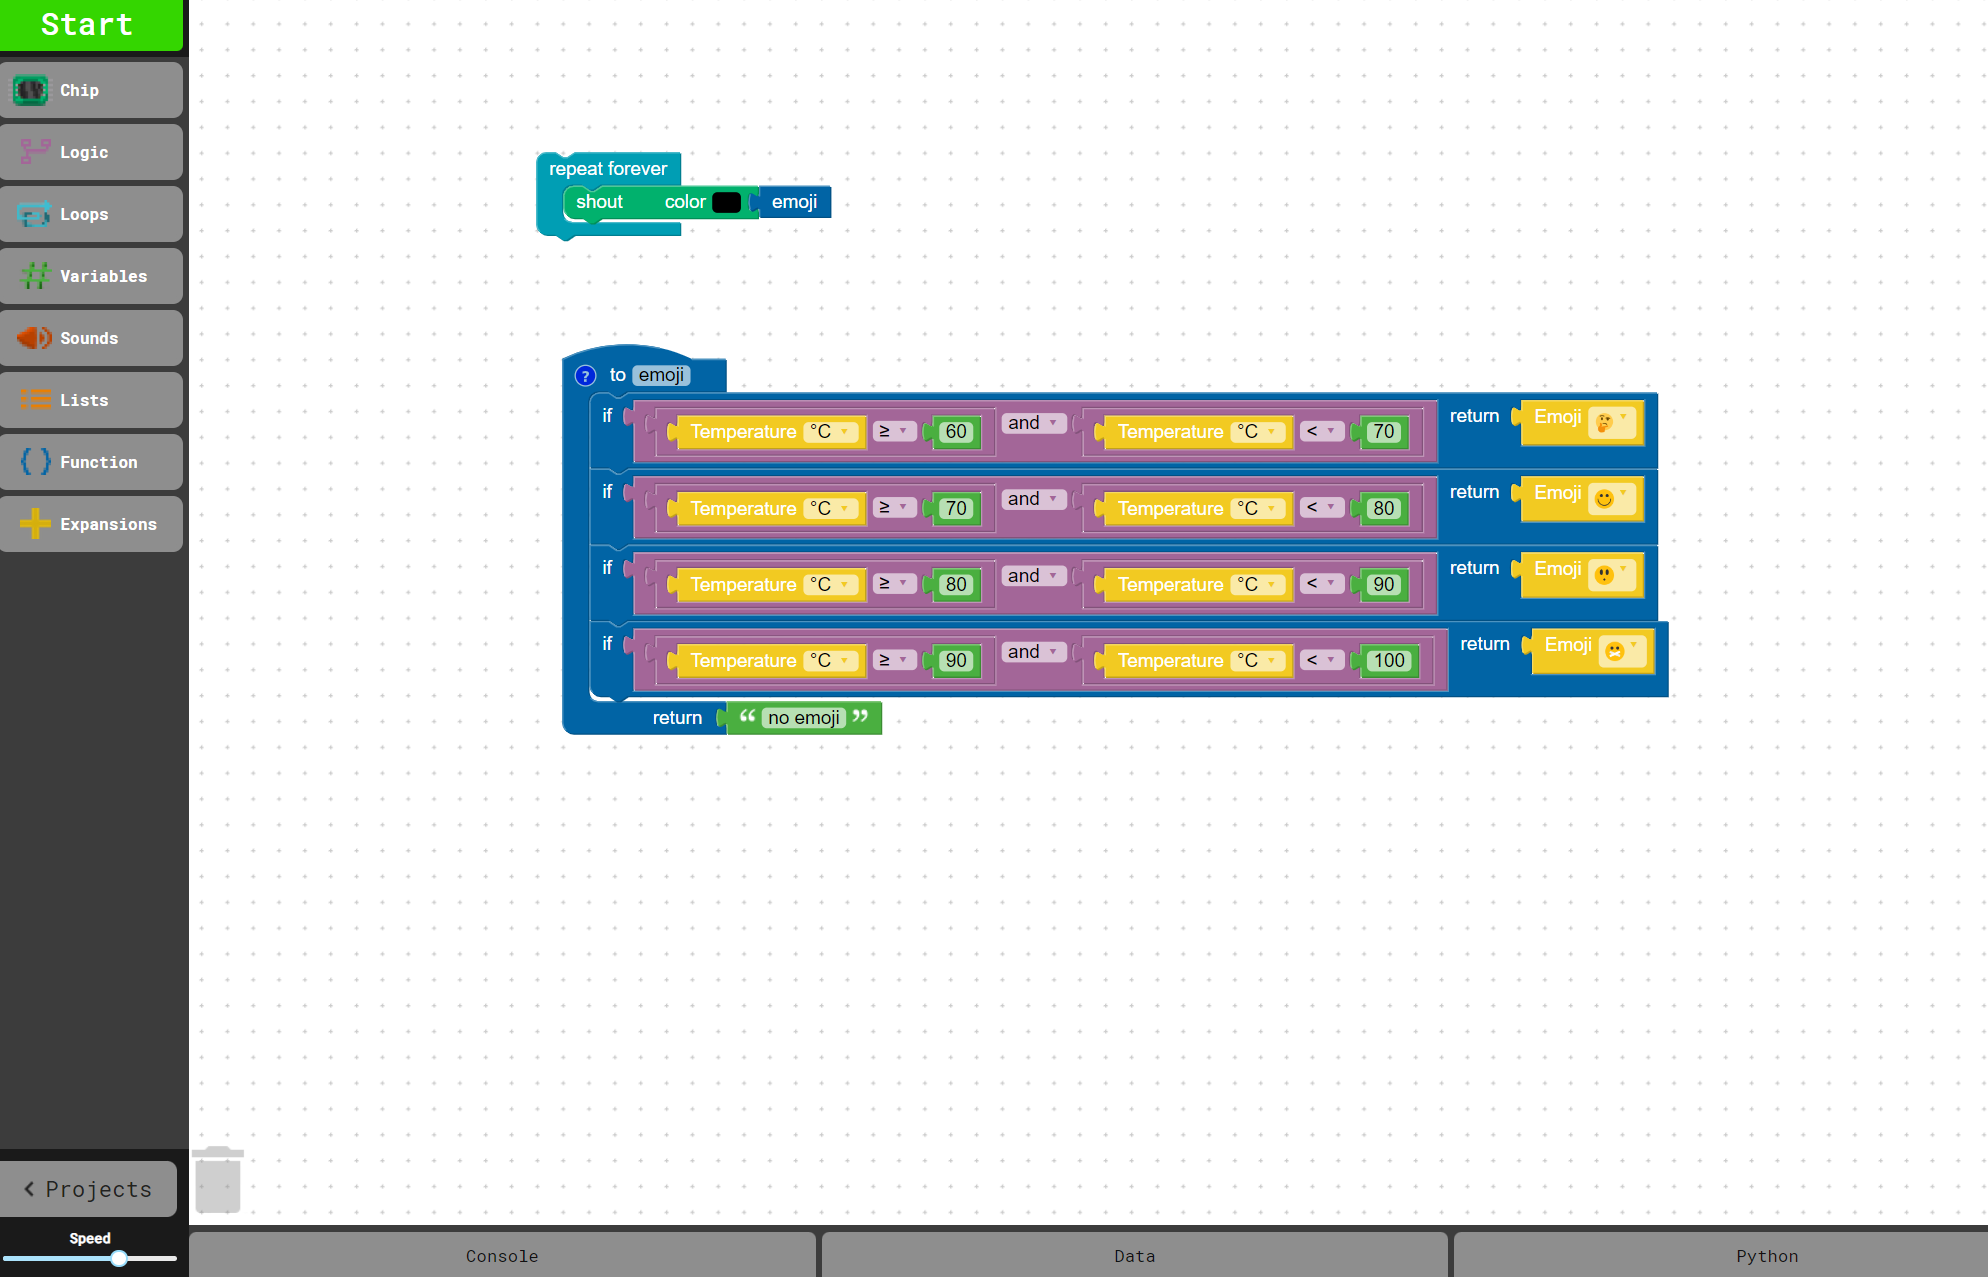
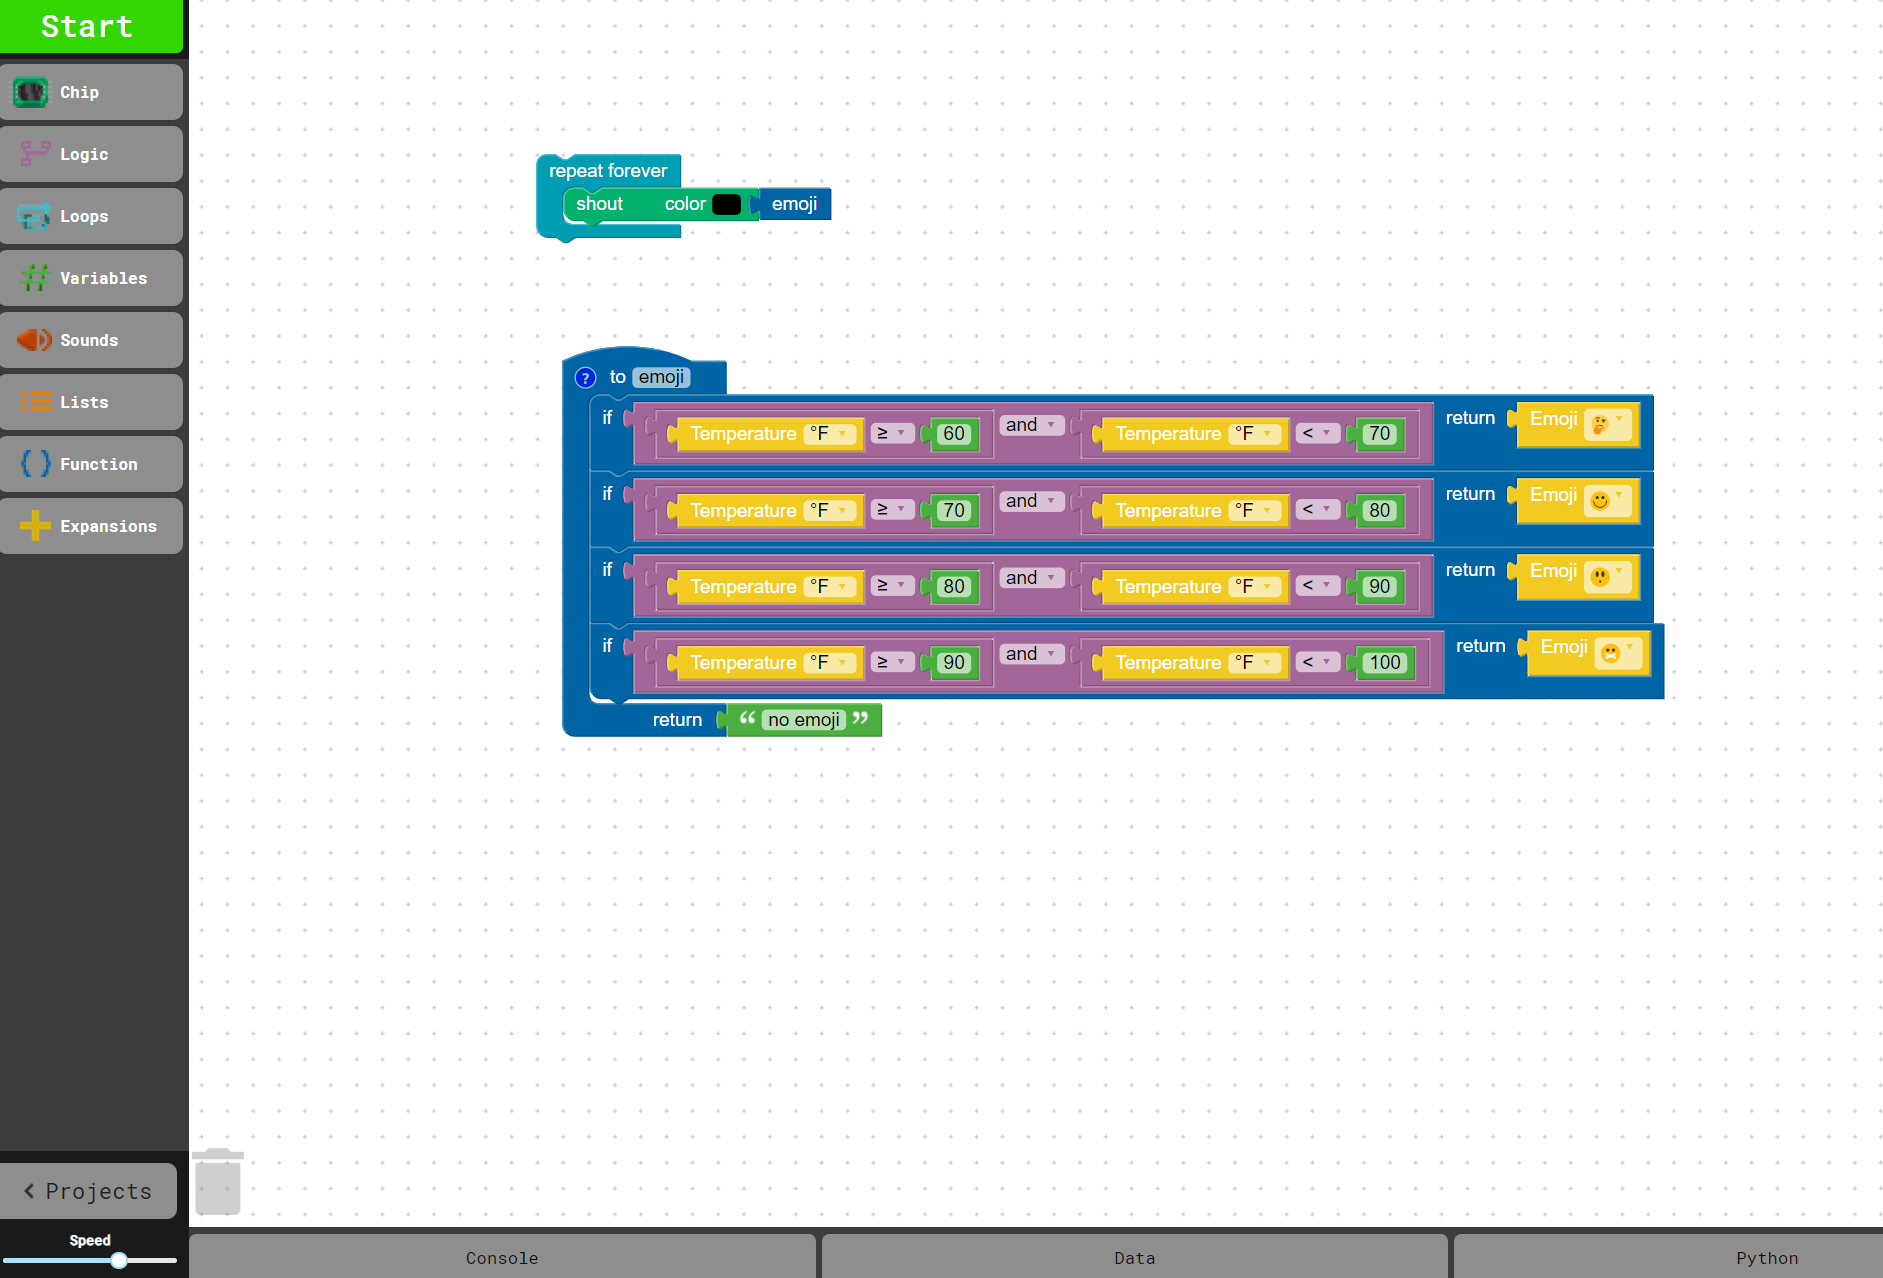
Find a do something block under Function and drag it out to your programming environment as shown below. Change "do something" to "emoji". This block creates a routine with an implicit return.
Find the if, return block under Function. Drag it inside of the to emoji block. The if,return block allows the function to return something. In this case, we want to return emojis at different temperature ranges!
Under Logic, find the and block and place it inside of the if, return block. This allows you to create a temperature range for the return.
Place 2 = blocks, found under Logic, into the and Logic block as shown. Change the inequalities to ≥ and < respectively using the image above. Discuss: What do these symbols represent? Why are we using these inequalities in this case?
Find the Temperature block under Expansions. Drag 2 Temperature blocks, one into each inequality block, as shown. Change the units to Fahrenheit.
Under Variables, find the integer block with a 0. Add one to each inequality and change the values based on the image above (80 and 90 respectively). The integers allow you to define the temperature range to return a specific emoji.
Find the Emoji block under Expansions. Add the Emoji block to the return in the if, return block. Select the emoji based on your personal preference. Discuss: Which temperature range matches a particular emoji?
Next, we need to set a return for when the temperature is out of the range you set. Find the " " block under Variable and place it inside the return of the to emoji function as shown. Choose a statement and type it into the block. For example: "no emoji".
To have your emoji show on the screen and keep it on the screen, you will need to use a shout color block found under Chip, a repeat forever block under Loops, and an emoji block found under Function. This separate code excerpt should look like the image above.
Click START in the top left corner of the screen to start your code. Measure something in the included temperature range to test the emoji function. (Hint: Rub your hands together and hold the sensor in your hand).
As you measure, open the Temperature graph under your programming space by clicking on Data and choosing Temperature. Make sure you have the correct temperature units selected. Use the data visualizer to help you find the correct temperature in the range.
Add more emoji possibilities by clicking on the if, return block. Once highlighted, right click and select Duplicate. Drag the duplicate blocks into the to emoji function. Do anywhere between 2-4 times.
Select values for the temperature ranges and emojis based on those ranges. An example can be seen in the image above.
Click START, measure different temperatures and see what mood you're in based on the emojis. Use the temperature graph to help guide you as you measure objects. Discuss: How would your temperature ranges change if you use values in Celsius? Try it!