 Look for the graphic above
Take a deeper dive into breadboards and learn how they work in a real world environment. By making repairs to the virtual breadboard, you'll be able to learn how current flows in these devices.
Help Piperbot repair the breadboard to make sure the current is flowing properly. Once the toaster is fixed, watch the toast pop!
Take a deeper dive into breadboards and learn how they work in a real world environment. By making repairs to the virtual breadboard, you'll be able to learn how current flows in these devices.
To access this project from the Piper Computer Kit main menu, click StoryMode then Breadboard Bluffs
Note: Power Plant must be completed before unlocking the Breadboard Bluffs mission.
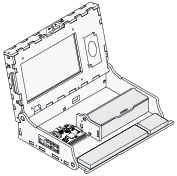 Piper Computer Kit
In this level, take a deeper dive into breadboards and learn how they work in a real world environment. By making repairs to the virtual breadboard, you'll be able to learn how current flows in these devices. A circuit is created between the GPIO pins and the components on the breadboard using jumper wires.
(Note: All components and wires must be connected together before current will flow. If any part of the circuit is broken, current cannot flow. This is similar to traffic on a highway. If a bridge is being repaired or there is an accident, traffic cannot flow until it is fixed.)
In this project the crafting table is right in front of you, and very easy to find! But once you right click on the crafting table with the wrench, you are teleported inside the breadboard!
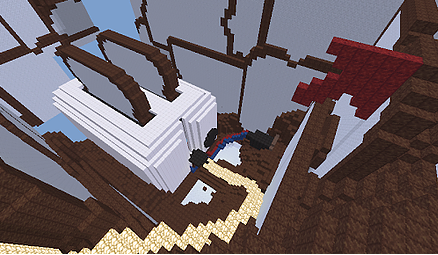
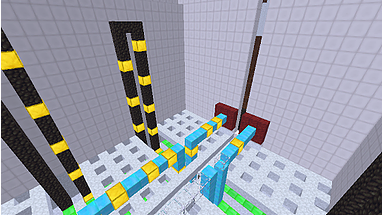
Your character is now inside the breadboard. Find the glass blocks, break them and replace them with solid green blocks. Notice that electrical current (yellow blocks) flows once the green blocks are installed. Exit the world and follow the path down, down, down.
In this new area, you will see electrical current piping through the blue blocks. This represents current flowing inside a breadboard, both along the bottom as represented by the green blocks in step #2 and with blue blocks representing the individual holes in the breadboard. Just like step #2, replace the glass blocks with solid blocks, and use blue blocks this time. Once the repairs are made, then move outside to get to the next level.
Navigate down inside the toaster. In this area, continue making repairs so that the electricity may flow. But watch out, as the toaster heats up you will see the lava and it's time to get out! Navigate to the exit and you will find the portal.