 Look for the graphic above
Help Piperbot combine buttons and switches into a new wiring scheme and recall different structures from memory. Once completed, make your way to the next portal. This is review of buttons and switches however they are combined now in a new wiring scheme. Two buttons allow you to call a different structure from memory that will allow you to cross the chasm. Eventually, you’ll plug in a switch as well, which will let you ‘pave’ a platform as you move or jump.
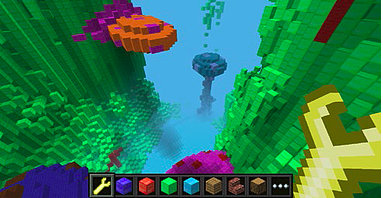
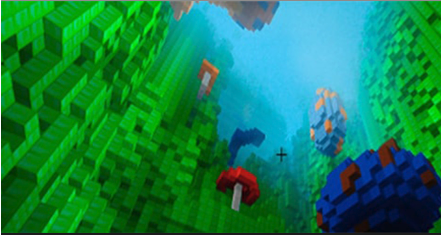
Piperbot is in a magical world of funky fungi and chasms searching for the next portal.
Help Piperbot combine buttons and switches into a new wiring scheme and recall different structures from memory. Once completed, make your way to the next portal. This is review of buttons and switches however they are combined now in a new wiring scheme. Two buttons allow you to call a different structure from memory that will allow you to cross the chasm. Eventually, you’ll plug in a switch as well, which will let you ‘pave’ a platform as you move or jump.
To access this project from the Piper Computer Kit main menu, click StoryMode then click Funky Fungi.
Note: Rainbow Bridge must be completed before unlocking the Funky Fungi mission.
UNLOCK MINIGAME: Chest Quest
For more information about MiniGames visit: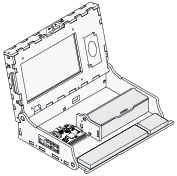 Piper Computer Kit
In this level, the buttons allow you to call different memory states and the buttons to share what is called a ground. A third state, set by a switch, allows you to call from memory continuously instead of on demand.
To find the crafting cable, find the staircase then make your way to the house.
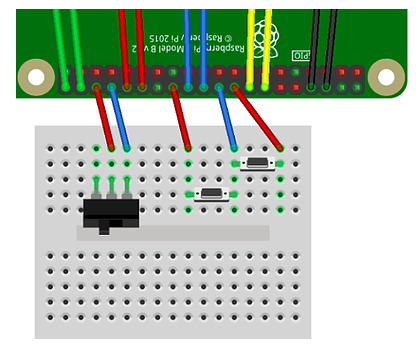
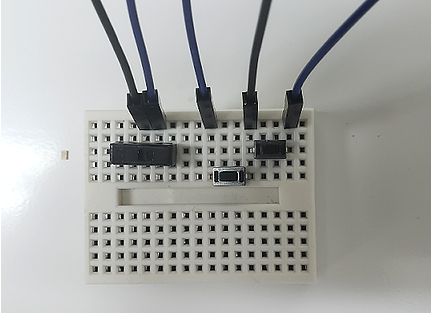
In PipingMode, the instructions will have you grab two buttons from your storage chest. In this project, one wire will be shared between two switches so you only need three wires. GPIO Setup: 17,19,25 (Note: The image below also shows a switch, we will build the switch in a subsequent step.)
Use the push buttons to build your own path. Each of the buttons will place blocks in a unique design.
(Note: You are able to build "straight up" by placing blocks underneath your character by jumping as you place blocks.)
Find the 2nd crafting table along the side of the path. The instructions will have you build a switch: GPIO pins: 33,35
When the switch is in the "on" position the blocks will be built automatically underneath you, so you'll have no need to press the buttons. Continue to follow the floating path by building your own path until you find the portal!